Tech Tuesday is a weekly blog that addresses some of the most common questions and concerns that I hear throughout the previous week from users of BobCAD’s CNC software. Both customers and future customers are more than welcome to leave a comment on what they would like to see covered for the following Tech Tuesday.
Today’s article trails off of last week’s Tech Tuesday. In the previous article, I drew a rectangle in CAD, added CAM plates and made a solid part model with the Boolean Add function. In this article, we are going to take that same part and apply a fillet & a center pocket. If you missed last week’s Tech Tuesday, click here to catch up!
To get started, click on the Fillet icon in your Create 2D tab. You will notice that we have 3 picking method options. For this example, I’m going to use the Single Corner click method. Before we select our corner, we want to update the radius to reflect ⅛ of an inch. Click the points we want to apply our Fillet to and we will see sharp corners become rounded.
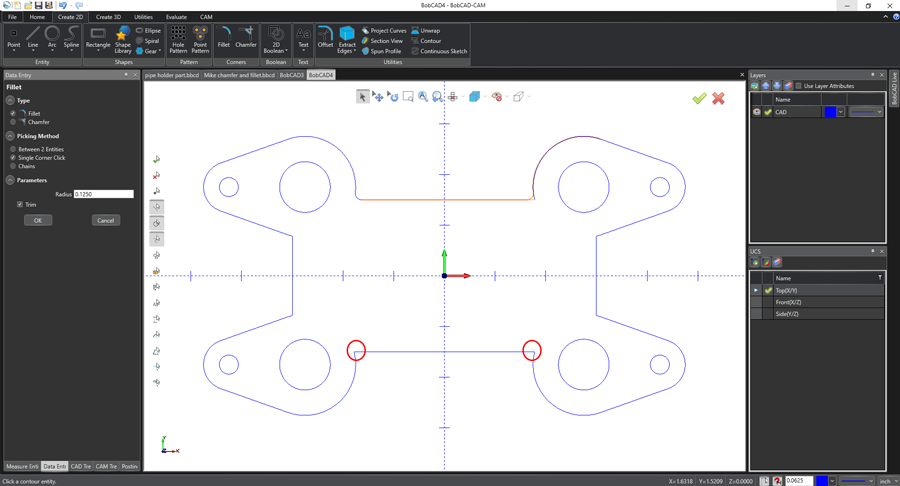
When finished, hit Cancel. As you can see, we got our ⅛ inch Fillet applied to the part and we can move forward to the final step of adding a pocket to the center of our part.
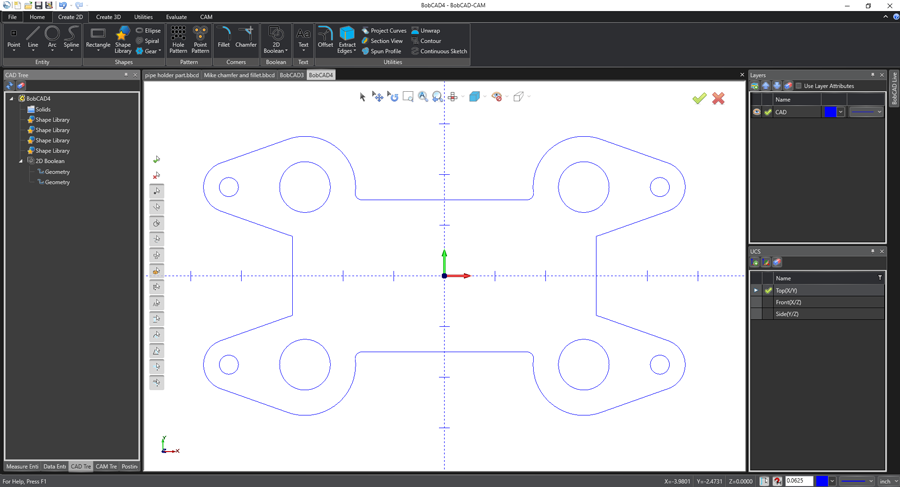
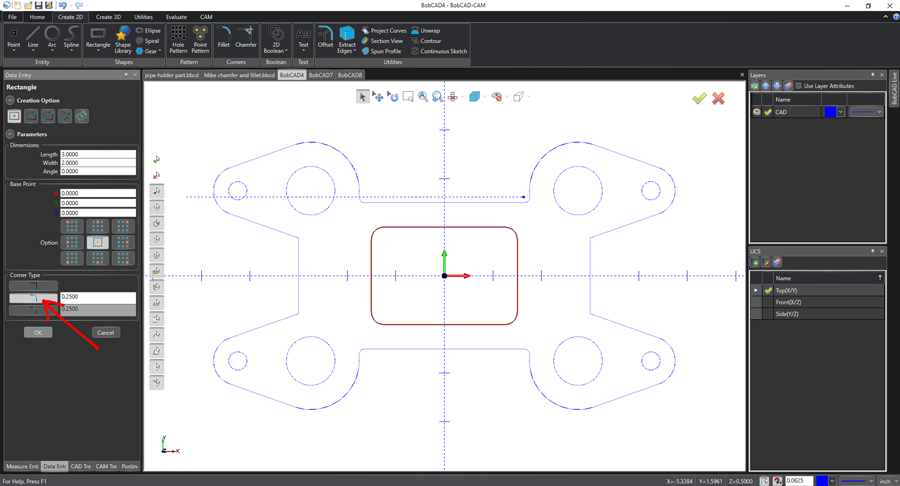
Let’s create the geometry for the center pocket. Go into the Create 2D tab and select the rectangle function. The dimension for our rectangle will be 3 inches long and 2 inches wide. I will then change my corner type to radius (red arrow) at a quarter-inch value. This allows me to skip an additional step with the fillet command. Hit OK and cancel to save and move on.
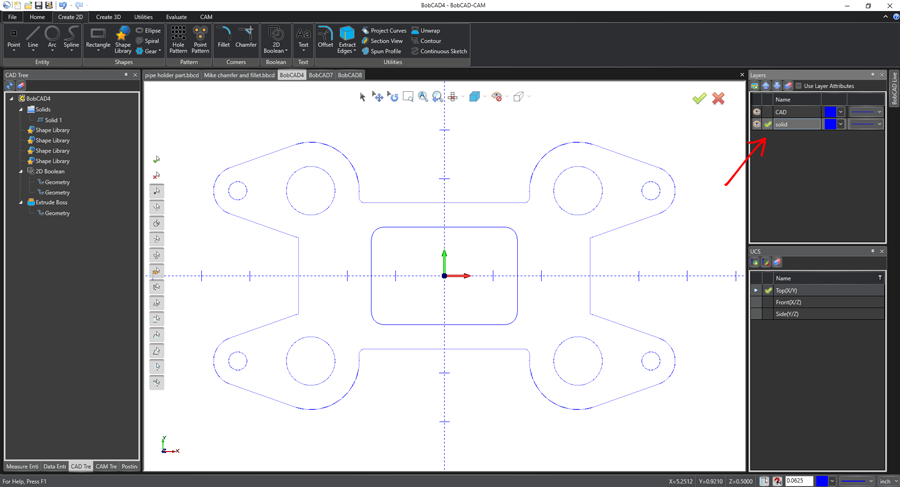
Now we are ready to make a solid model. Let’s go ahead and put our solid model on a new layer. Go into the layer window, right-click and then select New layer. Let’s name it “Solid” & hit enter. The green check lets me know that layer is now active.
Subscribe to BobCAD-CAM's Tech Tuesday Blog
Join your fellow machinists. Get the latest Tech Tuesday CAD-CAM articles sent to your inbox. Enter your email below:Now I’ll go and change the view on my document toolbar to the ISO2 view. This gives me a good perspective of the part when I’m using the 3D commands. Then I’ll go to my Create 3D tab & pick the Extrude Boss command.
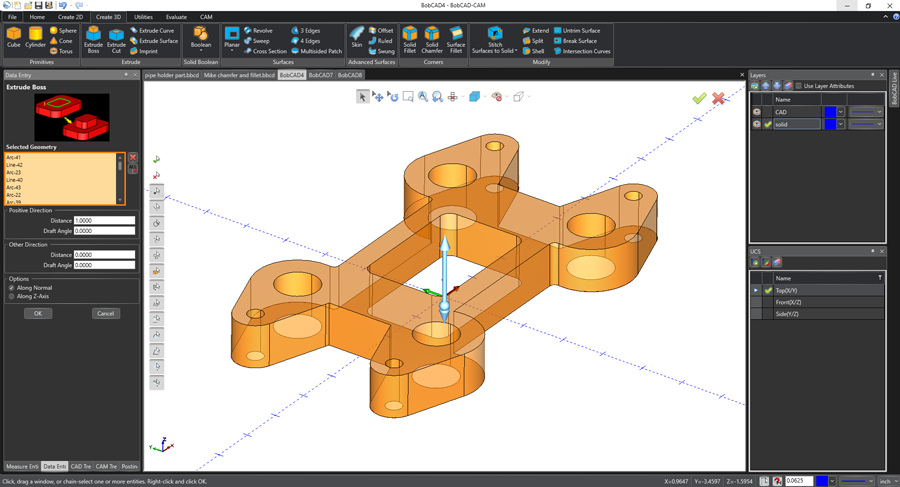
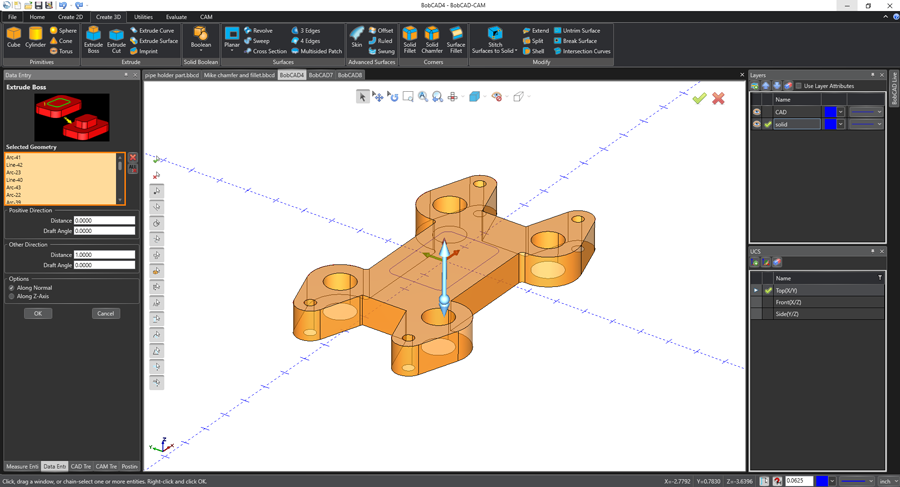
As you can see, the system has the positive distance at 1 shown in the image above and I want it at 0. The default Other Direction value is 1 and that is what I want. However, I don’t want the center pocket to go all the way through so I will hit Shift & left-click on the center rectangular geometry to close the hole… hit OK & cancel to save your work.
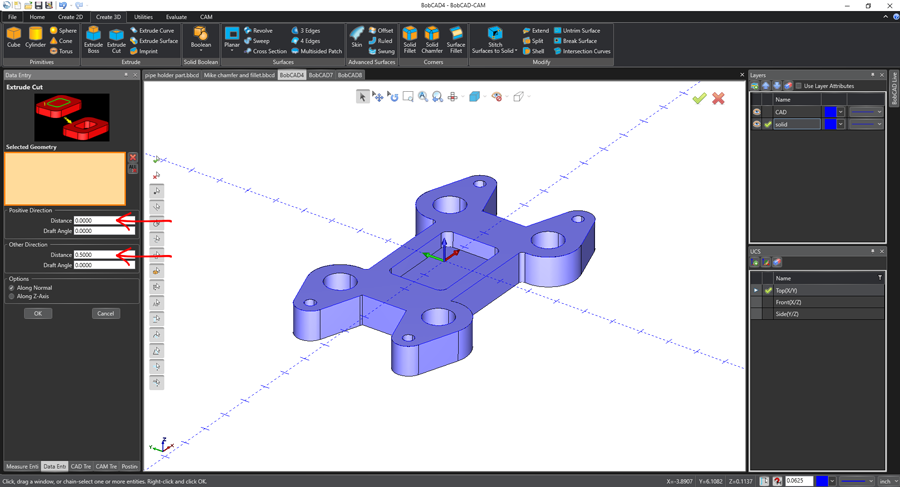
As we conclude our final step, I am going to select the Extrude Cut function in the Create 3D tab and select our center pocket. It’s difficult to do with the shading on, so I am going to hit “S” on my keyboard to turn it off. Hit shift and left-click on your center rectangle geometry. Change the positive distance to 0 and change Other Direction to a .5 value. Hit OK and turn your shading back on to reveal the pocket we created in the center of our part.
That’s it for today’s Tech Tuesday. If you don’t own V31 and you want to try applying a fillet and center pocket to our part model, download our trial version HERE. Thank you for reading another Tech Tuesday; see you next week!
You’re one click away from subscribing to BobCAD’s YouTube channel. Click the link below for tips, how-tos and much more!
BobCAD-CAM has provided CAD-CAM CNC Software products to the global manufacturing industry for over 30 years. BobCAD-CAM software can be found to increase CNC productivity for many applications in aerospace, automotive, production manufacturing, mold making, general machining, woodworking as well as the medical manufacturing industry, consumer products, musical instruments, custom fabrication, defense industry and many others due to the products ability to automatically generate NC programming code for such a wide variety of CNC controllers. BobCAD-CAM software is also found in educational institutions throughout the world as well as independent hobby home use. Products include machining technology for 2, 3, 4 & 5 Axis CNC Milling, Routing, Waterjet, Plasma and Laser machines as well as 2 Axis CNC Lathe. BobCAD-CAM is modular allowing shops to start off at a reduced technology level and add technology as it is needed including an add-on, BobART, for artistic machining. Unique technology includes adaptive high-speed machining multiaxis milling and routing which is a first in the world of CAD-CAM software. BobCAD-CAM also provides a variety of quality training products that include regional and online training classes or private sessions tailored to specific applications. Professional certification and multi-tiered support solutions are available. Contact BobCAD-CAM directly for more information at 877-262-2231 or 727-442-3554.


Leave a Reply