


Snap Increment Examples
Introduction
This topic will present examples of sketching lines and arcs using the snap increment function.
In these examples, we will cover:
- How to change the snap increment Distance value in the status bar
- Using the status bar to view the current mouse position
- The snap increment determines a uniform grid of snap locations from the WCS
- Using the snap increment with other Data Entry parameters
Example 1) Sketching Lines
For our first example, we explore how the snap increment works with sketching.
- in the Quick Access Toolbar, click
 New.
New. - In the Entity group, of the Create 2D ribbon, click
 Line.
Line.
The snap increment distance value displays in the status bar on the lower-right side of the user interface based on what you have set in the Settings Default.
- Double-click the current value in the distance
box to select the entire value.

The Snap Increment value highlights. - Type 1
and press the Enter key to update
the value.

Important: After modifying the snap increment distance value in the status bar, you must press the Enter key to update the value.
- Move the mouse pointer near X1 Y1 and click to place the start
point of the line.
Note that you can use the XYZ mouse position indicators in the Status Bar to view the current mouse pointer position.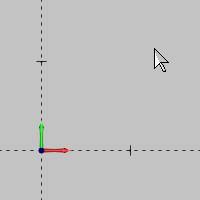
- Move the mouse pointer away from the start point to display
the CAD preview and move it in a circle.
Notice how the preview snaps only to 1 unit increments (and that the start point snapped to X1 Y1).


Important: Note that the snap increment distance does not specify the length of the line we are sketching, but rather the distance between snap increment locations in the graphics area (in reference to the WCS). You can see in the previous images that the preview of the line is longer when angled than when it is vertical or horizontal.
-
Next we update the snap increment during the sketch to get the exact value needed. Without clicking anywhere else, double-click in the snap increment distance box, type 3.125, and press Enter to update the value.

Move the mouse pointer close to X3.50 Y1 and notice that the preview snaps to X3.125 Y0 (this is our current snap increment from the WCS).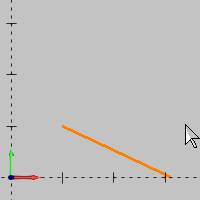
We can now force a horizontal line using the Data Entry parameters. -
In the Data Entry Manager, click the Horizontal/Vertical check box.
Move the mouse pointer near X3.5 Y1 and click to place the end point of the line.

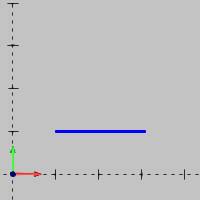
The end point of the line snaps to X3.125 Y1. The length of the line is 2.125 units.
Note: While this example is provided to show a few key points, in actual practice, you can simply set the snap increment value to the smallest division to which you need to sketch. For this example, we could have set the snap increment to 0.125 and sketched the same line without the need to turn on the Horizontal/Vertical option in the Data Entry Manager.
Example 2) Sketching Arcs
There are two main points to understanding how to use the snap increment when sketching arcs. When sketching arcs, the first click sets the arc center and the second click sets the arc radius. The arc center uses the snap increment in reference to the WCS, but the arc radius applies the snap increment in reference to the arc center.
-
in the Quick Access Toolbar, click
New. -
In the Entity group, of the Create 2D ribbon, click the down arrow under
 Arc, and select
  Arc Center.
 -
Double-click in the snap increment box in the status bar to select the entire current value.
Type 0.5000 and press the Enter key to properly update the value.
Important: After modifying the snap increment distance value in the status bar, you must press the Enter key to update the value.
-
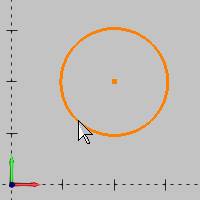
Move the mouse pointer near X2 Y2 and click to place the arc center. Note that you can use the XYZ mouse position indicators in the status bar to view the current mouse position or use the hash marks on the X and Y axes in the graphics area.

Notice that the arc center values update in the Data Entry Manager (X2 Y2 Z0).
-
Now, slowly move the pointer away from the arc center and watch the Radius value in the Data Entry Manager.

You can see that the Radius value only updates to increments of the snap increment distance value.
When you click to place the radius, the closest increment is applied (the current value in the Radius box).

This concludes the arc sketching example.