Create an Arc Using Coordinate Values
Example
- Open a new graphics area
by left clicking on the File
menu and then New.
- Left click on Arcs in the
main menu, then on Coordinates.
- The Data-CAM Tree Manager
will be ready for user input.
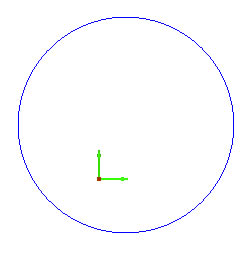
- Input 0.5 for the Center X,
1.0 for the Center Y, 0 for
the Center Z, 2.0 for the
Radius, 0 for the Start
Angle and 360 for the End
Angle.
- Next, left click on OK
in the Data-CAM Tree Manager.
- An arc is created in the graphics area like the arc in the following
image.
- To end this operation, left click on Cancel
in the Data-CAM Tree Manager
or right click anywhere in the graphics
area, then left click on Cancel
in the pop-up menu.
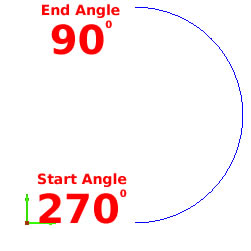
TIP: BobCAD-CAM
V26 always creates arcs in a Counter-Clockwise
direction.
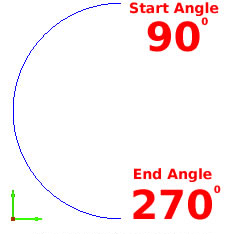
For Example:
To create the left side of an arc that goes
from 6 o'clock to 12 o'clock, the Start
Angle will be 270 and the End
Angle will be 90. If this arc is to be the right side, the
Start Angle and End
Angle should be reversed, as shown in the following examples:
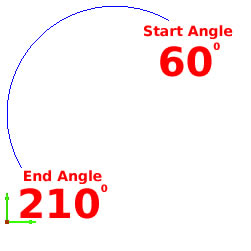
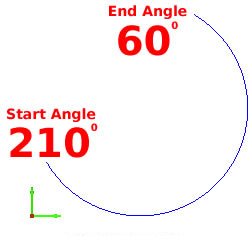
To create the left side of an arc that goes
from 2 o'clock to 7 o'clock, the Start
Angle will be 60 degrees and the End
Angle will be 210 degrees. If this arc is to be the right
side, the Start Angle and End Angle should again be reversed,
as shown in the following examples: