The Line Continuous function creates lines and/or arcs as a continuous chain of entities. The function can be used to sketch (click any location in the graphics area) or to snap to other geometry in the graphics area.
The general process requires three clicks: the start point, anchor (mid point), and end point. The direction and amount of mouse pointer movement between anchor point and end point determine whether a line or arc is created. For all entities after the first, only two clicks (the anchor and end points) are required to create them.
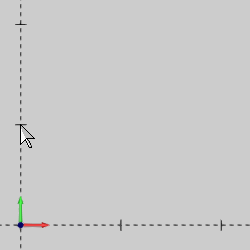
In the graphics area, point to the Y-axis (near Y1), and click to set the start of the first entity. (In the following steps, we refer to this click location as the start point.)
Move the pointer around the graphics area and notice the CAD preview displays a line between the start point and the mouse pointer. Only the start of the first entity is currently defined.
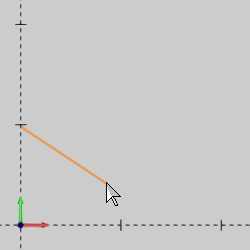
Point to an area to the right of the start point so that the preview is roughly horizontal.
Click to anchor the first entity (near X1 Y1).
Notice that the entity still displays in the preview color (no entity is created yet).
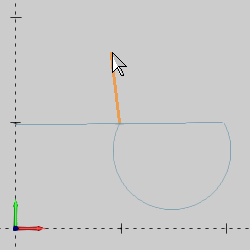
Now that the first entity is anchored, move the pointer slowly up or down, and notice that the preview entity changes from a line to an arc.
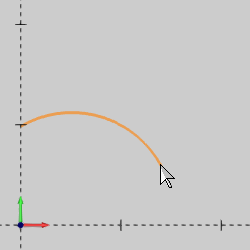
TIP: The Line Tolerance value in the Data Entry tab determines how far you can move the mouse pointer before the entity changes to an arc (as in the previous step). You can increase this value to make it easier to create lines. For example, if you set the value to 0.50, the pointer can move 0.25 units to either side of the line before it starts to form an arc.
Before clicking the final point to create the first entity, move the pointer to the right of the last click location, and notice that the preview entity returns to a line.
The location that you click next determines whether you create a line or arc.
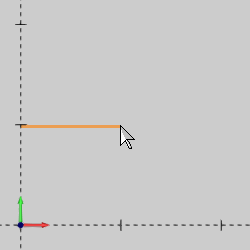
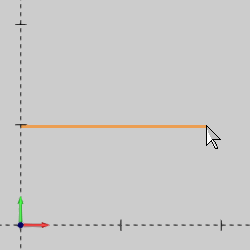
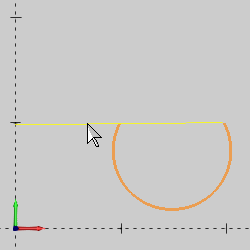
Move the pointer close to X2 Y1 (horizontal to the anchor point), and click the final location to set the end and create the first entity.
The first entity changes to the active drawing color to show that it is fully defined. The preview of the next entity displays as you move the mouse pointer away from the end point.
NOTE: Once the first entity is created, all additional entities (of a continuous chain) only require two clicks, because the end of the first entity determines the start of the second.
In addition to sketching as shown thus far, you can also use the snap points of entities in the graphics area. This is shown next.
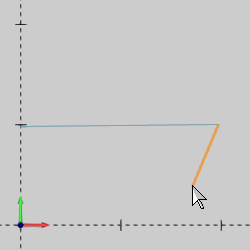
Point to an area below the first entity, and click to set the anchor point of the second entity.
This time we create an arc and we use the snap points of the line to set the end of the arc.
When using snap points, you click an entity to select the snap point that is closest to the location that you click. Lines, for example, always have three snap points: start, middle, and end. You do not have to show the snap points to use them, but we do in the next step to clarify.
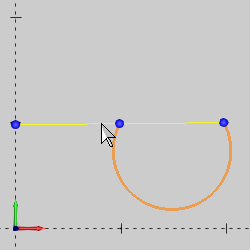
To show the snap points, press and hold Shift, and click the line.
The snap points display on the line as three small spheres.
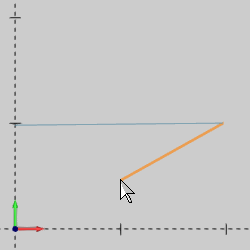
Before selecting a snap point, while pointing at the line, move the pointer back and forth between the two left snap points. Notice how the preview snaps to the closest snap point.

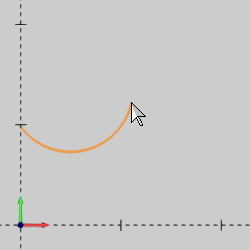
Click either the middle snap point or the line near the middle snap point to set the end of the second entity.
This creates the arc which changes to the active drawing color. The preview displays the next entity as you move the pointer away.
You can continue this process to create as many chained/continuous entities as needed.
To end the current chain and start another, right-click anywhere in the graphics area and click OK. (You could also press the Spacebar, or click OK in the Data Entry tab. For this function, all three OK methods provide the same result.) You can now create a new chain of entities with the function.
To end the function, click Cancel.
When creating lines, you can click the start, point to the end, and click twice slowly (do not double-click)to anchor the line and finish it. This means the anchoring point and the end point can be the same location, you don't have to move the pointer after anchoring an entity.
To make it easier to create lines, increase the Line Tolerance. This allows for more pointer movement before line entities change to arcs.
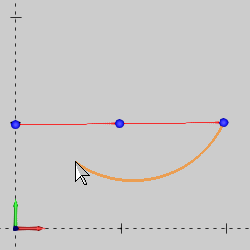
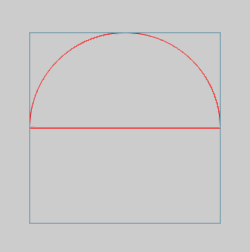
When accuracy is needed with the function, use the snap points of other entities to determine each point of the continuous chain as shown in the following image. The arc and line (in red) were created with Continuous Sketch using the snap points of a rectangle.
This concludes the example.