 Cross-Section Surface Cross-Section Surface
The Cross-Section Surface function creates a surface from a group of wireframe curves that are roughly parallel. To perform the function, you chain select each of the cross section entities one at a time, press the Spacebar to confirm the selection, and click OK. You can have as many cross sections as you like, but you must have at least two. The order in which you select the cross sections determines how the surface is created.
To open Cross-Section, do one of the following:
In the Surfaces menu, click Cross-Section.
On the Surfaces toolbar,
click the icon.
Right-click anywhere in the Workspace, point to CAD, Surfaces, and click Cross-Section.
The parameters display in the  Data Entry tab
of the Data-CAM Tree Manager.
Data Entry tab
of the Data-CAM Tree Manager.
 Preview - Select the check box
to enable the CAD preview, which displays the result that will be
created when you click OK. You must select two cross sections before
a preview is able to be displayed.
Preview - Select the check box
to enable the CAD preview, which displays the result that will be
created when you click OK. You must select two cross sections before
a preview is able to be displayed.  Preview - Clear the check box
to turn off the CAD preview. The geometry is created when you confirm
the selections.
Preview - Clear the check box
to turn off the CAD preview. The geometry is created when you confirm
the selections.
The Selected Geometries list, shows all entities
chosen for the creation of a Cross Section Surface.
![]() (Move
Up) - moves the selected entity up one level.
(Move
Up) - moves the selected entity up one level.
![]() (Move
Down) - moves the selected entity down one level.
(Move
Down) - moves the selected entity down one level.
![]() (Delete)
- removes the selected entity from the Selected Geometries list.
(Delete)
- removes the selected entity from the Selected Geometries list.
![]() (Reverse
Direction)- reverses the direction of the highlighted entity
in the Selected Geometry list.
(Reverse
Direction)- reverses the direction of the highlighted entity
in the Selected Geometry list.
![]() (Delete
All)- removes all entities from the Selected Geometries list.
(Delete
All)- removes all entities from the Selected Geometries list.
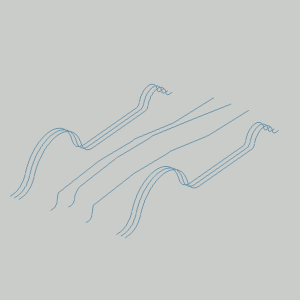
When creating a Cross-Section Surface, you complete one chain selection for each cross section. Each chain can be one or more entities. The selection order determines the results, and the chains should all share the same general direction, such as left to right.
1 Open the function.
2 Chain select the first chain.
TIP: To chain select an entire chain, hold Shift and click near the end of the last entity to set the start and end of the chain in one click. To select a portion of a chain, click near the end of the first chain entity to set the start of the chain, then hold Shift and click near the end of the last entity to set the end of the chain.
3 Chain
select the second chain using the same direction as the first chain.
With two chains selected, the Preview appears.
4 Repeat this process until all cross sections of the surface are selected and using the same direction.
The Preview updates with every new cross
section added to the Selected Geometry list.
5 To
create the surface, in the Data Entry Manager, click OK.
The feature is added to the CAD Tree.
You can repeat this process for any other
surfaces.
6 To close the function, click Cancel.