The Break Screen function is used to break a wireframe entity perpendicular to the location at which you click in the graphics area. This function can be used with any wireframe entity in the graphics area. You first select the entity to break, and then you click any location (that is at a right angle to the entity) to break it. (For help drawing wireframe entities, view the CAD_Tutorials.)
With any wireframe geometry (lines, arcs, or splines) in the graphics area, use the following steps.
The Break Screen parameters (Cancel only) display in the Data Entry tab of the Data-CAM Tree Manager.
TIP: Right-click anywhere in the graphics area, and click Entity Summary. At the top of the dialog box, notice the Quantity of Entities box. (For the geometry in this example, the number is 3.) Make a note of this number, as this is checked again later in this example. To close the dialog box, click OK.
Notice that the entire entity is displayed in the Highlight color. This shows that the line is a single entity.
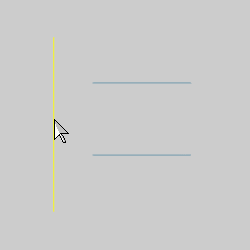
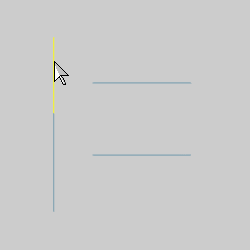
While the entity is displayed in the Highlight color, click to select it.
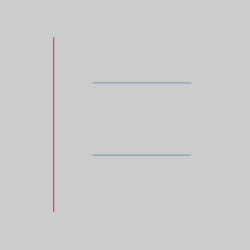
After selecting the entity, it changes to the Selection color. The selection defines the entity to be broken.
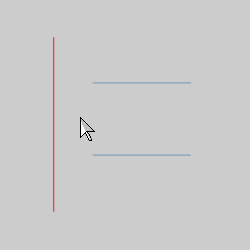
To break the entity, click any location in the graphics area (that is perpendicular to the entity).
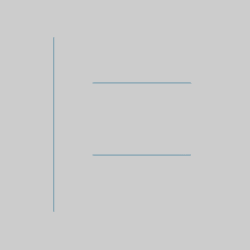
After clicking in the graphics area, the entity is broken perpendicular to the point that you click. Notice that the entity is no longer displayed in the Selection color.
To visually confirm the change, point to either end of the broken entity.
Notice that only half of the line is displayed in the Highlight color.

Notice again that only half of the line is displayed in the Highlight color. This confirms that the entity was broken.
To further confirm the results, right-click anywhere in the graphics area, and click Entity Summary. Notice that the Quantity of Entities is now one greater than when we checked earlier.
You can repeat the process explained in this example to break as many entities (or break one entity as many times) as you want. Be aware that after selecting the entity to break, if you click anywhere in the graphics area that is not perpendicular to that entity, you will receive a Failed In: Break Screen message.
To end the function, in the Data Entry tab, click Cancel.
This concludes the example.