
The Trim/Extend One Entity function is used to trim or extend a wireframe entity to the intersection of another wireframe entity. (The term intersection here refers to either the actual intersection of the entities or the theoretical intersection of the entities. An example of each is shown.) When using the function, the first selection is the trim/extend entity and the second selection is the trim/extend to entity. You can trim arcs, lines, or splines, and you can extend lines or arcs, but not splines, using other wireframe geometry (including points) as the trim/extend to entity. The following example explains the steps to use the function. (You can use the CAD_Tutorials to learn how to sketch similar entities to use with this example.)
The Trim One Entity parameters display in the Data Entry tab of the Data-CAM Tree Manager. (Cancel button only)
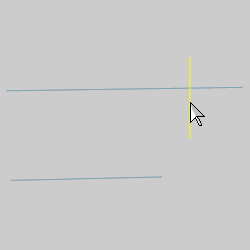
The first step is to select the entity that you want to trim. What is important here is that you select the side of the entity that you want to keep. (Selecting the portion of the entity to keep only applies when the trim entity intersects at least one other entity.) The following image shows the entities used for this example.
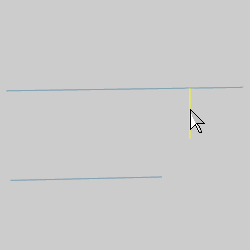
After you click the entity to trim, the entity is displayed in the Selection color.

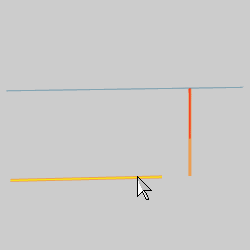
In the graphics area, click the entity to use as the trim to location/intersection.

When you click the trim to entity, the trim entity is trimmed to the intersection.

When using Trim Extend One Entity, you can also extend an entity using the same steps.
Select the entity that you want to extend.

Point to the extend to (trim to) entity to define the intersection to which the entity is extended.
Notice that when you point to the trim to entity, the CAD preview is displayed.
When you click the trim to entity, the trim (extend) entity is extended to the theoretical intersection of the two entities.

You can repeat this process for as many entities as needed to trim or extend them.
To end the function, in the Data Entry tab, click Cancel.
This concludes the example.