 Break Divide
Introduction
This topic will explain the Break Divide function, describe where to find it, and the options found in it. This topic will also provide quick steps and an example on how to use it, and provide links to related topics.
The Break Divide Function
The Break Divide function separates wireframe entities into multiple equal segments. You define the Number of Divisions, select the geometry, and confirm the selection to divide one or more entities.
Navigation
To open Break Divide:
- In the Break group, of the Utilities ribbon, click
 Break Divide.
The Parameters open in the Data Entry Manager.
The Data Entry Parameters
 Break Option
![]()
![]()
![]()
![]()
![]()
Entity Selection
-
Number of Divisions - sets how many segments are created from the entity.
|
|
|
| The list box will list the entities currently selected for the function. | |
 (Delete All)
- removes all entities from the list.
(Delete All)
- removes all entities from the list.
- OK - finalizes the function.
- Cancel - exits the function.
Quick Steps - Break Divide
- Open the function.
The Selected Geometry list automatically has focus. - Select the entities to be divided into equal parts.
The entities are added to the Selected Geometry list. - Set the Number of Divisions to create from the entities.
- Click OK to confirm.
- The entities are divided.
- Repeat as necessary.
- Click OK to confirm.
Example
-
In the Quick Access Toolbar, click
 New.
New. -
In the Entity group, of the Create 2D ribbon, click the down arrow under
 Arc, and select
  Arc Center.
The Arc Center parameters display in the Data Entry Manager. -
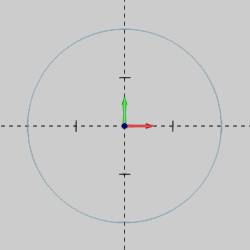
To create the default arc as shown in the CAD preview, click OK.

-
In the Break group, of the Utilities ribbon, click
Break Divide. -
In the Data Entry Manager, set the Number of Divisions to 4.
-
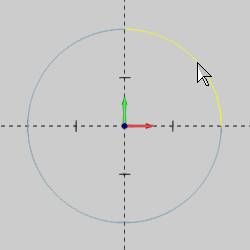
In the graphics area, point to the arc so that it displays in the Highlight color.

Notice that the entire arc displays in the Highlight color. This shows that the arc is a single entity. -
While the arc displays in the Highlight color, click to select it.

The arc is added to the Selected Geometry list.
All entities that you select for the function are divided the same way. -
To confirm the selection, click OK in the Data Entry Manager, right-click anywhere in the graphics area, and click OK, or press the Spacebar
The arc is divided and returns to the original color because it is no longer selected. -
To confirm that the arc is divided, point to the arc in each quadrant and notice the portions that display in the Highlight color.

-
As another way to confirm the result, right-click anywhere in the graphics area, and click Entity Summary.
Note the Quantity of Entities displays 4.
To close the dialog box, click OK. -
In the Data Entry Manager, change the Number of Divisions to 6.
In the graphics area, click to select any one of the arc segments.
To confirm the selection, press the Spacebar.
Point to the same arc segment again and notice the divisions.
Open the Entity Summary and note the Quantity of Entities. -
To end the function, click Cancel.
This concludes the example.