 Trim One Entity
Introduction
This topic will explain the Trim One Entity function, and the options found in it. This topic will also describe where to find the function, provide quick steps and an example on how to use it, and provide links to related topics.
The Trim One Entity Function
The Trim One Entity function is used to trim or extend a single entity from, or to, another entity. To perform the function, you select geometry in the graphics area.
Navigation
To open Trim One Entity:
-
In the Trim Extend group of the Utilities ribbon, click
 Trim One Entity.
The parameters display in the Data Entry Manager.
The Data Entry Parameters
 Trim/Extend Option
![]()
![]()
![]()
![]()
![]()
![]()
 Entity Selection
First Entity
|
|
|
| The list box will list the entity currently selected for the function. | |
Second Entity
|
|
|
| This list box will show the entity currently selected for the function. | |
-
OK - has no use with this function.
- Cancel - cancels the function when finished.
Quick Steps - Trim One Entity
- Open the function.
The First Entity list automatically has focus. - Select the first entity.
The entity is added to the First Entity list.
The Second Entity list is automatically given focus. - Hover over the second entity to see a preview of the result.
Select the second entity.
The function is automatically executed.
The First Entity list is automatically give back focus to allow the function to be repeated. - Click Cancel to close the function.
Example
The Trim/Extend One Entity function is used to trim or extend a wireframe entity to the intersection of another wireframe entity. The term intersection here refers to either the actual intersection of the entities or the theoretical intersection of the entities. An example of each is shown. When using the function, the first selection is the trim/extend entity and the second selection is the trim/extend to entity. You can trim arcs, lines, or splines, and you can extend lines or arcs, but not splines, using other wireframe geometry, including points, as the trim/extend to entity. The following example explains the steps to use the function.
- In the Trim Extend group
of the Utilities ribbon, click
 Trim One Entity.
The Trim One Entity parameters display in the Data Entry Manager.
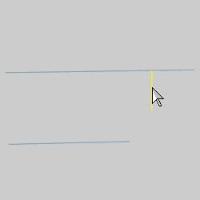
The first step is to select the entity that you want to trim. What is important here is that you select the side of the entity that you want to keep. Selecting the portion of the entity to keep only applies when the trim entity intersects at least one other entity. The following image shows the entities used for this example.
- In the graphics area, point to the entity that you want to trim
so that it changes to the Highlight color. While the entity is displayed
in the Highlight color, click to select it. Be sure to select the
part of the entity that you want to keep.

After you click the entity to trim, the entity is added to the First Entity list, and is displayed in the Selection color.
The Second Entity list is automatically given focus. - The next step is to select the trim
to entity or the intersecting entity to which the trim entity
is trimmed.
In the graphics area, click the entity to use as the trim to location/intersection.
When you click the trim to entity, the trim entity is trimmed to the intersection.
When using Trim Extend One Entity, you can also extend an entity using the same steps. - Select the entity that you want to
extend.


- Point to the extend
to (trim to) entity to define the intersection to which the
entity is extended.

- Notice that when you point to the trim
to entity, the CAD preview is displayed.
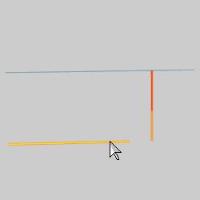
When you click the trim to entity, the trim (extend) entity is extended to the theoretical intersection of the two entities.
You can repeat this process for as many entities as needed to trim or extend them. - To end the function, in the Data Entry
tab, click Cancel.
This concludes the example.
