User Defined Templates
Introduction
This topic will introduce User Defined Templates, will describe where to access them, and will explain how to create them and work with them. This topic will also provide links to related topics.
User Defined Templates
The User Defined Templates take the default strategies found in the DMS Defaults dialog a step further. The DMS Defaults dialog box controls the number and order of Mill, Lathe
Navigation
- Create a feature.
- Move to the Machining Strategy page of the wizard.
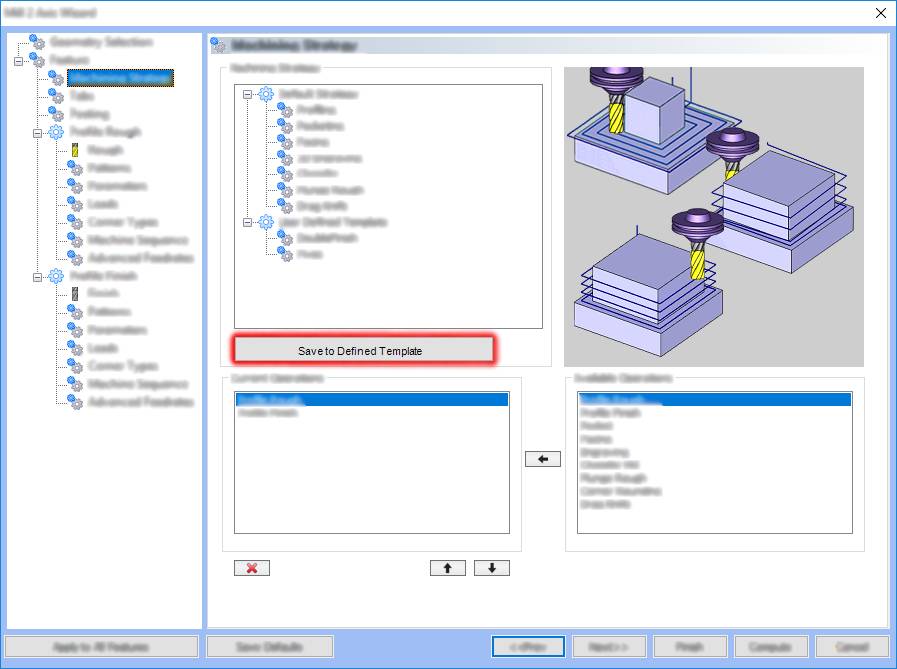
- In the Machining Strategy group, the Save to Defined Template button will be available under the Machining Strategy list.

Creating a User Defined Template from Saved Features
- Navigate to your BobCAD-CAM Program Files folder.
This is typically installed to C:\Program Files\BobCAD-CAM\BobCAD-CAM V32. - Open
 BobCAD-Utility.exe.
The BobCAD-CAM V32 Utility opens. - Under the Directories of Saved Feature(s) group, click Add Directory.
The Browse For Folder dialog appears. - Navigate to the desired folder, select the folder, and click OK.
The directory is added to the Directories of Saved Feature(s) group.
By default the Include subfolders option is selected, this will ensure all features in the folder will be used, even if those are in subfolders. - Repeat this previous step to list all the directories you would like to pull features from.
- Click the Convert to Template button.
The new Machining Strategies are created in the C:\BobCAD-CAM Data\BobCAD-CAM V32\Technology\Templates\CAM\MachiningStrategies folder, and the features that were used are added to the Converted Templates list. - Click OK to close the BobCAD-CAM V32 utility.
Important: BobCAD-CAM will not open until this utility is closed.
Creating a User Defined Template
The User Defined Templates can be created while programming a part, or by settings up a template in advance. These steps will describe creating a User Defined Template in advance. When creating a User Defined Template in advance, we will not be selecting geometry, or defining feature settings.
Step 1) Create a feature
- In the CAM Tree, right-click a
 Machine Setup and create a feature as you normally would.
The corresponding Wizard launches. - Click Next>> twice to move to the Machining Strategy page.
Notice the Save to Defined Template button at the bottom of the Machining Strategy group. This is the option we will use later, but for now, move through the wizard and alter the tools of the selected operations, and any of the values you would like to be set differently the next time this User Defined Template is used.
Tip: Keep in mind, we can also save and load features. Saved features obviously have all of their values, and the values used in the their operations saved. When saving these values, we don't want to completely customize our operation(s) for a single specific part, we only want to change the settings we want to be applied the next time this template is used.
Step 2) Save the Operations to a Template
- Once all the tools and operation values have been updated in the wizard, move back to the Machining Strategy page.
- Click the Save to Defined Template button.
The Save As dialog appears.
Important: The location of the saved template should not be altered by the user. Be sure to name the file appropriately, but the templates can only be read from a single location, and so, that location should not be changed.
- Give the template a name.
- Click Save.
The Save As dialog disappears, and the template name appears in the User Defined Template section of the Machining Strategy list. This template will now be available for this feature type in the future.
Step 3) Use the User Defined Template
Since the current operations in our feature are the same as the template we cancel the current feature to see our template load.
- Click Cancel.
The Wizard closes. - Create the same type of feature used to create our template.
- Click Next>> twice to move to the Machining Strategy page.
Notice the name of our User Defined Template now appears in the list. - Click on our new template.
The operations used in our template automatically populate the Current Operations list.
Note: Once the feature is closed, using Compute or Finish, the template is set. This means, if the feature is edited, you will not be able to select a new template. You can, of course, use the Current Operations list, and the Available Operations list to edit the operations being used, but you will notice the templates in the Machining Strategy group are no longer available for selection.