


 Line
Line
Introduction
This topic will explainthe Line function, and the options found in it.This topicwill also describe where to find the function, provide quick steps onhow to use it, and provide links to related topics.
The Line Function
The Line function creates a line using a sketch method, or a specified location using coordinates.Toperform the function you either, click two separate locations in the graphics area, or manually enter coordinate values in the DataEntry Manager for the Start Point and End Point, and click OK.You canalso enter values for the Start Point only, and then specify values forthe Length and Angle, and click OK.
Navigation
To open Line:
-
In the Entity group, of the Create 2D ribbon,and click
 Line.
Line.
The parameters display in the Data Entry Manager.
The Data Entry Parameters
 Creation Option
![]()
![]()
![]()
![]()
![]()
Parameters
Line
-
Join to closest snap point - gives you the option to connect to an entity at the specific pointer location, or the at the closest snap point on the entity.
|
|
|
|

|
Start Point
- X- allows you to manually set the end point location along the X axis.
- Y- allows you to manually set the end point location along the Y axis.
- Z- allows you to manually set the end point location along the Z axis.
End Point
Absolute
- X- allows you to manually set the end point location along the X axis.
- Y- allows you to manually set the end point location along the Y axis.
- Z- allows you to manually set the end point location along the Z axis.
Incremental
- X- allows you to manually set the end point location, from the start point, along the X axis.
- Y- allows you to manually set the end point location, from the start point, along the Y axis.
- Z- allows you to manually set the end point location, from the start point, along the Z axis.
-
Length - sets the length of the line currently in modify mode.
-
Angle - sets the Angle of the line currently in modify mode.
- OK - finalizes the function.
- Cancel - exits the function.
Quick Steps - Line
Sketch Method
- Open the function.
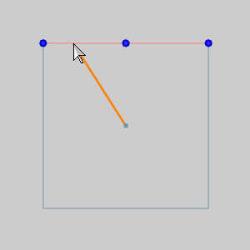
A preview appears showing a line using the default values. - Click a location in the graphics area to set the Start Point.This can be an open area, point, snap point, or any position on an existing entity.
Move your mouse away from the first position and notice the preview from the selected start point to the cursor location. - Click the second location.
The preview disappears and the line shows in a darker, bolder version of the currently used color.
This shows that the entity is in modify mode, and values can now be adjusted before the line is finalized. - Adjust the Start and End Point as necessary.
- Click OK to confirm the line, or simply begin the next to finalize the last.
- Click Cancel to exit the function.
Tip: To create vertical, horizontal, or even line perpendicular to other entities, utilize the ![]() construction geometry toggle.
construction geometry toggle.
Enter Method
- Open the function.
The preview appears showing the results using the default values. - Adjust the Length and Angle values,and/or the Start Point, and End Point values in the Data Entry Manager.
As the values update, the preview updates.
Tip: It is good practice to set the Start Point, and then adjust the Length and Angle, or set the Start Point, and then adjust the End Point.With the Start Point set, adjusting the End Point will automatically adjust the Length and Angle, and vice versa.
- Click OK tofinalize the line.
- Continue this process to create the needed lines.
- To close the function, click Cancel.