


 Point Incremental
Introduction
This topic will explain the Incremental function, and the optionsfound in it.This topic will also describe where to find the function,provide quick steps, and an example on how to use it, and provide links to related topics.
The Point Incremental Function
The Point Incremental function is used to create points in the graphicsarea a given distance from a particular location.Using this creationoption, points can be created by using construction lines originatingfrom applicable geometry, or snap points on existing geometry.When apoint can be created from a given position, a preview will be visible.Once the preview is available, clicking will created the point.
Navigation
To open Point Incremental:
-
In the Entity groupof the Create 2D ribbon, click the down arrow under
 Point, and select
  Point Incremental.
The parameters display in the Data Entry Manager.
Note: Whether you click the main icon, or the down arrow to get to the other options, you will have access to the same options in the Data Entry Manager.
The Data Entry Parameters
Incremental
The Incremental section is used to enter an incremental distance touse from a given position, to create a new point.
- X - setsthe incremental distance along the X axis.
- Y - setsthe incremental distance along the Y axis.
- Z -sets the incremental distance along the Z axis.
-
OK - has no use with this function.
- Cancel - closes thefunction.
Point Incremental - Quick Steps
-
Set the desired incremental values in the Data Entry Manager.
- Move yourmouse into the graphics area, and hover over an existing point, snappoint, or utilize the construction lines to create a point of placement.
When an applicable position is highlighted, a Previewof your point is seen at the specified incremental distance, as seenbelow.
-
Click to create the point.
The point is finalized as seen below.
Tip: Alldata entry boxes can also be used as a calculator.As an example, adding"-.25" to the end of the existing value, and tabbing out ofthe box, will subtract 0.25 from the currently listed value.
-
Continue this process to create the needed points.
-
To close the function, click Cancel.
Example
Part 1) Open a New File and Create Example Geometry
- In the Quick Access Toolbar, click
 New.
New. - In the Shapes group, of the Create 2D ribbon,click
 Rectangle.
The Rectangle parameters display in the Data Entry Manager. - Below Corner Type,click
 Radius.
Leave the defaultRadius value 0.250.
The CAD preview updates to reflect the changes.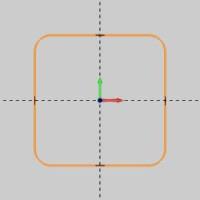
- To create the rectangle as shown in the CAD preview,click OK.
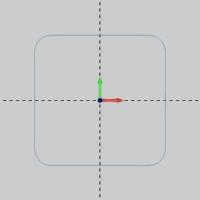
Part 2) Create Points at the Snap Points of a Wireframe Entity
When you use the Point Incremental function with the XYZ Delta valuesall set to zero, you can place points directly at the snap points of wireframeentities.
- In the Entity groupof the Create 2D ribbon, click the down arrow underPoint, and select Point Incremental.
- With all Delta values at zero, point to the left side ofupper line of the rectangle in the graphics area so that it changesto the Highlight color.

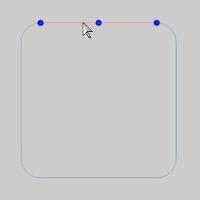
- Click on, or near the snap point to the left.

The snap points disappear and the created point is visible.
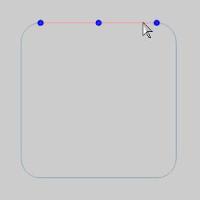
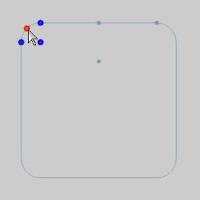
Notice we did not have to highlight the snap point to put a point on the end of the line. - Move the pointer toward the middle snap point, and click to create another point.

- Repeat this for the end of the line.

- Next we use snappoints to place a point at the arc center of the corner radius.
Hover over the arc as seen in the image below to show the snap points.
Move your mouse to the highlight the arc center snap point, and click to create the point.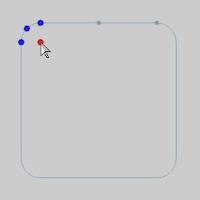

The point is created at the arc center.
Important: While, we can select snap points of a line without actually highlighting them, to select arc center, we do need to highlight the snap point.
Part 3) Create a Point at an Incremental Distance from Another Point
Next we want to create a point 0.750 units in the positive X-axis directionand 0.250 units in the negative Y-axis direction from the last point created.
- In the Data Entry Manager, in the DeltaX box, change the value to 0.750,and press Tab.
- In the DeltaY box, type -0.250.(Be sure to type the negative sign.)
- Point to the point at the arc center.

A preview of the result appears. - Click the point.

A new point is created by the specified change in position (delta)from the selected point.
Next we want to create points one unit directly above the middle ofeach arc in the rectangle.
- Change the Delta X valueto 0.00, and press Tab.
- In the Delta Y box, type 0.00, and press Tab.
- In the Delta Z box, type 1.00.
- In the graphics area, point to the middle of the top-left arcand click to create the point.
Tip: Using View, Zoom In can also be helpfulwhen selecting snap points.

- Repeat this process for the remaining three arcs.

- To better view the points, press Ctrl+7to select the ISO 2 view.

You can rotate the view to confirm that the last four points were created1 unit above the selected snap points.To use rotate, drag with themiddle mouse button, or click Rotate in the document toolbar. - To end the function, click Cancel.
This concludes the example.