


 Break Entity
Introduction
This topic will explain the Break Entity function, describe where to find it, and the optionsfound in it.This topic will also provide quick steps and examples on how to use it, and provide links to related topics.
The Break Entity Function
The Break Entity function separates an entity at the intersection ofanother entity.To perform the function, you select the entity to be broken, and then the entity to use for the break.
Navigation
To open Break Entity:
- In the Break group, of the Utilities ribbon, click
 Break Entity.
The Parameters open in the Data Entry Manager.
The Data Entry Parameters
 Break Option
![]()
![]()
![]()
![]()
![]()
Entity Selection
First Entity
|
|
|
| The list box will list the entity currently selected for the function. | |
Second Entity
|
|
|
| This list box will show the entity currently selected for the function. | |
-
OK - has no use with this function.
- Cancel - cancels the functionwhen finished.
Quick Steps - Break Entity
- Open the function.
The First Entity list automatically has focus. - Select the entity to be broken.
The entity is added to the First Entity list, and the Second Entity list is automatically given focus. - Hover over the entity being used as a breaking point on the Fist Entity.
Notice a preview of an X has appeared on the First Entity showing where the break will occur.
Note: The First and Second entity do not need to be intersecting, but must share a point of eventual intersection, where they to be extended, for the function to work.
Click the Second Entity.
- The First Entity is broken, and the focus has shifted back to the First Entity list to allow the function to be repeated.
Repeat as necessary. - Click Cancel to exit the function.
Examples
Example 1 - Single Intersection
-
In the Break group, of the Utilities ribbon, click
Break Entity.
The Break at Entity parameters display in the Data EntryManager. -
In the graphics area, point to the entity that youwant to break so that it changes to the Highlight color.
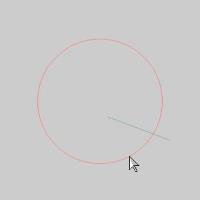
Notice that the entire arc displays in the Highlight color.This showsthat it is a single entity. -
While the entity displays in the Highlight color, clickto select it.
The entity is added to the First Entity list, and the focus is automatically shifted to the Second Entity list.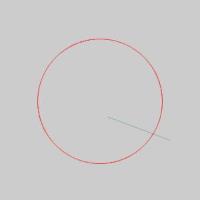
-
Hover over the entity being used to break the first.
Notice the break preview appears.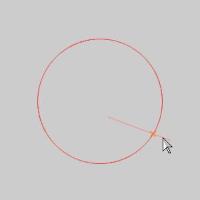
Click the second entity.
The arc is broken as soon as you click the second entity, there isno need to confirm the selection.
The entities are no longer highlighted, and the lists in the Data Entry Manager are cleared, with focus returning to the First Entity list.
-
With the function still active, point to the arc.
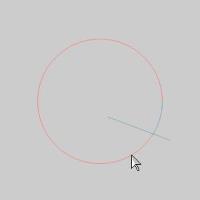
Notice that the arc is now two entities. -
To end the function, click Cancel.
Example 2 - Multiple Intersections
When the break at entity intersectsthe break entity in more thanone place, you can still use the function as explained in this topic.The only difference is that you can perform the function more than onceif you want to break the entity at more than one intersection.The software breaks the entity at the intersection that is closest tothe location you click on the break entity.A quick example followsto help illustrate this.
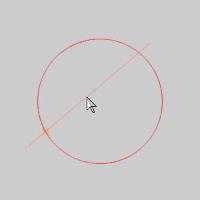
Similar to the first example, a line intersectsthe arc, but in this case, it intersects in two places instead of one.
-
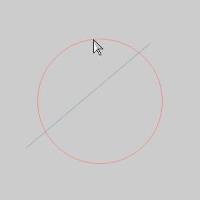
The arc is selected as the breakentity, and the line is selected as the breakat entity.

The arc is broken into two entities.Notice that this is the closestintersection to the location at which the arc was selected.
-
Press Ctrl+Z to undo the results.
- The process is repeated using the top halfof the arc and the line.
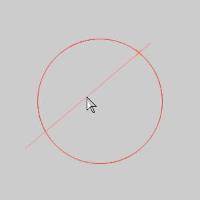
The arc is broken into two entities.Notice that this is the closestintersection to the location at which the arc was selected.
Note: Thisfunction only works if the entities share a common intersection.Thisis important when working with 3D wireframe drawings.It can be helpfulto zoom-in closely and/or change to a different view to confirm that theentities do in fact intersect each other.
Tip: Whenselecting a point as the break location, the point does not have to intersect(or touch) the break entity.In this case, the function works like BreakScreen meaning that the entity is broken perpendicular to the point.
This concludes the example.