


 Quick Trim
Introduction
This topic will explain the Quick Trim function, and the optionsfound in it.This topic will also describe where to find the function,provide quick steps and an example on how to use it, and provide links to related topics.
The Quick Trim Function
The Quick Trim function trims selected entities to an intersectionpoint with another entity.To perform the function, you select geometryin the graphics area.
Navigation
To open Quick Trim:
-
In the Trim Extend groupof the Utilities ribbon, click
 Quick Trim.
The parameters display in the Data Entry Manager.
The Data Entry Parameters
 Trim/Extend Option
![]()
![]()
![]()
![]()
![]()
![]()
Entity Selection
-
OK - has no use with this function.
- Cancel - cancels the functionwhen finished.
Quick Steps - Quick Trim
- Open the function.
- Hover over an entity to see a preview of the result.
Select the first entity.
The entity is automatically trimmed. - Repeat the function as desired.
- Click Cancel to close the function.
Example
The Quick Trim function is used to delete or trim wireframe entitiesin the graphics area.If an entity does not intersect another entity,Quick Trim deletes the entire entity.If an entity intersects other entities,Quick Trim deletes the selected portion up to the intersections.You clickthe entity (or portion of an entity) that you want to trim.
- In the Quick Access Toolbar, click
 New.
New. - In the Shapes group, of the Create 2D ribbon,click
 Rectangle.
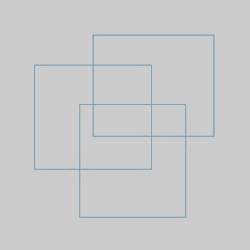
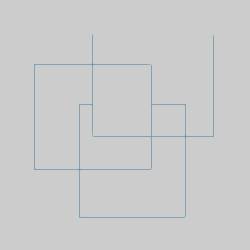
The Rectangle parametersdisplay in the Data Entry Manager. - Click a few different locations in the graphics area to sketch a few overlapping rectangles.
- In the Trim Extend groupof the Utilities ribbon, click Quick Trim.
- In the graphics area, point to any entity that intersects anotherentity and notice the color of the entity.
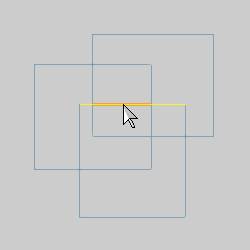
Notice that the entire entity is displayedin the Highlight color, and the portion that will be removed is displayedin the CAD Preview color.
Note: These colors can be updated in Settings Part for the current part, and Settings Default for future documents.
-
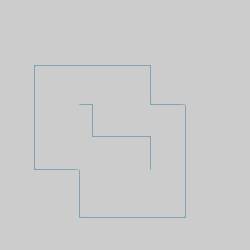
Click the entity to trim it as shownin the CAD preview.
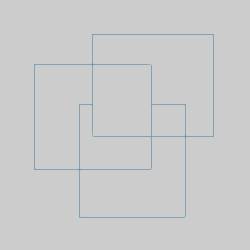
Notice that the entity is trimmed to thepoints of intersection with the other entities.
-
This time, point to any entity thatdoes not intersect another entity.
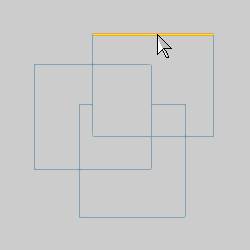
Notice that the entire line is displayedin the Preview color.
This shows that the entire entity will be deleted.
-
Click to trim the entity as shownin the CAD preview.
You can repeat this process for as many entitiesas you want to trim.
-
To end the function, in the Data Entrytab, click Cancel.
Note: TheQuick Trim function can be used with any wireframe entities (and points).
This concludes the example.