


 Trim Strings
Introduction
This topic will explain the Trim Strings function, and the optionsfound in it.This topic will also describe where to find the function,provide quick steps and an example on how to use it, and provide links to related topics.
The Trim Strings Function
The Trim Strings function is used to trim or extend multipleentities to create one contiguous curve.To perform the function, youselect geometry in the graphics area.
Navigation
To open Trim Strings:
-
In the Trim Extend groupof the Utilities ribbon, click
 Trim Strings.
The parameters display in the Data Entry Manager.
The Data Entry Parameters
 Trim/Extend Option
![]()
![]()
![]()
![]()
![]()
![]()
Entity Selection
First Entity
|
|
|
| The list box will list the entity currently selected for the function. | |
Second Entity
|
|
|
| This list box will show the entity currently selected for the function. | |
-
OK - has no use with this function.
- Cancel - cancels the functionwhen finished.
Quick Steps - Strings
- Open the function.
The First Entity list automatically has focus. - Select the first entity.
The entity is added to the First Entity list.
The Second Entity list is automatically given focus. - Hover over the second entity to see a preview of the result.
Select the second entity.
The function is automatically executed.
The First Entity list is automatically give back focus to allow the function to be repeated. - Click Cancel to close the function.
Example
The Trim Extend Strings function is used to trim or extend entitiesso that they form a continuous string or chain of entities.This is donein a continuous order along open or closed chains.You can apply the processshown in the following example to use the function.
- In the Trim Extend groupof the Utilities ribbon, click Trim Strings.
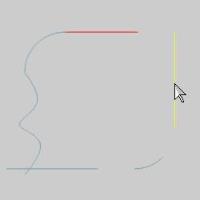
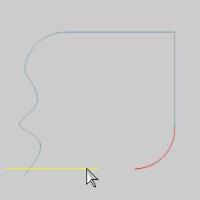
The Trim Strings parameters display in the Data Entry Manager. - In the graphics area, point to the first entity that you want totrim so that it is displayed in the Highlight color.
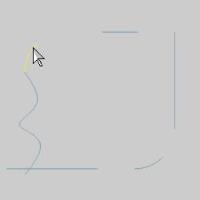
- While the entity is displayed in the Highlight color, click toselect it.
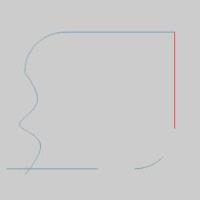
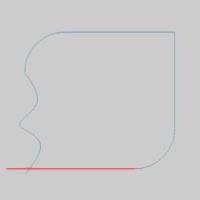
After you select the entity, it is added to the First Entity list, and is displayedin the Selection color.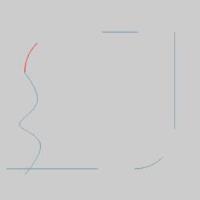
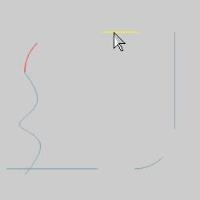
The next step is to select the trimto entity.This may result in entities being trimmed or extended,based on the selections.In this example, we extend the arc and the lineto meet. - In the graphics area, select the nextentity to trim or extend.
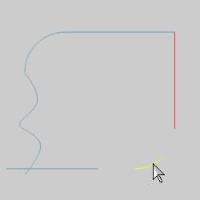
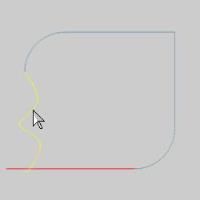
When you select the second entity, the entitiesare trimmed or extended until they connect, and the last selected entity is placed in the First Entity list.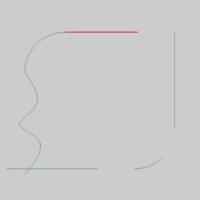
Notice that the second entity is now displayedin the Selection color.This is now the current trim entity. - In the graphics area, select the nextentity to trim or extend.
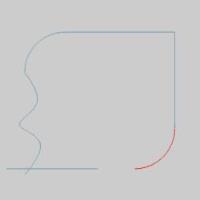
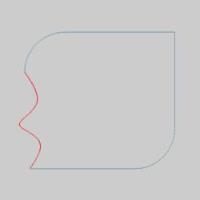
The entities are trimmed or extended untilthey are connected. - Select the next entity.
- Continue selecting the entities totrim or extend.
- To end the function, click Cancel.
Note: The final geometry is now a closed chain.All of the entities createdusing Trim Extend Strings are single entities.What this means is thatwhen an entity is extended, the software does not add a new entity, itreplaces the previous entity with one new entity.Note that when usingsplines, as in the last entity of this example, you can only trim to them,you can't extend a spline to another entity.
This concludes the example.