


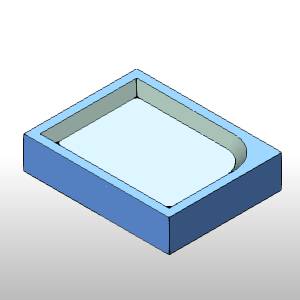
V-Carve Pocketing
The V-Carve feature type is generally used to engrave text, arcs, linesand splines in a 3-dimensional form with 3-axis tool motion, with pocketingof open spaces in the selected profiles if necessary.There are two V-Carveoperation types, Tapered Pocketing and V-Carve Finishing (engraving).This example uses the both operations, one to perform the pocketing withan endmill, and the second to cut a tapered wall around the pocket.
Pocketing a shape withV-CARVE example:
1) Open a new file
-
 New
New
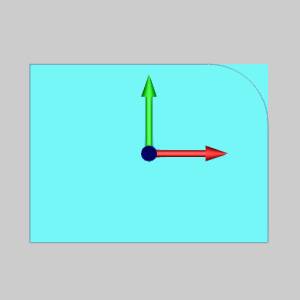
2) Create the Rectangle
-
In the

-
- In the Option group of the Base Point section, click
 to set the Base Point at the bottom left of the rectangle.
 -

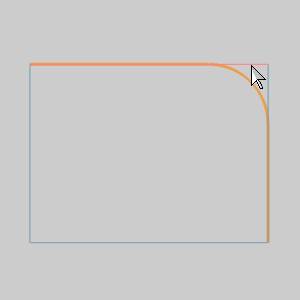
3) Create the Fillet
- In the

- Click anywhere in the graphics area, and zoom out so the entire rectangle is visible.
- In the Data Entry Manager, update the Picking Method to Single Corner Click.
- Change the Radius value to
-
-
- Click Cancel to close theData Entry Manager.
4) Create the CAM Job
- In the CAM
 New Job.
 - With the Milling job typeand the BC 3X Mill machineselected, click Stock Wizard.
The Workpiece dialog appears in the Data Entry Manager. - Click the
 (next)button to skip the workpiece assignment.
5) Create the Stock
- With Rectangular selected,the software automatically creates a bounding stock for the rectanglein the graphics area.
- In the Dimension / Offset group, enter:
| X | Y | Z | |
| Dim |
|
|
|
| Offset + | 0.250 | 0.250 | 0.000 |
| Offset - | 0.250 | 0.250 | 0.000 |
- Click to go to the MachineSetup.
For this example, we use the default settings for the machine setup location.
6) Set the Work Offset
- Click the Work Offset button.
The Work Offset dialog launches. - Next to Z, change the value to
- Click OK to finish theMachine Setup.
7) Blank the Stock
- In the CAM Tree, right-click
 Stock, and select Blank/Unblank.
The Stock disappears.
8) Create the V-Carve Feature
- In the CAM Tree, right-clickMachine Setup, and click Mill V-Carve.
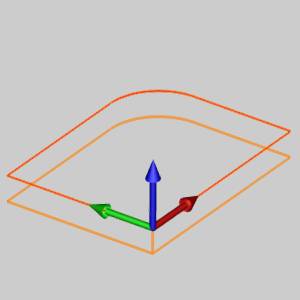
9) Select Geometry for the Feature
- In the Mill V-Carve Wizard,click the Select Geometrybutton.
The Mill V-Carve Wizard disappears, allowing you to select geometry from the graphics area. -
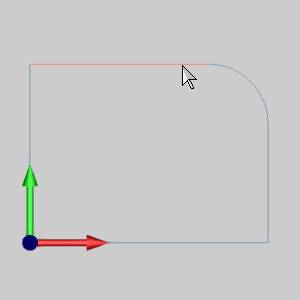
- Press Ctrl+7 to enter into an isometric view.
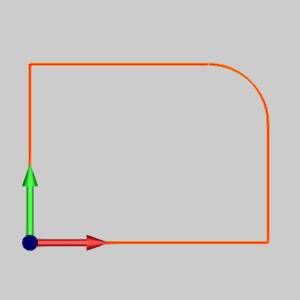
10) Set the Depth of the Feature
Notice the feature preview displays the current depth.
- In the Total Depth group, change the Depth to 0.250, and press Tab.
The preview updates.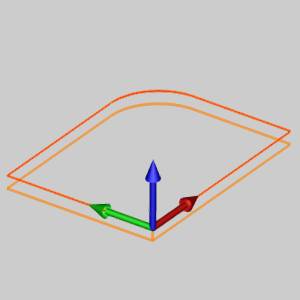
- Click
 (OK) to confirmthe selection.
The Mill V-Carve Wizard reappears.
11) Set the Machining Strategy
- In the Tree on the left of the wizard, click
 Machining Strategy to jump to that page.
 - Under Available Operations,with Tapered Pocketing selected,click the left arrow button,
 ,to add the operation to the Current Operations list.
 - Under CurrentOperations, click the up arrow button,
 , to movethe Tapered Pocketing operation to the top of the list.
 - Click Next>> to updatethe tree with the new operations.
12) Set the Roughing Tool
- Click Next >> again to move to the tool page.
- Change the Diametervalue to 0.250, and pressTab to update the value.
The system automatically selects a tool from the Tool Library(after checking the Tool Crib).
13) Set the Parameters
- Click Next>>to go to the Parameters page.
- Notice the Pocket Depthis already defined.
- Change the Depthof Cut value to 0.2500.
Note: You can use the Depth of Cut value to create multiple depth cuts,but for this example, we cut the pocket at one depth.
- Click Next>>.
14) Set the Finishing Tool
- Confirm the default 0.5000inch Diameter V-Tool is selected,and click Next>>.
15) Set the Finishing Parameters
- Under Depth Options, changethe V-Tool Depth of Cut valueto 0.0625.
- Change the V-Tool Roughing Stepovervalue to 0.0300.
Note: Notice the V-Tool Cleanup Parameters.Because we are using a Tapered Pocketing operation, we can set thestepover to perform a cleanup path in the corners of the pocket usingthe V-tool.
- Change the V-Tool CleanupStepover value to 0.005.
- At the bottom of the wizard, click Compute.
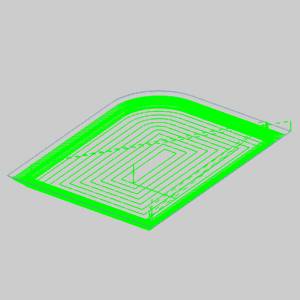
- To view the toolpath simulation, right-click MillingJob and click Simulation.For more information on using simulation, view GettingStarted with Simulation.
This concludes the example.