


Using View Options for Geometry Selection
Introduction
This topic explains how to use the view options, shaded, wireframe,and transparent to make geometry selection easier.Note that the informationhere can be applied to CAD and CAM.
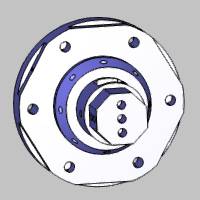
Example Part
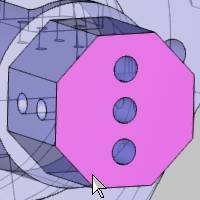
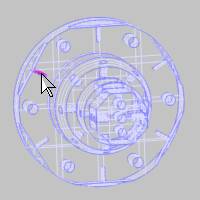
The following image shows an example part with the default viewing options.We use this part to illustrate the example.
How to Change the View Options
These steps are provided here as they apply to one or more of the examplesthat follow.
To turn on and off the Transparentview:
- In the document toolbar, clickthe drop down list next to the
 icon, and select
 Transparent.
 - You can also use the shortcut key T.Just click anywhere in the graphics area, to give it key focus, and pressthe T key to toggle the transparentview.
To turn on and off the Shaded view:
- In the document toolbar, click Shaded.
- You can also use the shortcut key S.Just click anywhere in the graphics area, to give it key focus, and pressthe S key to toggle the shadedview.
To turn on and off the Wireframeview:
- In the document toolbar, clickthe drop down list next to the icon, and select
 Wireframe.
 - You can also use the shortcut key W.Just click anywhere in the graphics area, to give it key focus, and pressthe W key to toggle the wireframeview.
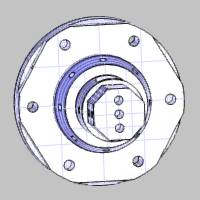
Transparent View
Select Edges Through Transparent Faces
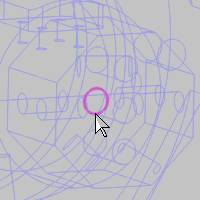
Utilizing the transparent view option during selection allows you toselect surface edges through the transparent faces of the model.Thiscan greatly reduce the need to zoom in and out and rotate the model formany parts and selection scenarios.
Tip: Turningon the transparent view is a great way to confirm the selections you havemade, because it shows selections that may be covered by other surfaces(when transparency is off).
When the transparent view is on, you can still select geometry as younormally would, but you can also then select edges that are behind thetransparent faces of the model.
When you point to a surface (and there are no edges behind the mousepointer), it highlights for selection.
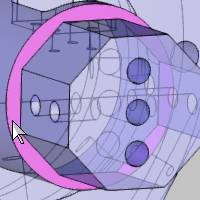
When the mouse pointer is moved to a surface edge that sits behind atransparent face, the edge highlights for selection.

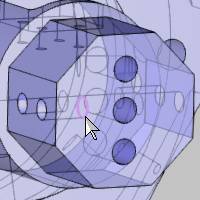
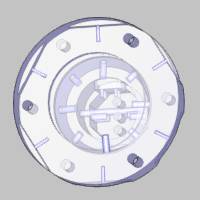
Shaded View
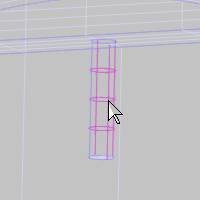
Turn Off Surface Shading to Select Edges Only
The shaded view option is helpful for geometry selection because itremoves the shading of surfaces leaving only surface edges available forselection.This method can be very helpful for CAD and CAM, but specificallyCAD functions, such as extrude boss, when you need to select wireframegeometry that is on a surface.
Tip: Inaddition, turning off the shaded view is a great way to confirm the selectionsyou have made, because it shows selections that may be covered by othersurfaces (when shaded is on).
When the shaded view is turned off, you can easily select any surfaceedge of the model (and surfaces do not highlight).You can also easilyselect wireframe geometry that is on a surface as the surface does nothighlight.
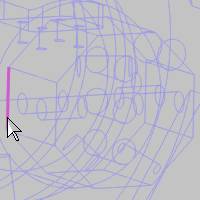
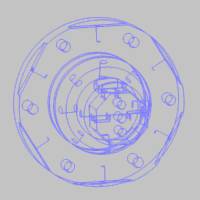
Shaded and Wireframe Views
Surface Selection
This section explains a special case tip for selecting surfaces froma part model, specifically very small surfaces.Turning off the shadedview and turning on the wireframe view allows you to easily select surfacesby clicking the wireframe, which in many scenarios can greatly reducethe need to pan, zoom, and rotate the viewing orientation of the part,and it still allows for selection of surface edges.For our example part,the selection of very small cylindrical surfaces is greatly improved.

For our example part, there are six small holes on the outside diameterof the part that require rotating and zooming to select all of the cylindricalsurfaces.Using the shaded and wireframe views allows these selectionsto be made from a single viewing orientation.
This concludes the example.