


What's New in BobCAM for SOLIDWORKS V11
Introduction
The new BobCAM for SOLIDWORKS V11 has a ton of new features! In this version we add general features, a quick way to create your BobART Canvas, a bunch of CAM features, and also introduce helical output support on your posts!
General Features
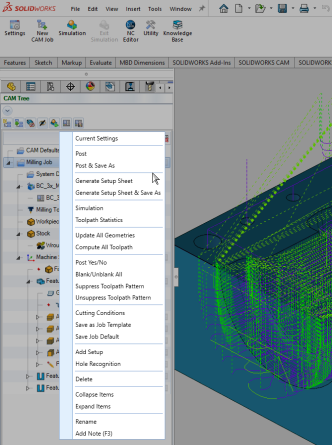
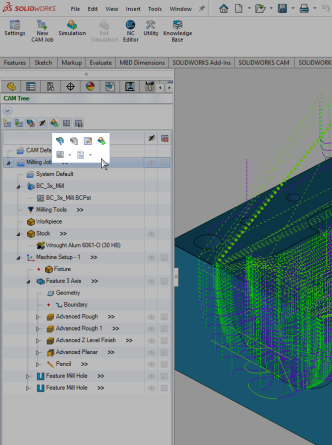
Contextual Toolbars
The new contextual toolbars give you easy access to the most frequently used commands! In this version, there's really no need to right-click items to then search through the context menu to find the desired command. Simply left-click the item once and the Contextual Toolbar appears, allowing access to the commands you use time and time again!
| CAM Context Menu | CAM Contextual Toolbar |
|
|
Migration
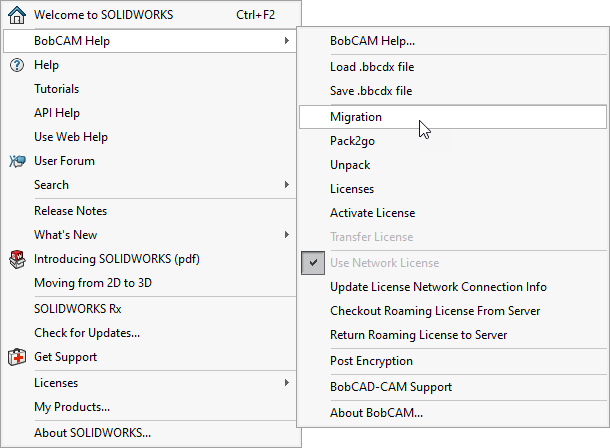
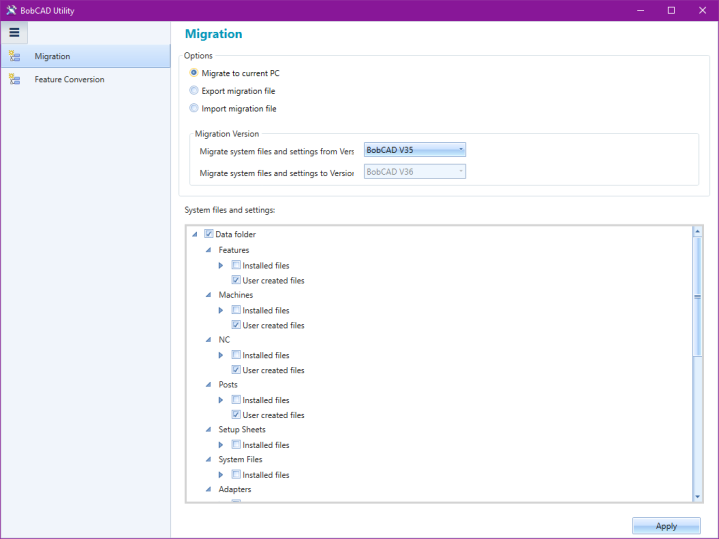
By popular demand, we now offer a simple migration tool to help you update into the latest and greatest BobCAD version without needing to manually copy individual items. With the new BobCAD Utility, simply select whether you are updating your version on the current computer, or exporting to a new PC. You can then select the version you're migrating from, and to, and even update saved features to templates!
| Click Migration | The BobCAD Utility is launched |
|
|
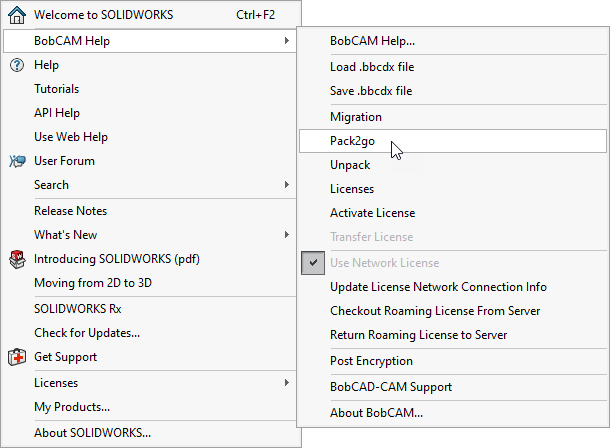
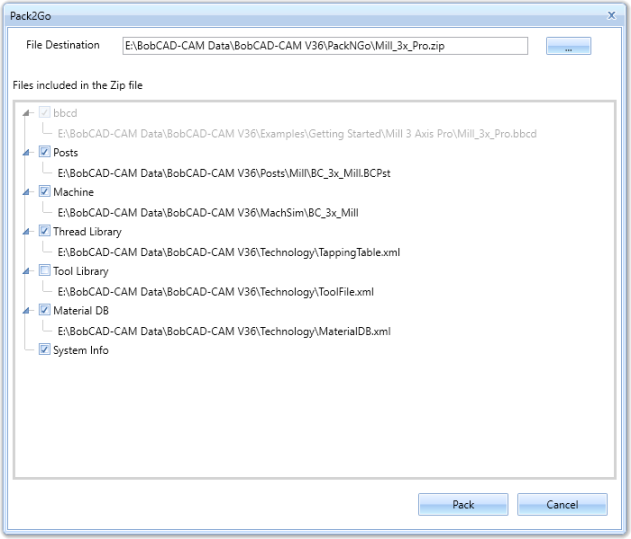
Pack2Go / UnPack Zip
The new Pack2Go utility takes the current file and all supporting files and zips it into an easily sharable file. This is a great way to ensure when a file is shared, the recipient will have everything needed to simulate and post the exact same result!
| Click Pack2Go | The Pack2Go dialog is launched |
|
|
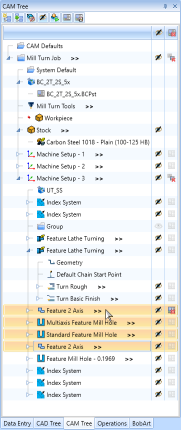
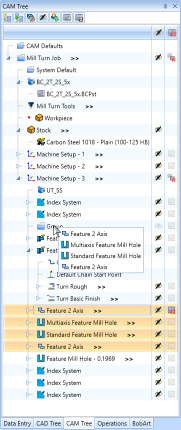
Multiple selection in picking boxes
Multiple selection now works for items in the CAM Tree,
| Select Multiple | Move Multiple | Done |
|
|
|
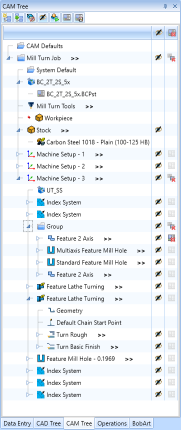
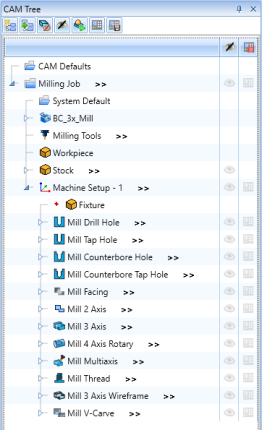
New Icons
In this latest version, we've made your jobs easier to organize at a glance with the new job icons! Feature naming is a great way to help keep track of the features in your jobs, but nothing beats an image to be able to quickly identify the components of your job. With these new feature icons, keeping your jobs organized and easy to read has never been easier.
| Milling Job | Turning Job | Wire EDM Job | BobArt Job |
|

|

|
|
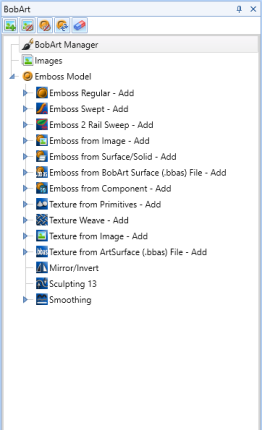
BobART Features
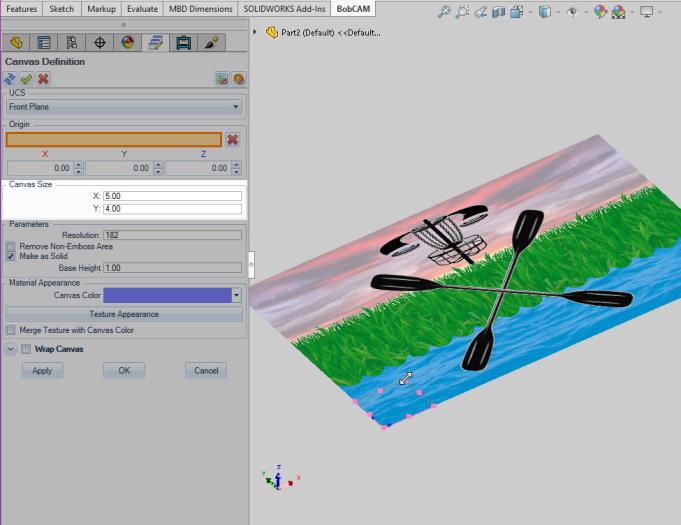
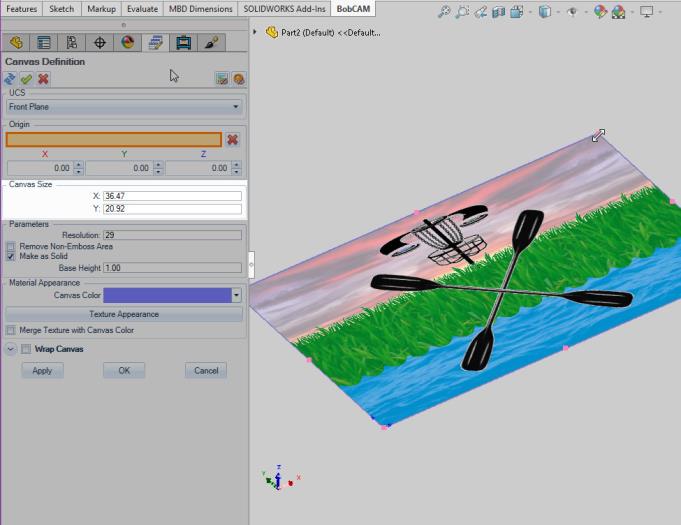
Drag canvas size
In this version we give you the power to drag the BobART Canvas to the desired size! Being able to drag your images to the approximate size needed was a huge hit, and now that same capability is available on the canvas itself! Simply drag a side, or corner, and release at the desired location!
CAM Features
General
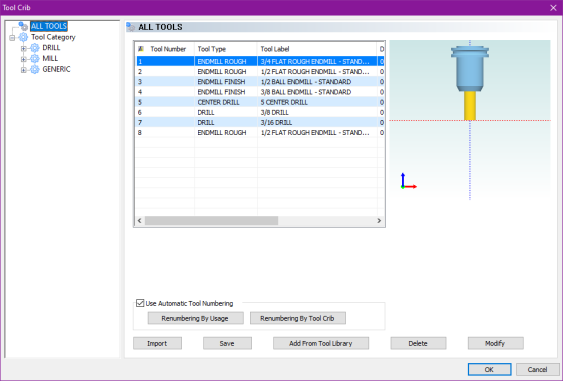
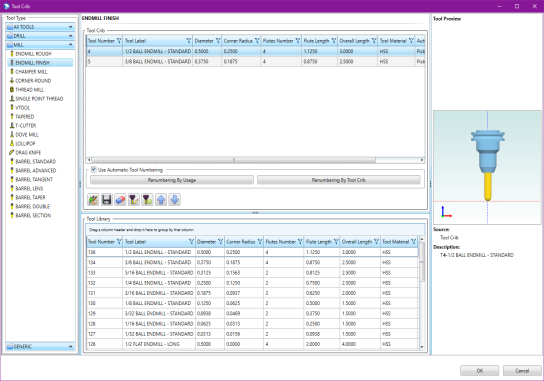
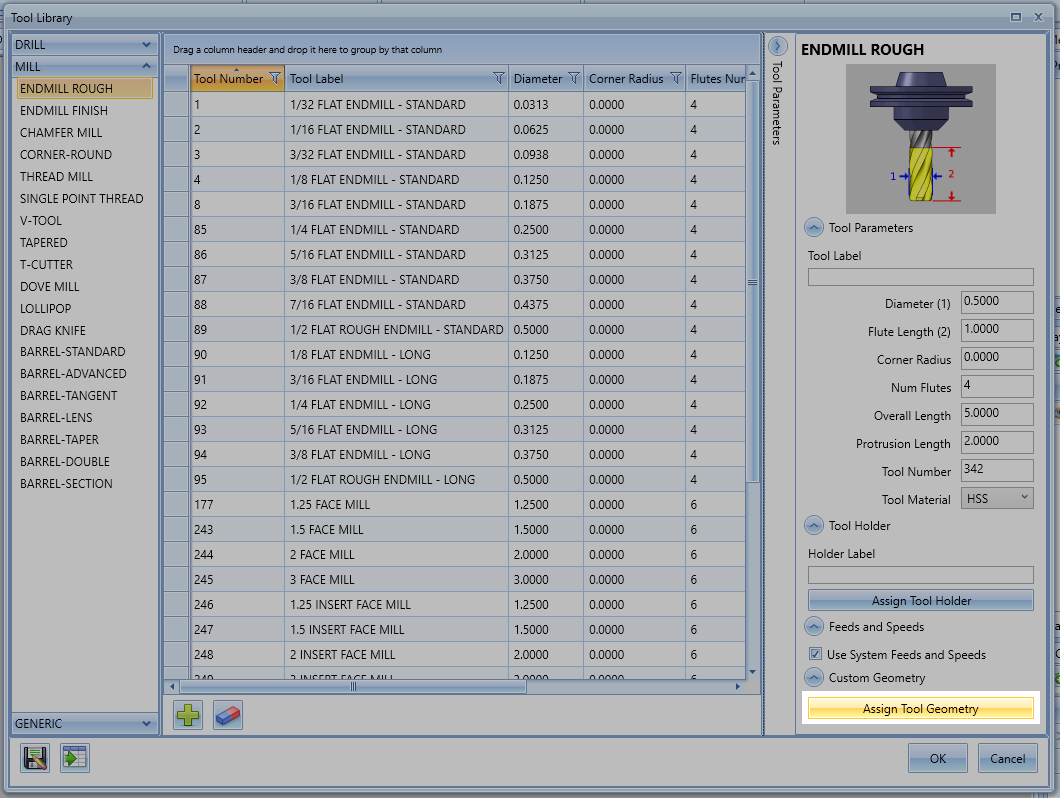
Redesigned Tool Crib
With our redesigned Tool Crib, you no longer need to open the Tool Library as a separate window and add your tools one at a time! The Tool Library is visible in the same window, and you can even select multiple tools to drag into the crib at the same time!
| Old Tool Crib | New Tool Crib |
|
|
Mill
Mill Express
General
Copy Machine Setups
In this latest version copying and pasting entire machine setups is possible! In some cases, when building a machine setup, another machine setup is needed and the same features and settings, or many of them can be applied to the new setup. Now, you can save a huge amount of time by simply copying and pasting to recreate the existing machine setup.
Mill 3 Axis Pro
General
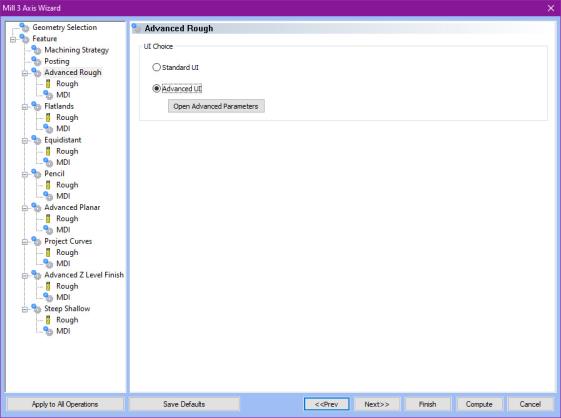
Advanced UI
Your Mill 3 Axis Pro operations now allow you to bypass the Standard UI and choose the Advanced UI to program your toolpath. This new user interface unlocks tons of brand-new options to give you an unprecedented amount of control over every aspect of your operations!
| Choose between Standard, or Advanced, UI | Brand new options available for your operations |
|
|
New barrel tool options
With Barrel tools becoming more and more common place, the Mill 3 Axis Pro toolpaths have been updated to support the three barrel types which were previously unsupported. These operations can now utilize all seven barrel types!
| Barrel Taper | Barrel Double Section | Barrel Section |
|
|
|
|
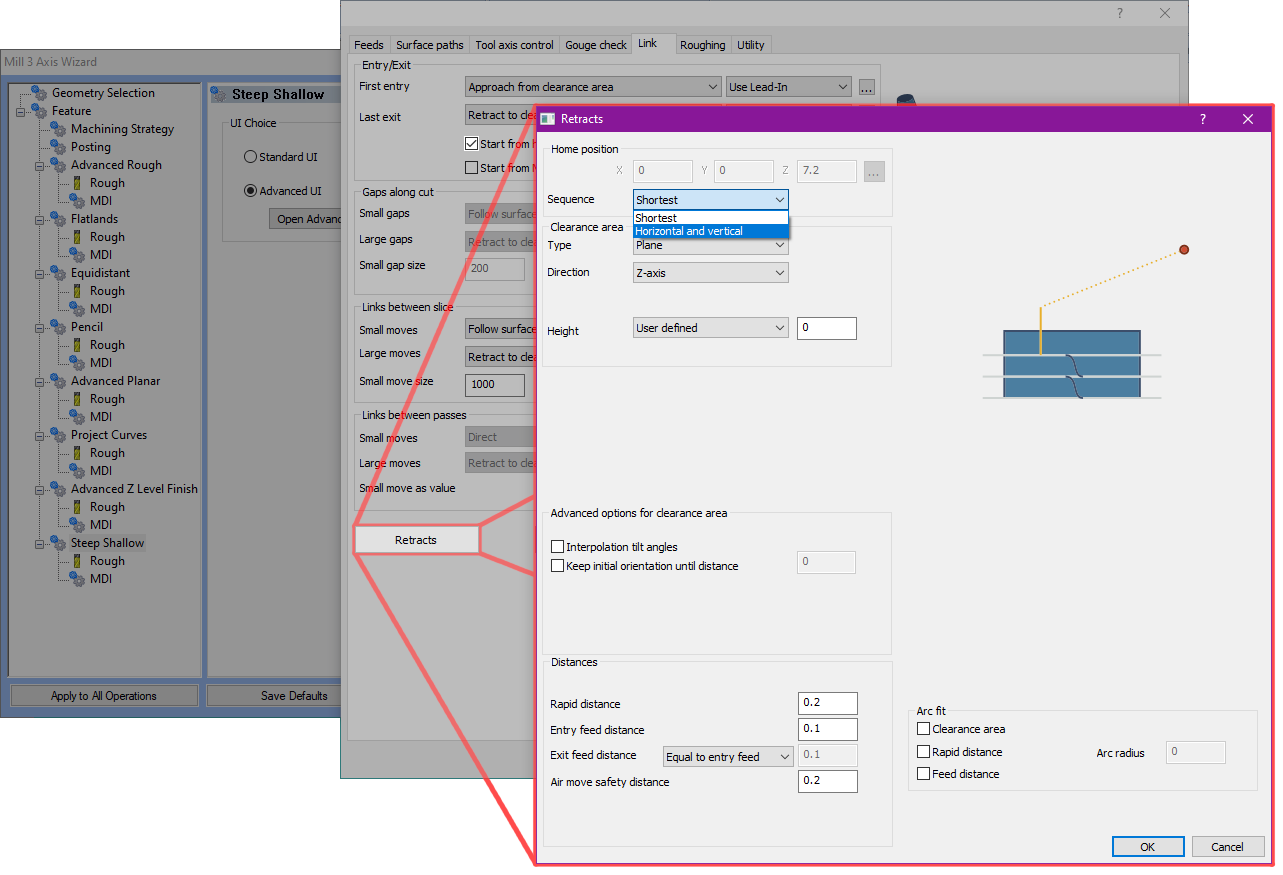
Homing sequence
A new feature has been added to the Mill 3 Axis Pro toolpaths allowing you to define the home position of the operation, and even how the tool moves from and to that home position! There are tons of reasons you may want to define where your operation begins, and how you approach and exit the workpiece, and in this new version, we allow you full control over how it's done!
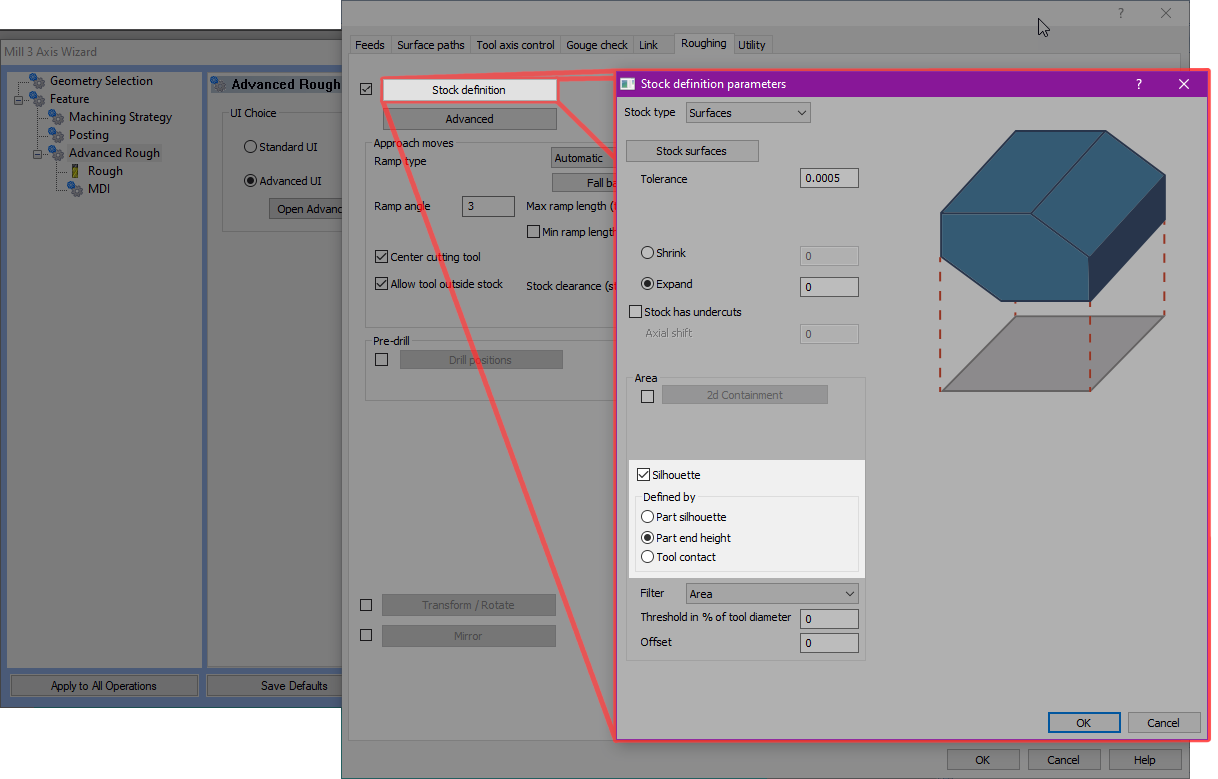
Stock silhouette containment options
A new feature has been added to the Advanced Roughing operation which acts as an automatic soft boundary to allow the tool approach from outside of this boundary. This option takes the selected machining surfaces and creates the boundary as a silhouette from these surfaces. This is a quick way to focus on the needed surfaces without creating boundaries manually!

Advanced Rough
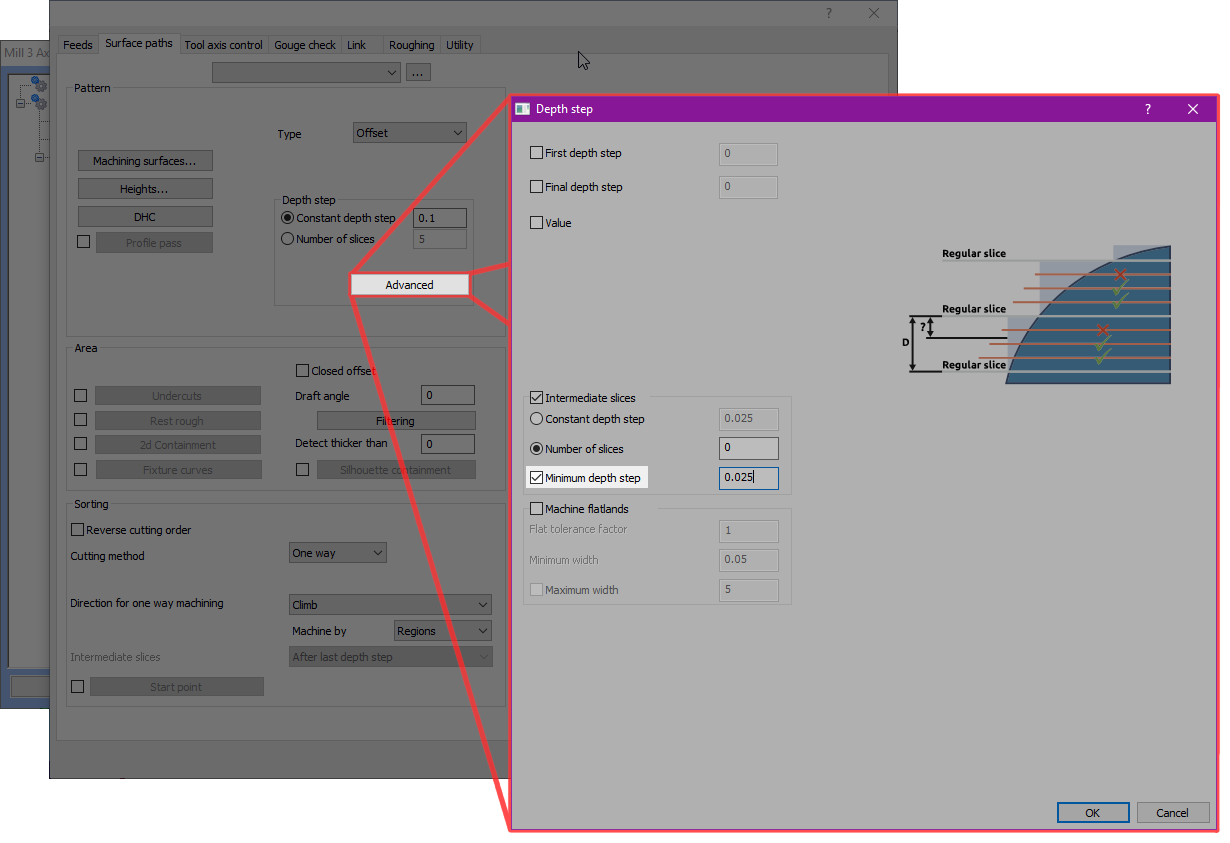
Minimum Depth Step
The new Minimum Depth Step option in the Advanced UI of the Advanced Rough toolpath adds extra control to intermediate steps by allowing you to remove steps under the main depth, that are below the specified amount. This enhances the cutting conditions during roughing and reduces vibrations and chatter.

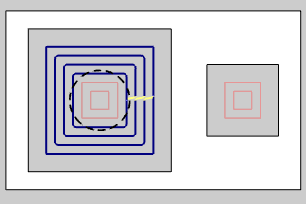
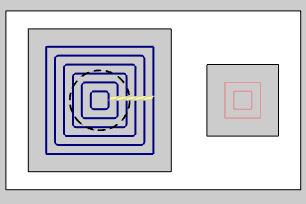
Remove Small Regions/Contours
The new Remove Small Regions/Contours options allow you to define areas which can be ignored by the operation based on their size. Simply choose how to define the area, whether by a diagonal distance, inscribed or circumscribed circle. You can then decide whether regions under this area are ignored, or even whether smaller portions of a larger toolpath should be ignored. Using this method means you don't need to manually create a boundary and can save quite a bit of time!
| Diagonal | Inscribed |
Circumscribed |
|
| Value |
|
|
|
| Contour |
|
|
|
| Region |

|
|
|
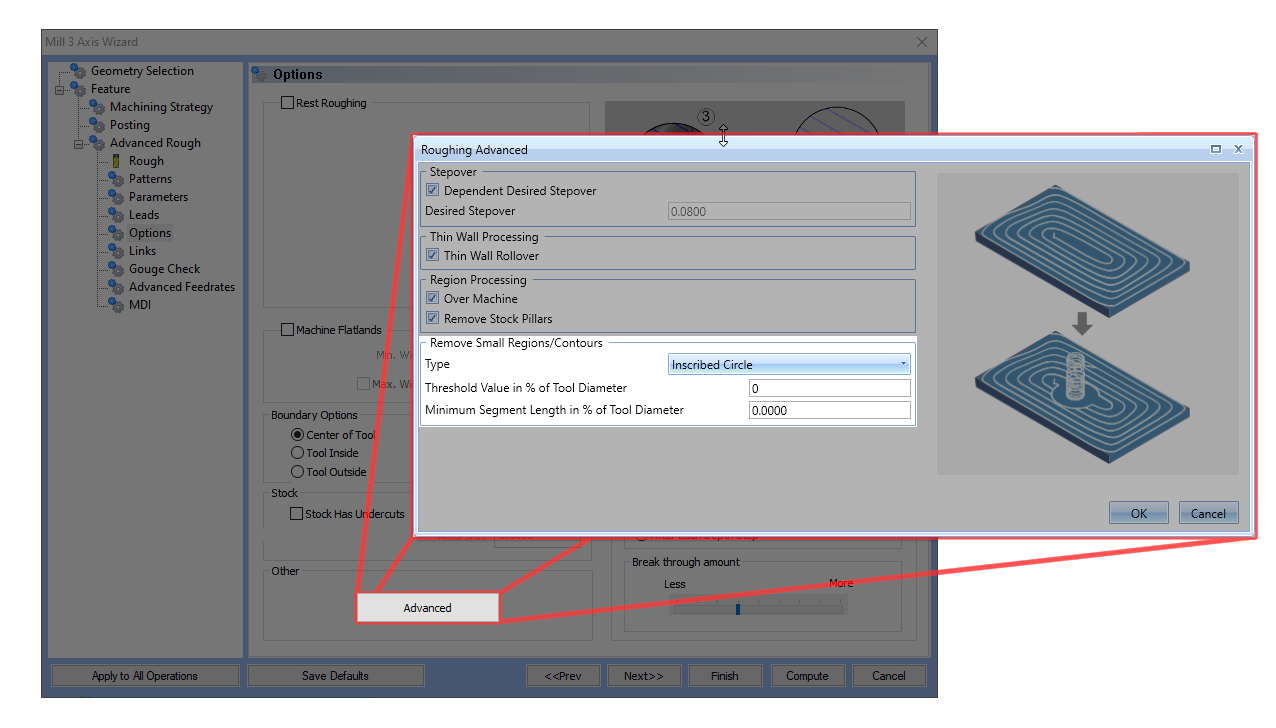
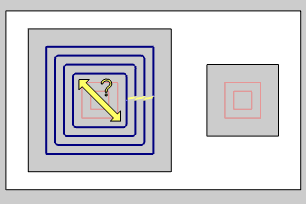
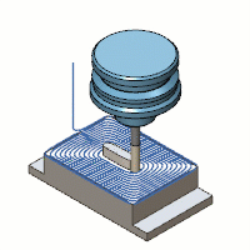
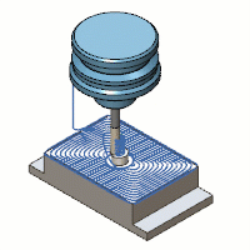
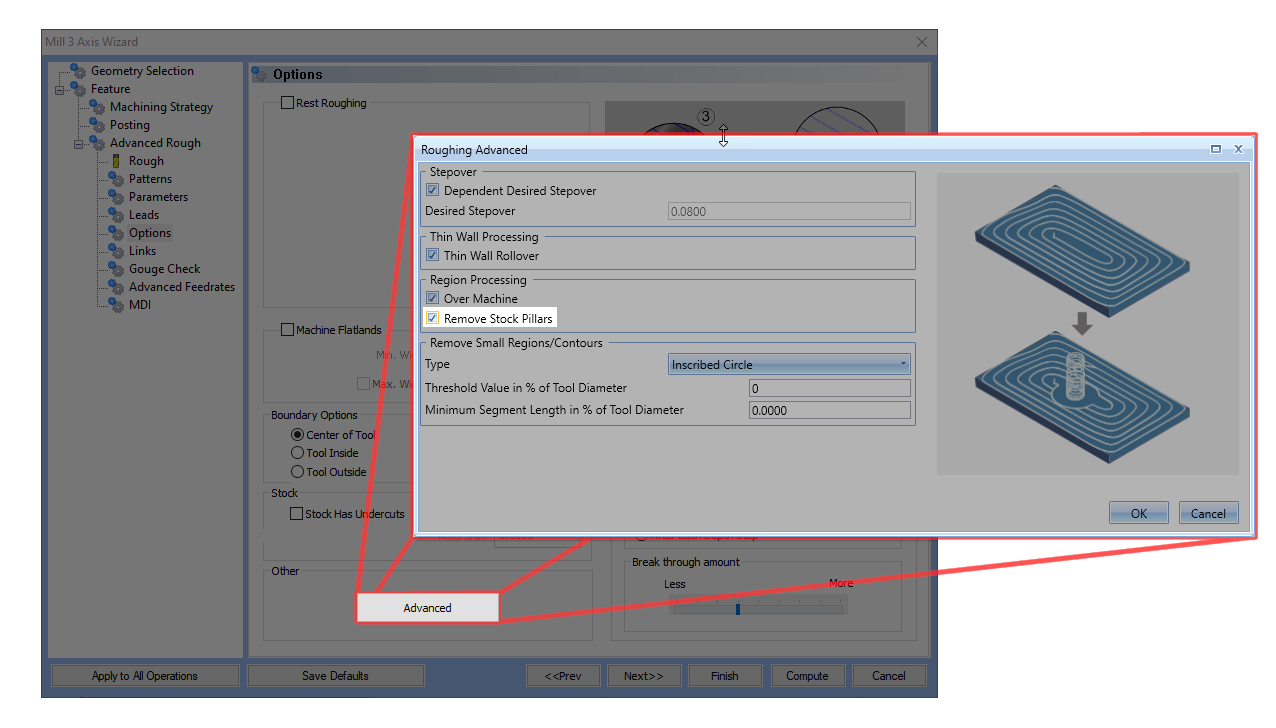
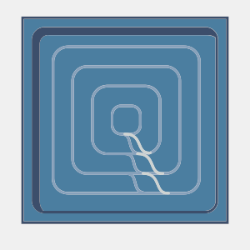
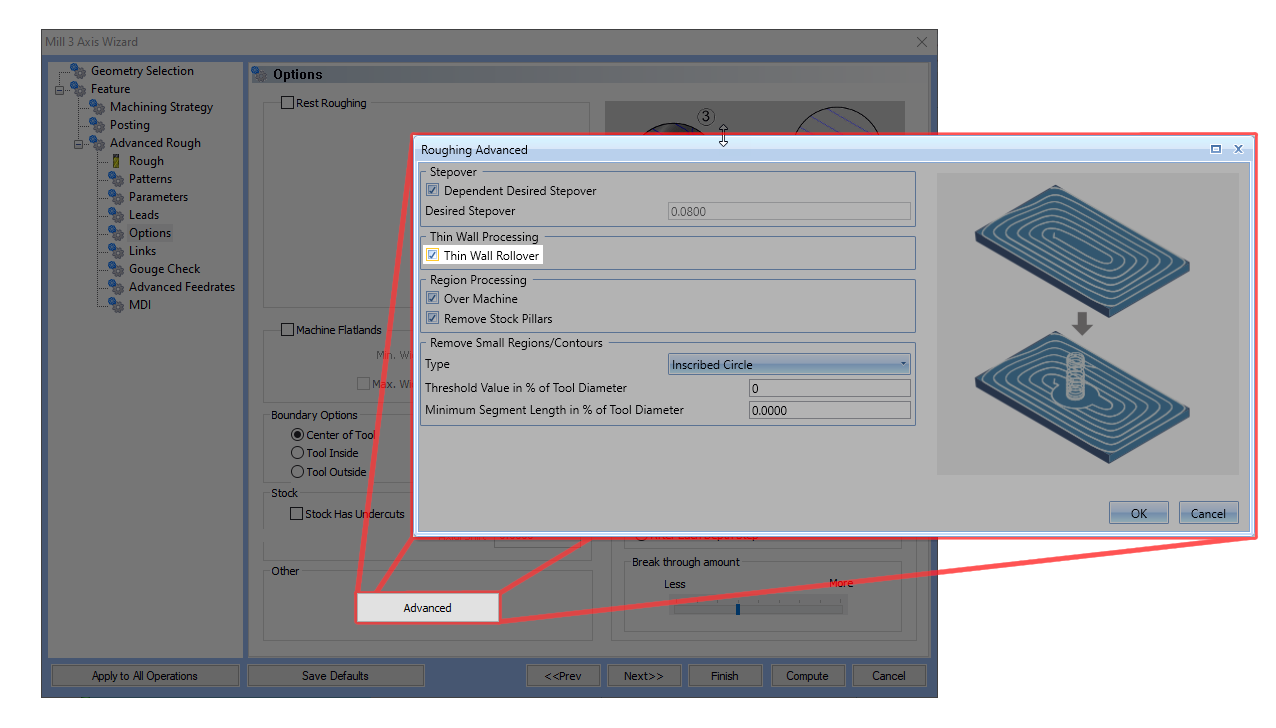
Remove Stock Pillars
The new Remove Stock Pillars option, for the Advanced Rough Adaptive pattern, allows you to finish the last of the stock on a given depth by leaving a cylinder of stock which is then finished with a single spiral ramp motion. This helps eliminate adverse cutting conditions, like vibrations and heat generation in small areas, which can be created when the pattern whittles down the stock to a thin walled island before finishing it off. With this new option, you can create optimal cutting conditions and help extend tool life.
|
|
|
|
|
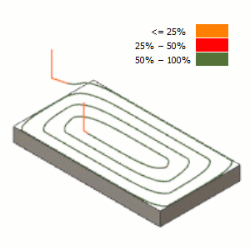
Over Machine
The Over Machine option allows you to optimize the milling conditions for hard metal milling to compensate for long tool deflections and cutting forces. This helps to avoid chatter caused by thin walls generated by tool deflections and helps prevent tool and spindle damage!
|
|
|
|

|

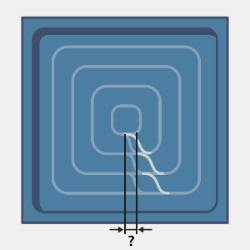
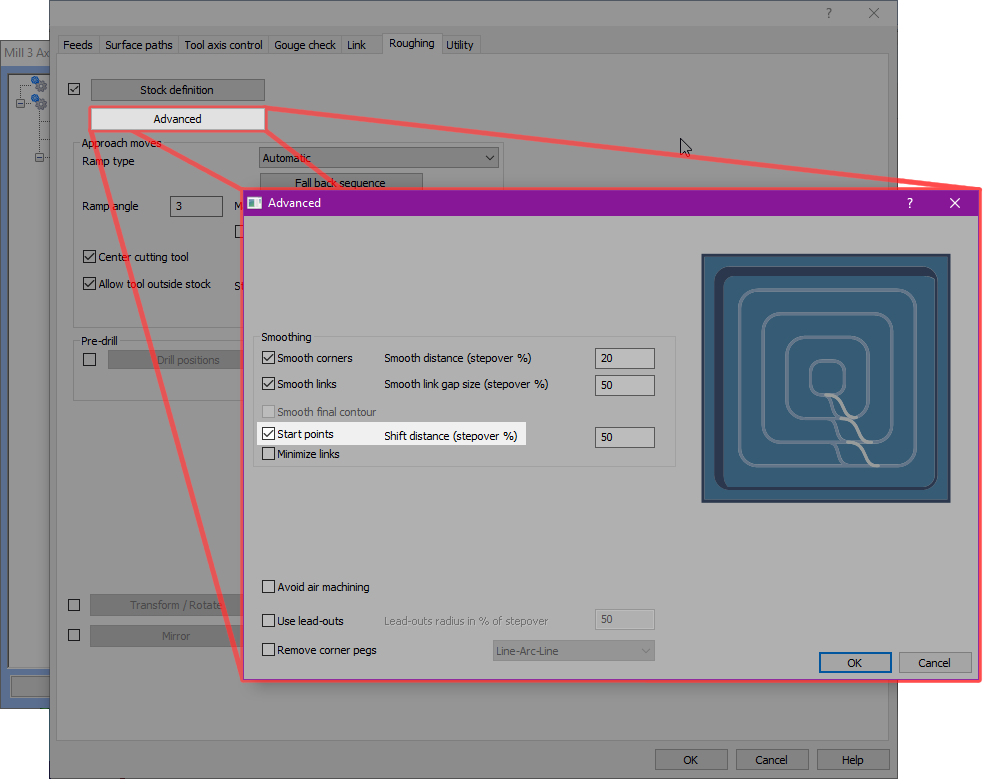
Shift Distance
The new Shift Distance/Stepover % value allows you to force each pass to be started the specified distance further along than the last. This allows you to blend out the link moves creating a smoother finish appearance!
Thin Wall Rollover
The new Thin Wall Rollover option can be a big time saver by simply continuing around any thin walls created during the machining process. This allows you to move around the wall and cut from the other side instead of wasting time air cutting when the tool moves away and comes looping back to engage all over again.
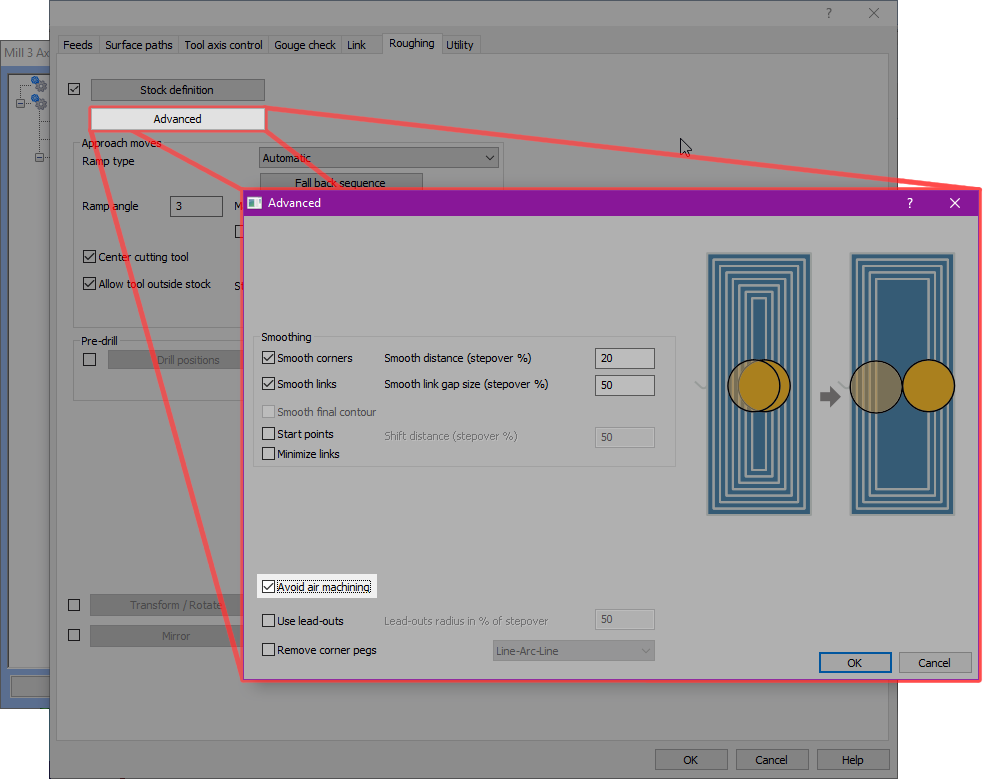
Avoid Air Machining
The new Avoid Air Machining option takes the tool diameter into consideration and terminates the toolpath as soon as the stock is cleared from the area. This is a great way to eliminate those extra few passes that can occur when the stepover is continued to completion along the part face using the Offset pattern.
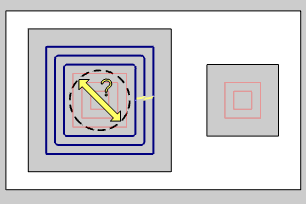
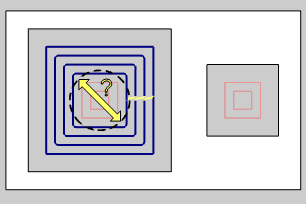
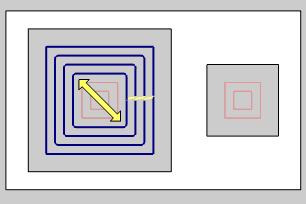
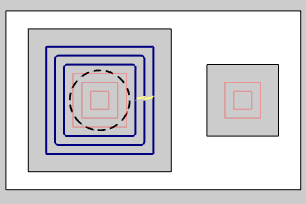
Radial clearance for link moves
The new Radial clearance options, in the Advanced UI Retracts page of the Advanced Rough, allow you to create additional clearance for your tool on Feed and Rapid link moves. This is a quick and effective way to get a little piece of mind by creating little safety bubble for your tool in those critical moves.
![]()
Custom tool shape roughing
In this version toolpath calculation now considers the exact shape of custom tools created by the user! This allows you to design tools that don't fit the standard tool type shapes and use them accurately in your Advanced Roughing toolpath!
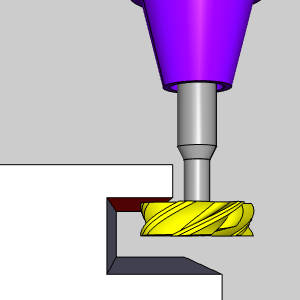
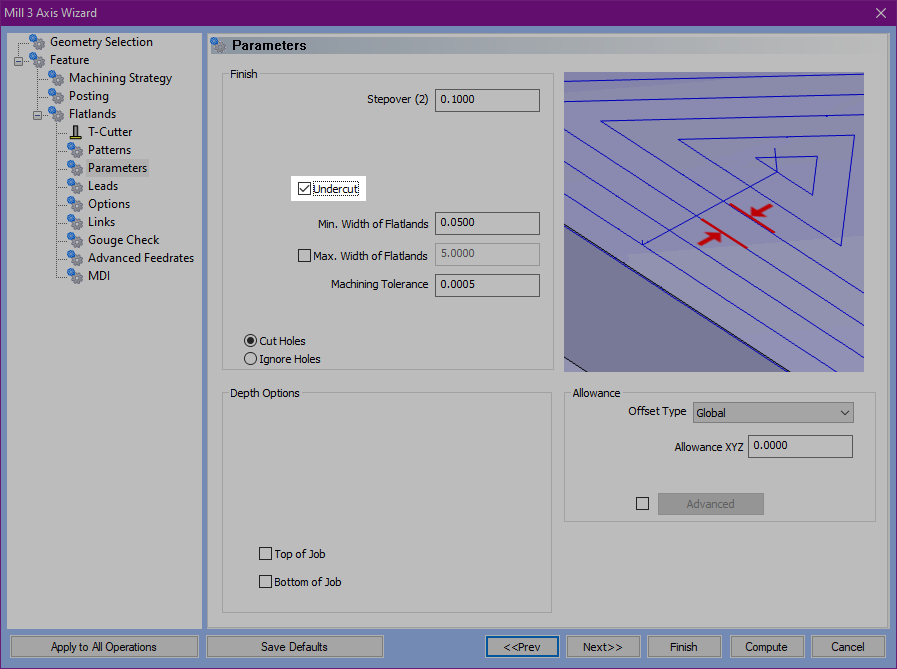
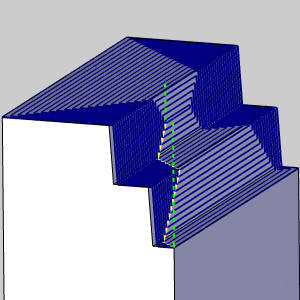
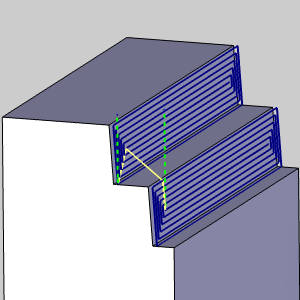
Flatlands
Undercuts
The Flatlands toolpath just got even more power with the ability to handle inverted flats! When using a capable tool, simply select the undercut option on the Parameters page to handle all your flats at the same time.
Equidistant / Advanced Planar
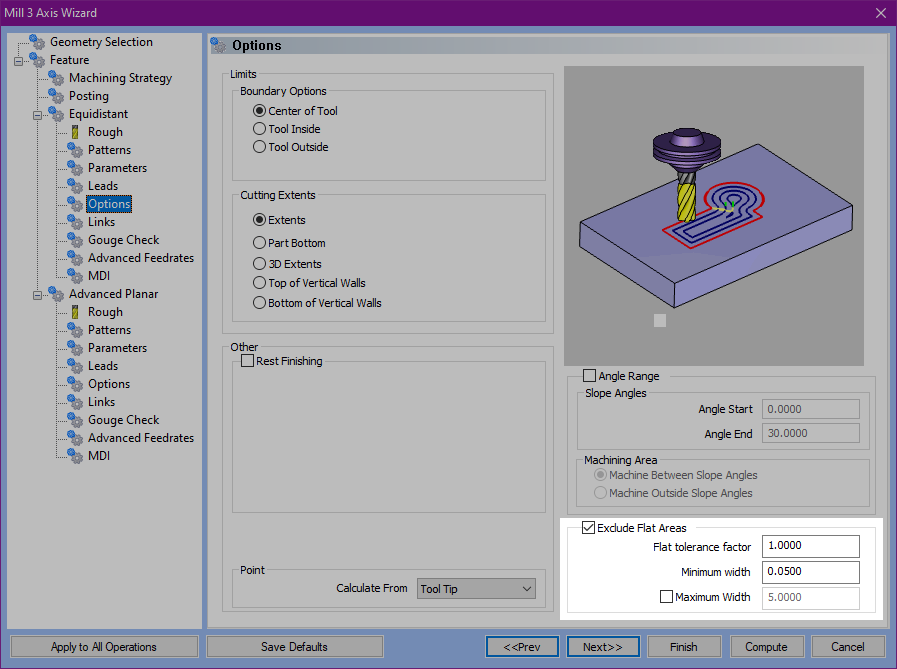
Exclude Flat Areas
The new Exclude Flat Areas option in the Equidistant and Advanced Planar toolpaths allows you to avoid flat portions of the selected part geometry. When applying a finishing pass to parts with ball nose or bull nose cutters, flat areas can never be finished as efficiently as they would using a flat endmill. So now, simply select Exclude Flat Areas in the Options page, adjust settings as needed, and the toolpath is automatically eliminated from those areas!
|
|
|
|
|
Advanced Z Level
Custom tool for undercuts
In this version toolpath calculation now considers the exact shape of custom tools created by the user! This allows you to design tools that don't fit the standard tool type shapes and use them accurately in your Advanced Z Level Finish operations! What's more, is that these same tools can be used accurately for undercut areas of your part!
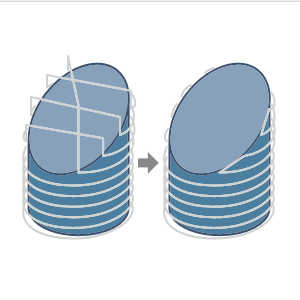
Zigzag open spiral cuts
When using the Advanced Z Level Finish operation with a spiral, this new feature allows you to save time by allowing zigzaging in areas which would otherwise retract and move over to the next cut. This lets you eliminate air moves in favor of zigzag until a constant spiral can be continued.

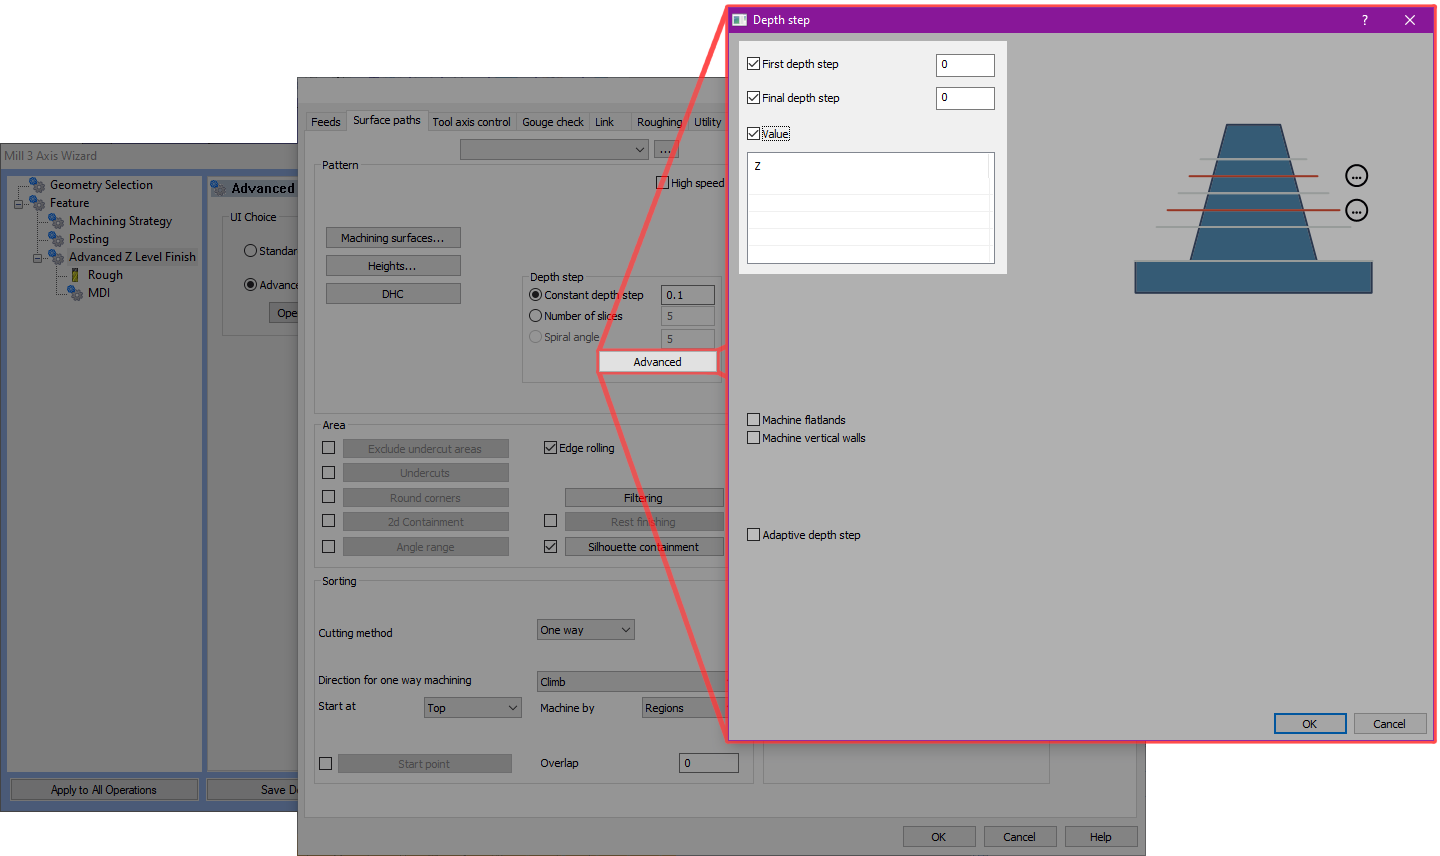
Additional cuts
New depth step options allow you to add additional cuts at specific depths! This provides you with an amazing amount of control over your depths of cut. While the overall operation is still set by the constant depth step, or number of cuts, you can now add a first, final, or any number of other cuts at depths of your choosing to cover all situations!

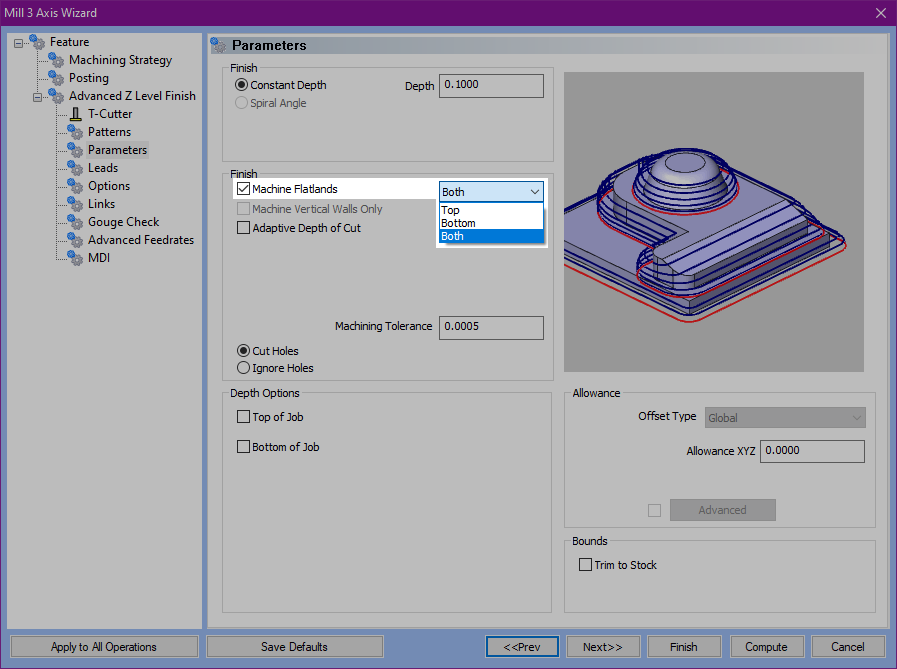
Machine Flatlands : Undercutting
When using the Undercut option on the Options page of the Advanced Z Level Finish, the new Top, Bottom, and Both options appear next to the Machine Flatlands option on the Parameters page. This allows you to handle cutting flat surfaces on the underside of the cuts as well as the standard top-facing flat surfaces. Simply choose the Undercut option, along with the Machine Flatlands option, then set it to cut the undersides, standard flats, or handle both!
| Top | Bottom | Both |
|
|
|
|
Mill 3 Axis Premium
Multiaxis > Surfaces
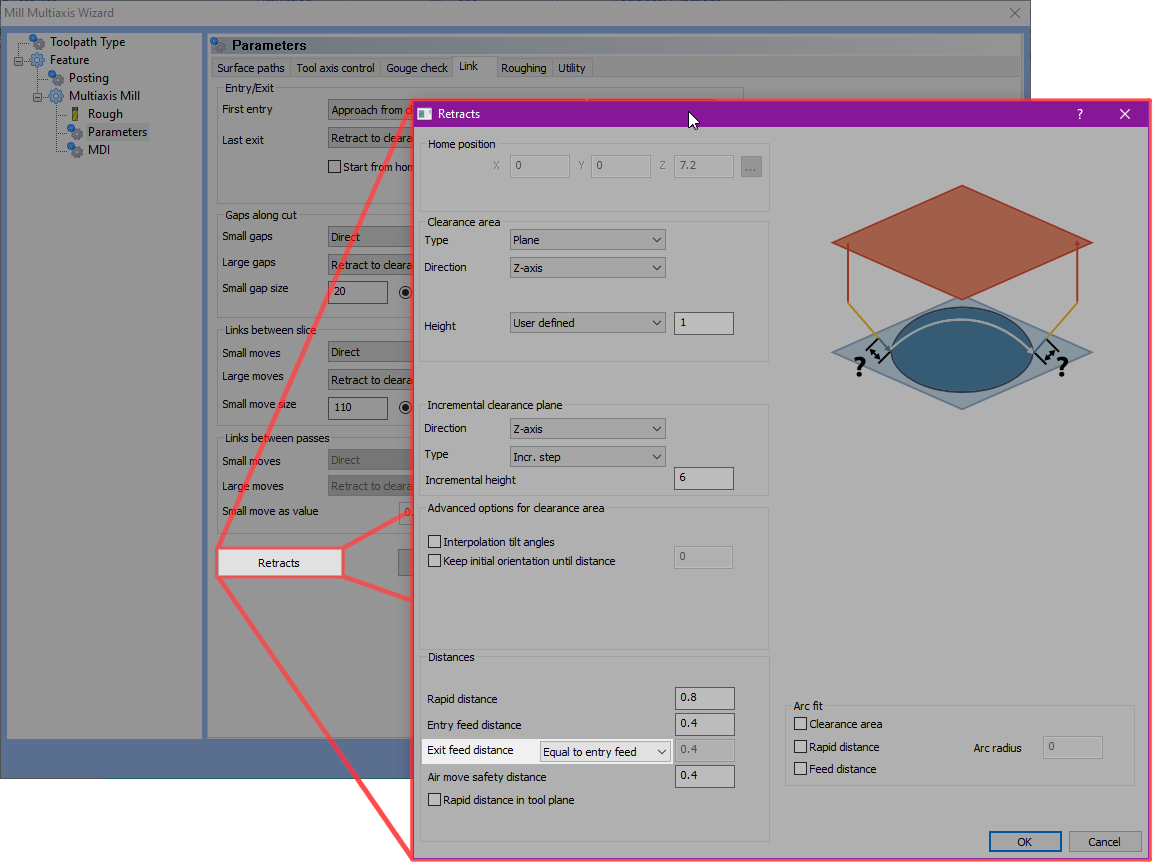
Unify Entry / Exit feed distance
A new feature, in the Surface toolpaths of the Mill Multiaxis feature, allows you to set the Exit feed distance to match the value of the Entry feed distance. This can save you several agonizing milliseconds of glancing at one value to enter a matching value in another text box!

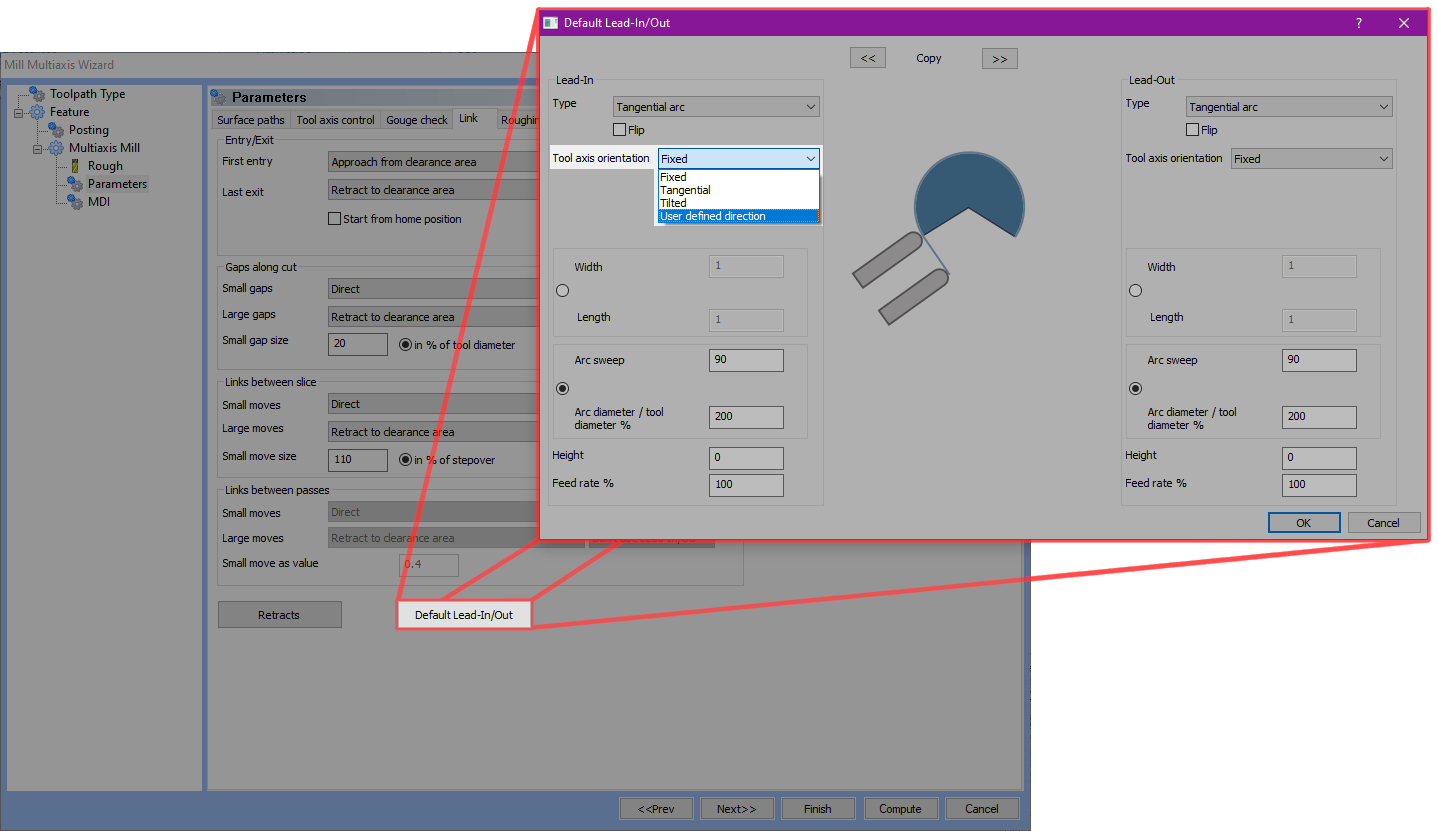
User defined tool orientation on lead-in/ lead-out
In order to give you as much control as possible, this new feature allows you to set how the tool is oriented moving into or out of the lead moves! Just set the Tool axis orientation to User defined direction, and choose between x, y, z, or user defined to choose anything in between! The tool will then move through the lead an morph into the orientation defined for the operation.

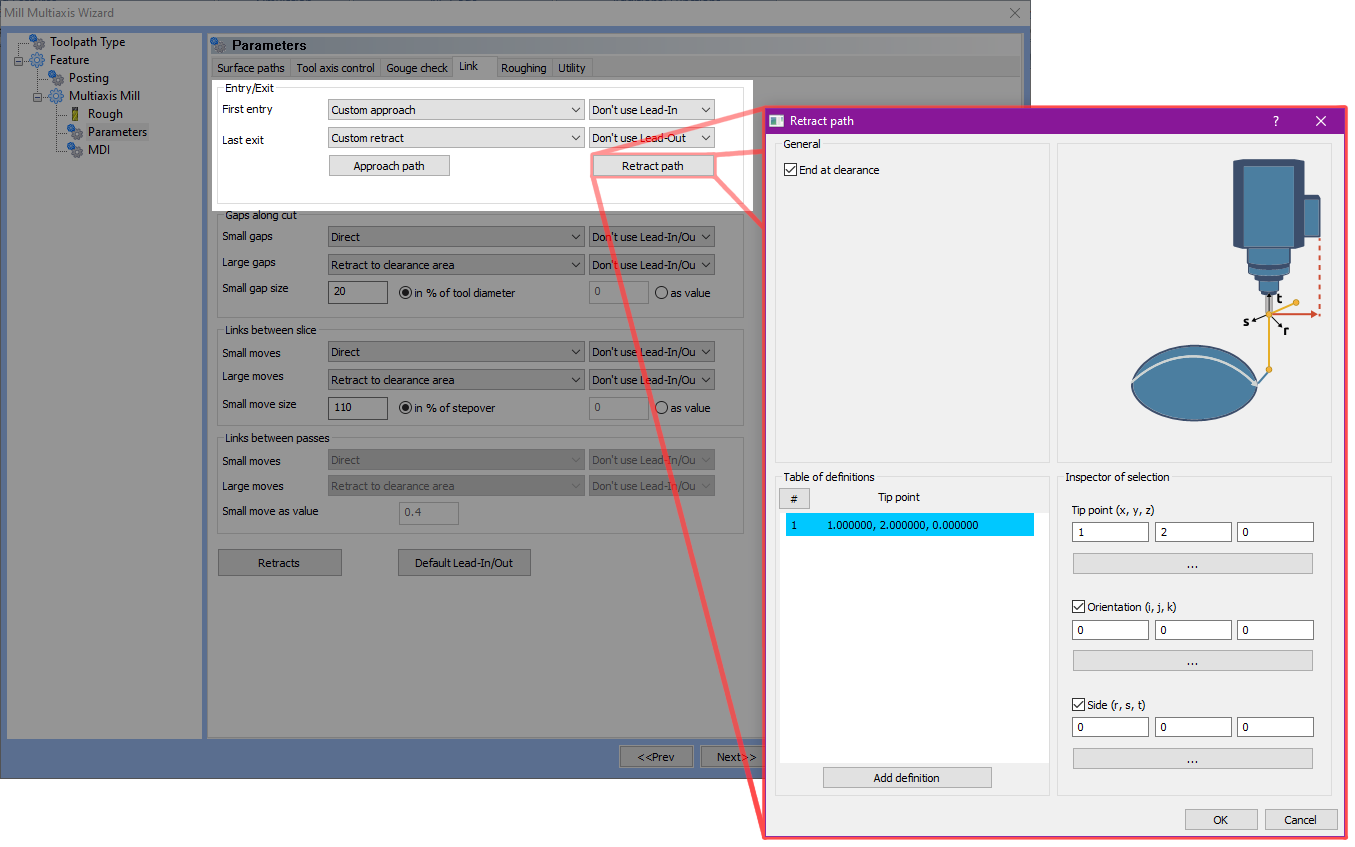
Custom Approach
When entering a cut, you can now define the exact movements made to approach that cut. Rather than just selecting between approaching from clearance, rapid, feed, or other generic options, this new feature allows you to select a specific series of points to literally map out your precise approach and retract!!
Deburring
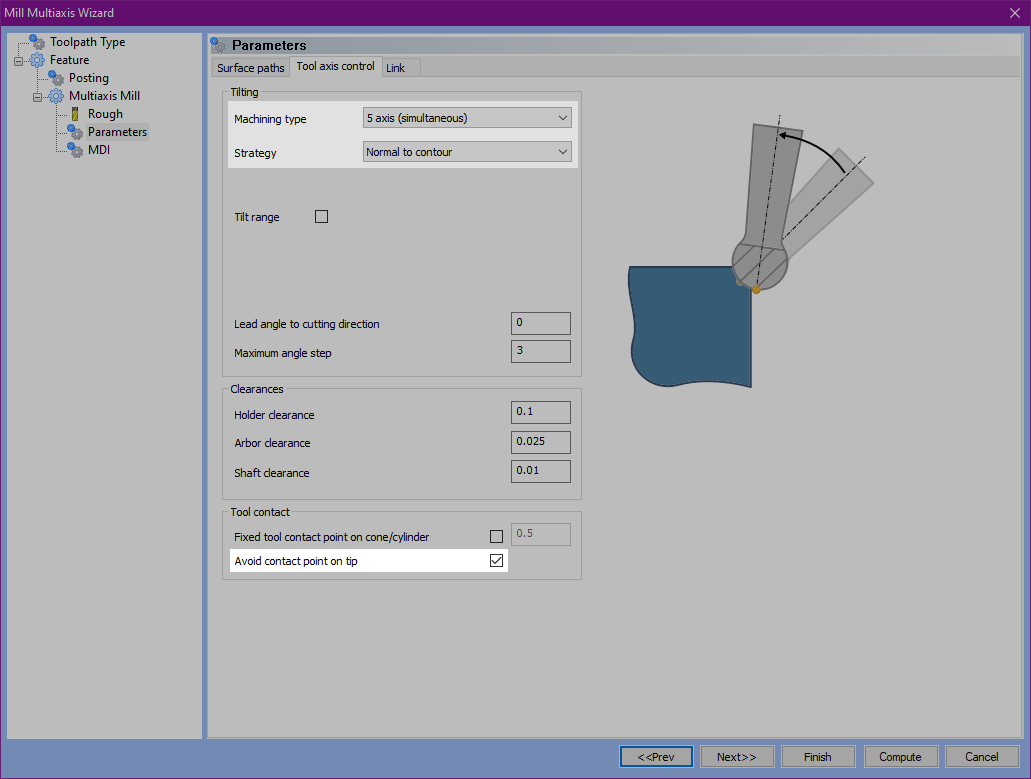
Avoid contact point on tip
This new option allows you to automatically tilt the tool so the tip is not used in the deburring process. Since the very tip of the tool is the least efficient contact point in material removal, this is the perfect way to avoid it without needing to actively choose a specific contact point to use!

Mill 4 Axis Pro
4 Axis Advanced Finish
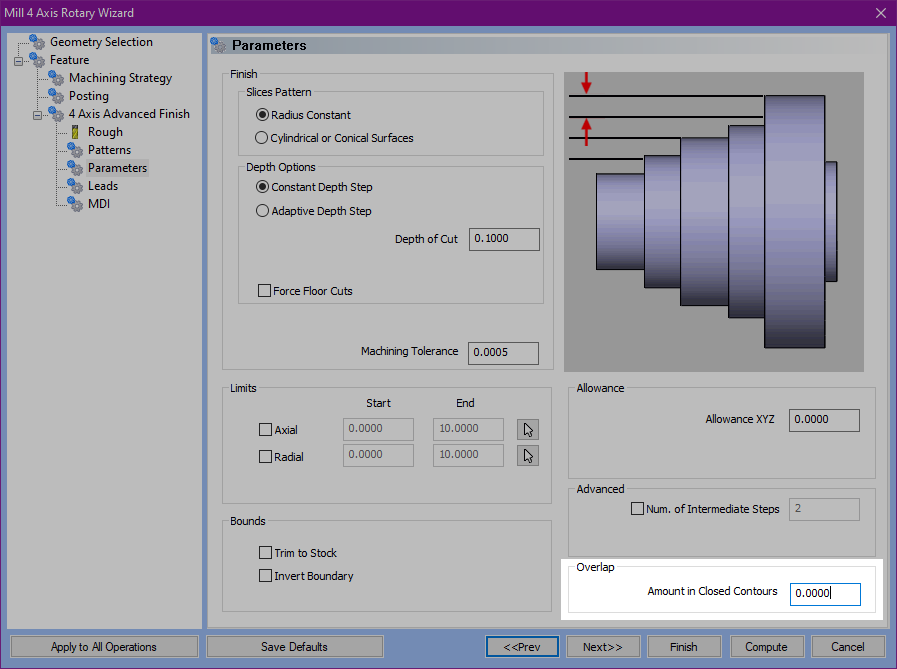
Floor Finishing
New options in the 4 Axis Advanced Finish allow you to choose between a Radius Constant finish, or the new Cylindrical or Conical Surfaces finish! This additional option gives you the tools you need to focus on the desired machining surfaces!
| Part | Radius Constant | Cylindrical or Conical Surfaces |
|
|
|
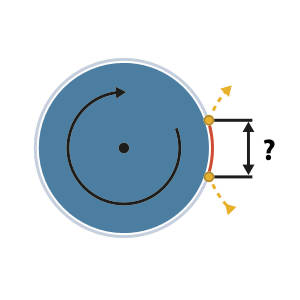
Overlap
The new Overlap group in the Parameters page of the Advanced Finish toolpath allows you to extend the point at which the toolpath begins and ends to ensure the entry into and exit from the part surface do not occur at the same location. This helps to blend the final finish and eliminate obvious marks from the finished part.
Rotary
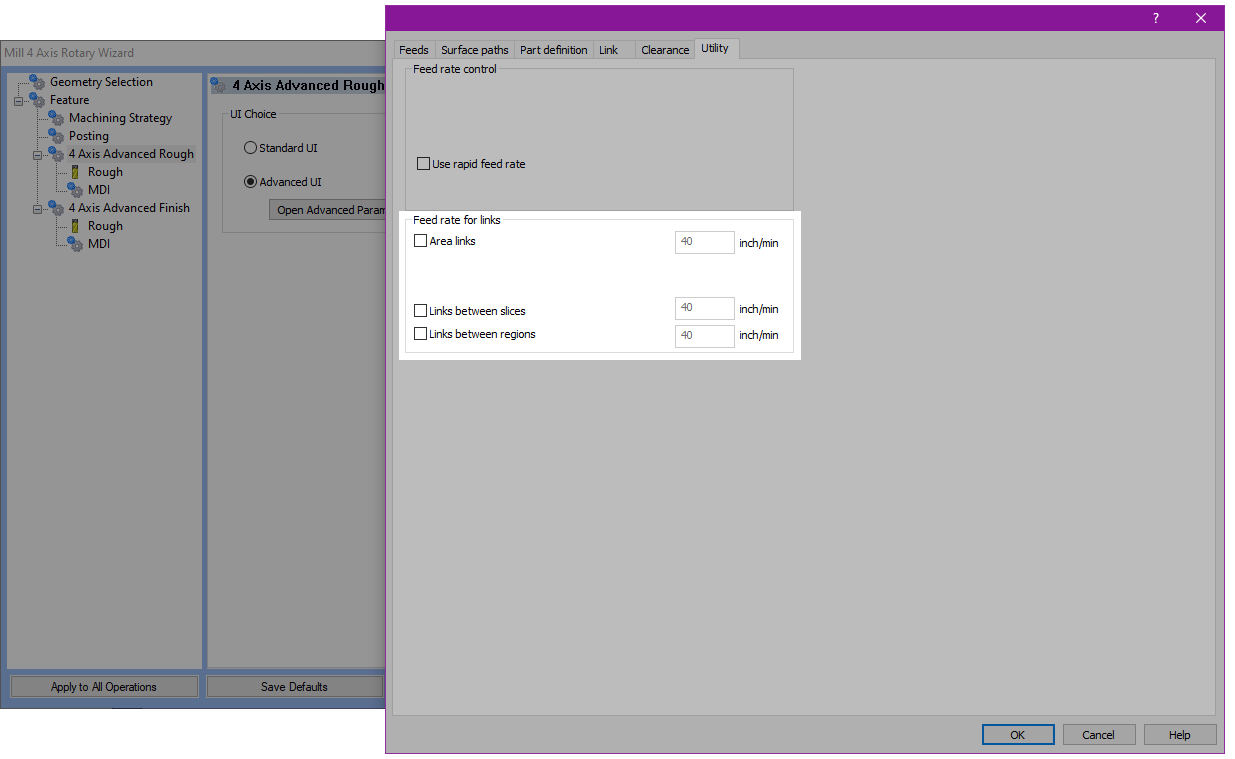
Feedrate for links
This version now allows you to have an enormous amount of control over your speeds! Rather than having to use rapids for everything, you can now set specific speeds for your links in the same area of toolpath, links between different regions of toolpath, and even links between individual slices! This is a great way to create smooth machine movements.
Filtering contours
A new feature has been added to allow you to ignore smaller contours by a percentage of the tool value, or a specified value. This even lets you specify whether the filtering is applied to open contours, closed contours, or both open and closed!
| Filtering open contours | Filtering closed contours | Filtering open and closed contours |
|
|

|

Turn Mill
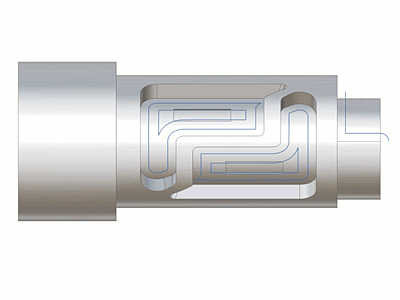
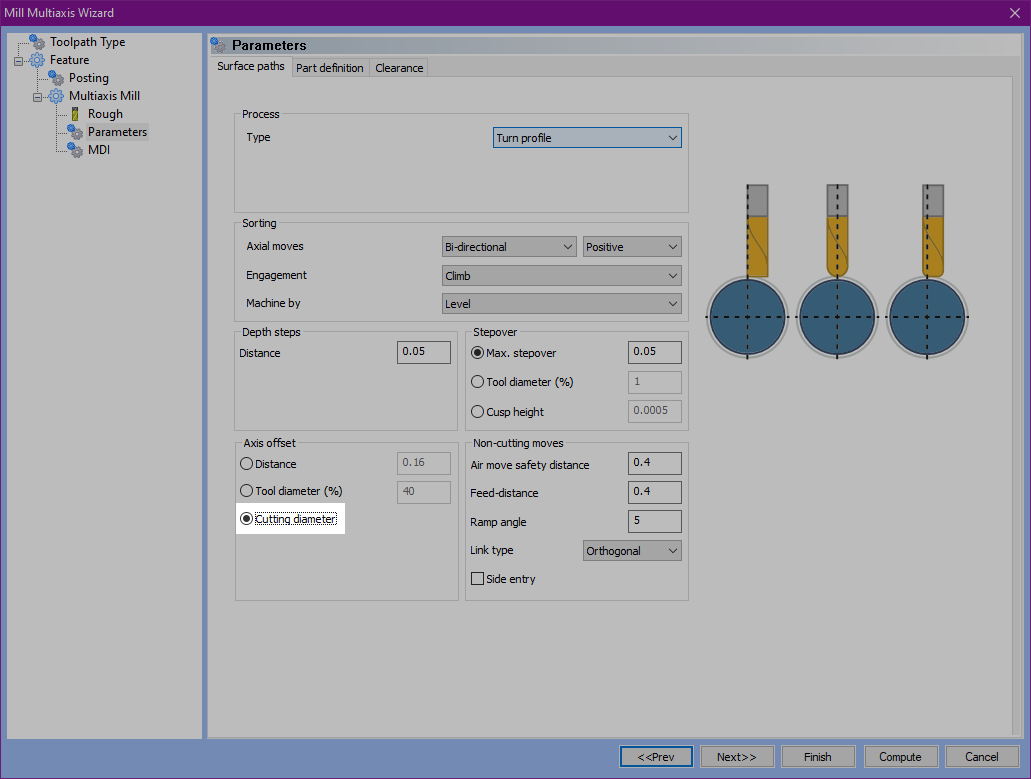
Automatic tool contact point
To get the most efficient cuts, it's important to add an axial offset to create the proper tool engagement. In this version, this can be done automatically! Simply select Cutting diameter for your axial offset, and the correct offset is created based on your tool shape!
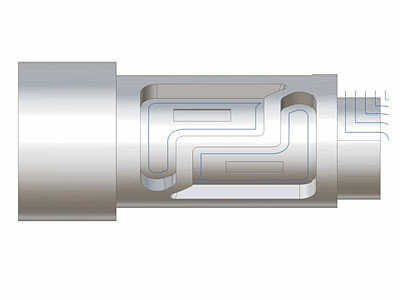
Tool clearances
Turn milling now allows for individual clearance control of the shaft, arbor, and holder of the tool for complete control of safety distances!
![]()
Side entry
This new option allows the tool to enter from the sides whenever possible. In many cases moving into the material from the side is far more efficient than plunging into it. With this feature, simply click Side entry, and the tool will move into the material along the axis of rotation.
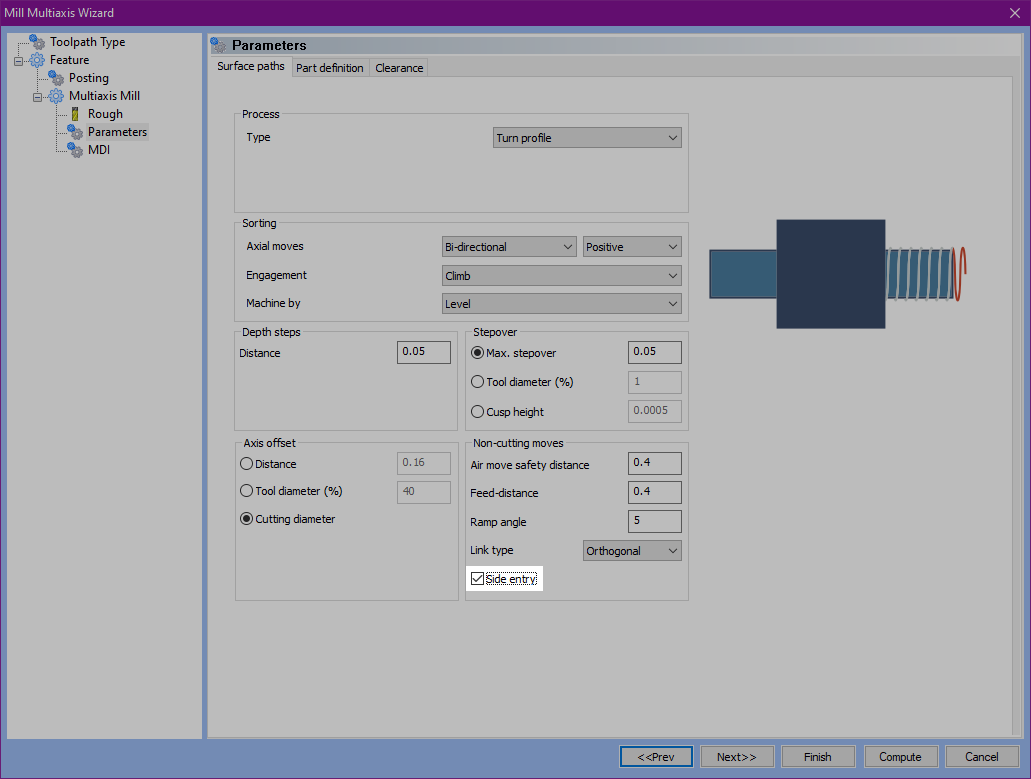
Cusp height stepover
Turn Milling now allows you to set your stepover by the cusp height that will be left by your tool. When cusp height is the variable you're worried about, this saves a huge amount or time by letting the software do the math and produce the exact stepover to meet the needs of the cusp height entered. This option even takes your axial shift into account!


Mill 5 Axis Pro
Multiaxis Machining
Finishing > Support for multiple unconnected surface finishing
This version now supports multiple unconnected surfaces for finishing to make programming your job that much easier! Don't worry about needing to create multiple operations, just select multiple surfaces, to use the same settings and reduce inter-operation linking.

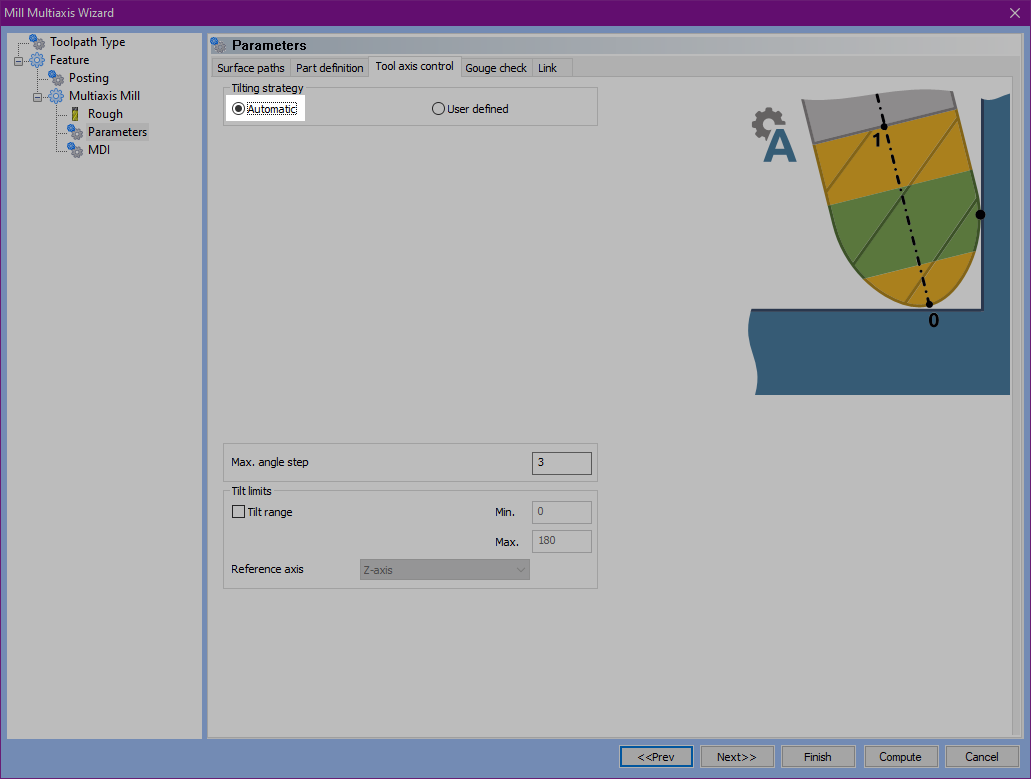
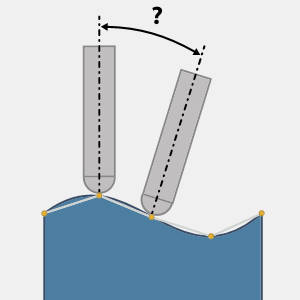
Finishing > Automatic Tool Axis Control
This version makes setting your contact point, and your lead and lag angles a breeze with the Automatic Tilting strategy! Simply select Automatic for your Tilting strategy, and six different values are automatically set for you!

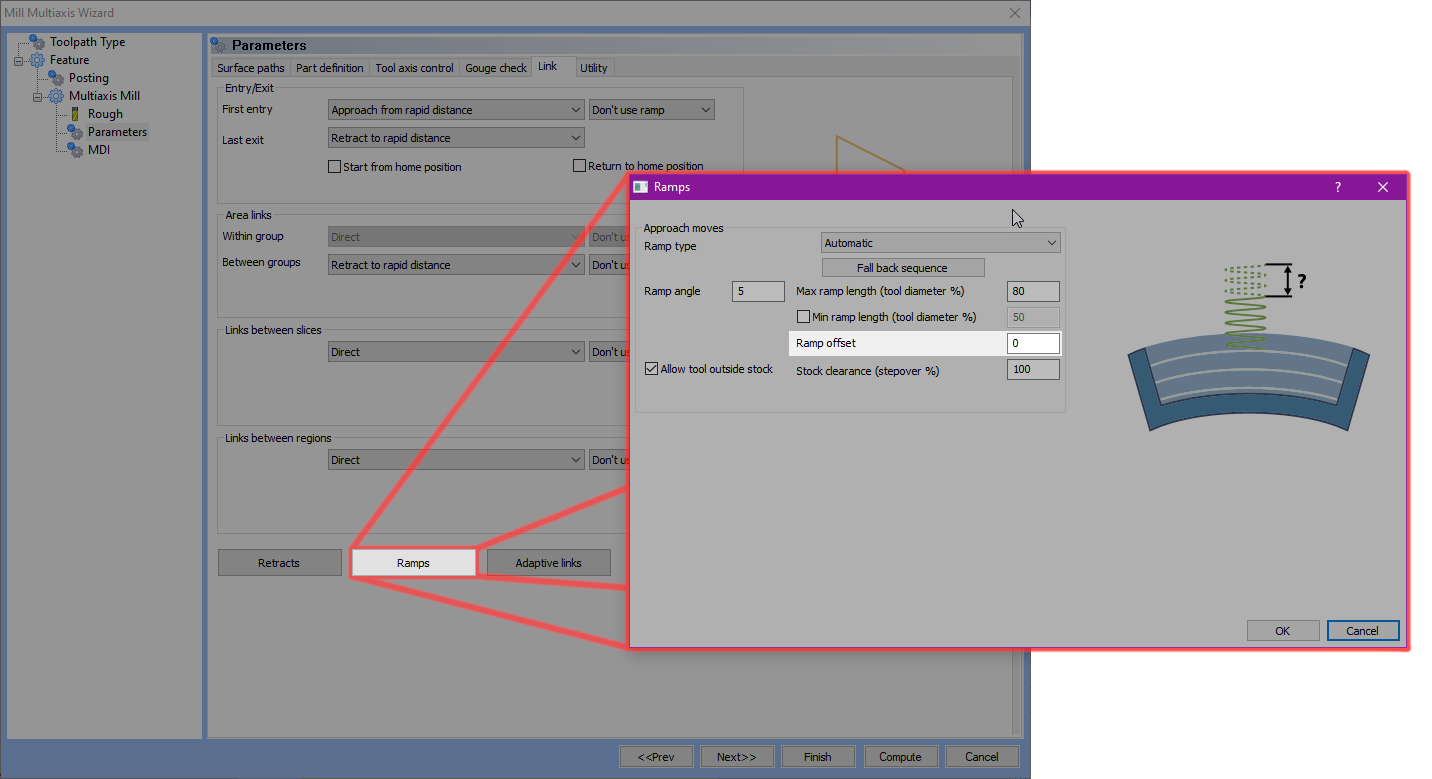
Roughing > Ramp Offset
You can now control the height of your ramp entry moves with the Ramp offset value! This option allows you to eliminate air machining moves and gives you more control over the final toolpath.

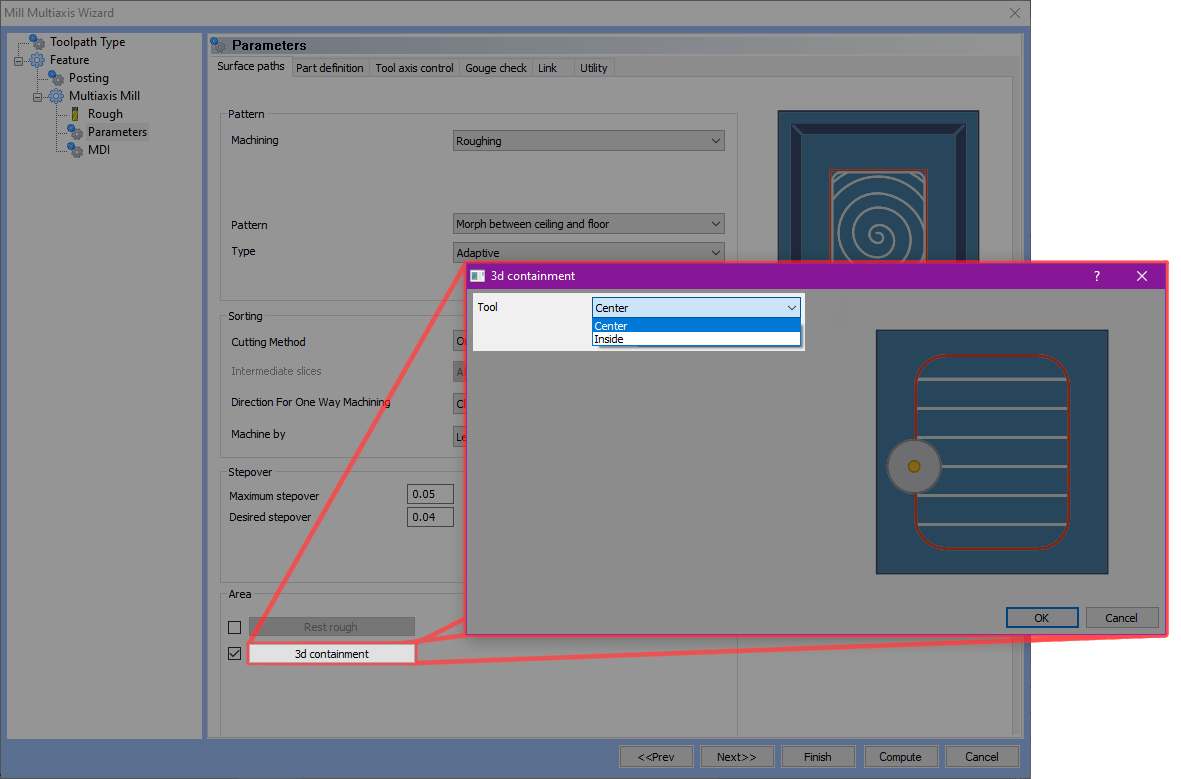
Roughing > Align with 3D containment
The 3d containment option now allows you to set whether the tool center, or tool radius should be contained. The 3d containment options have been a great way to save you the time of creating boundary geometry hand, and with this new option, even more situations are covered!

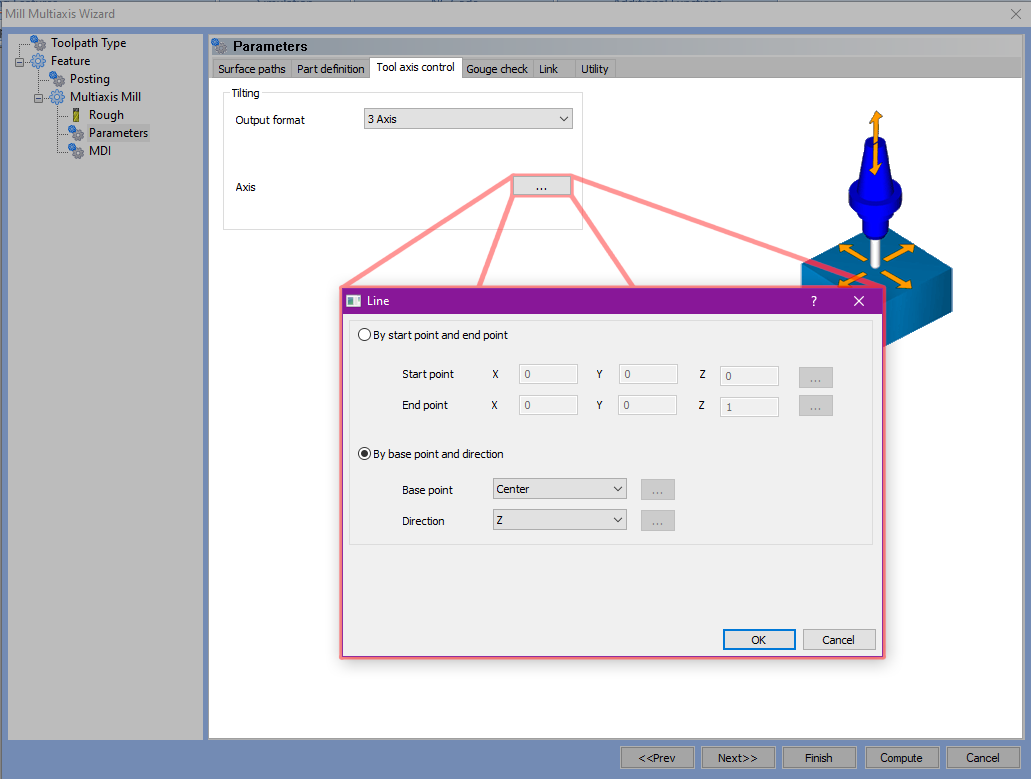
Roughing > Fixed Tool Axis
This latest version now allows you to lock your Multiaxis Roughing tool to a particular orientation! This can be great for 5 axis machines, and is the perfect solution for 3 axis machines with a aggregate head!

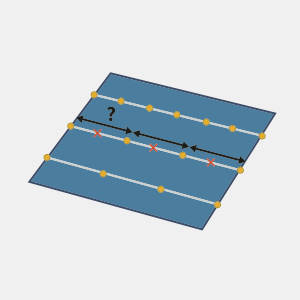
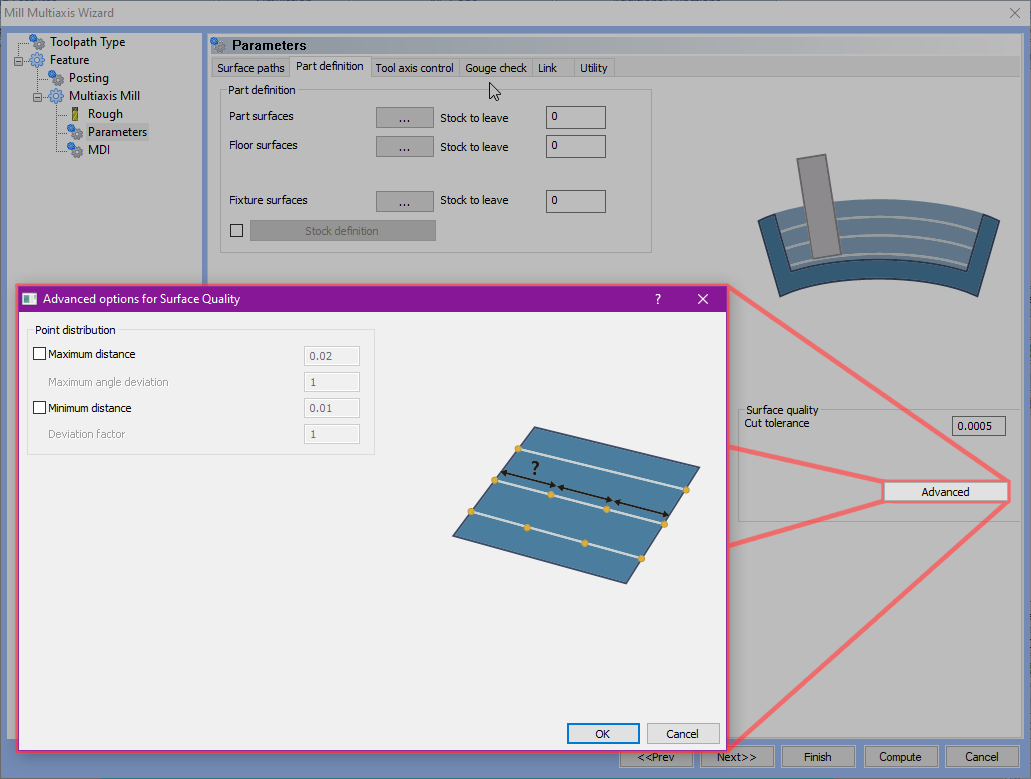
Roughing > Point Distribution
With multiaxis machining, the name of the game is always control, and this level of control can help you to turn 'great' into 'perfect'. Now, in the Part definition page, simply click the Advanced button in the Surface quality group to launch the Advanced option for Surface Quality dialog. Here, you can specify a Maximum Distance with a specified maximum angle deviation to tighten accuracy while minimizing abrupt tool angle changes. You can also set a Minimum Distance with a Deviation Factor to help smooth unnecessary surface model chatter. These options allow you to have unprecedented control over the roughing toolpath.
| Maximum distance | Maximum angle deviation |
|
|
| Minimum distance | Deviation factor |
|

|
Swarf
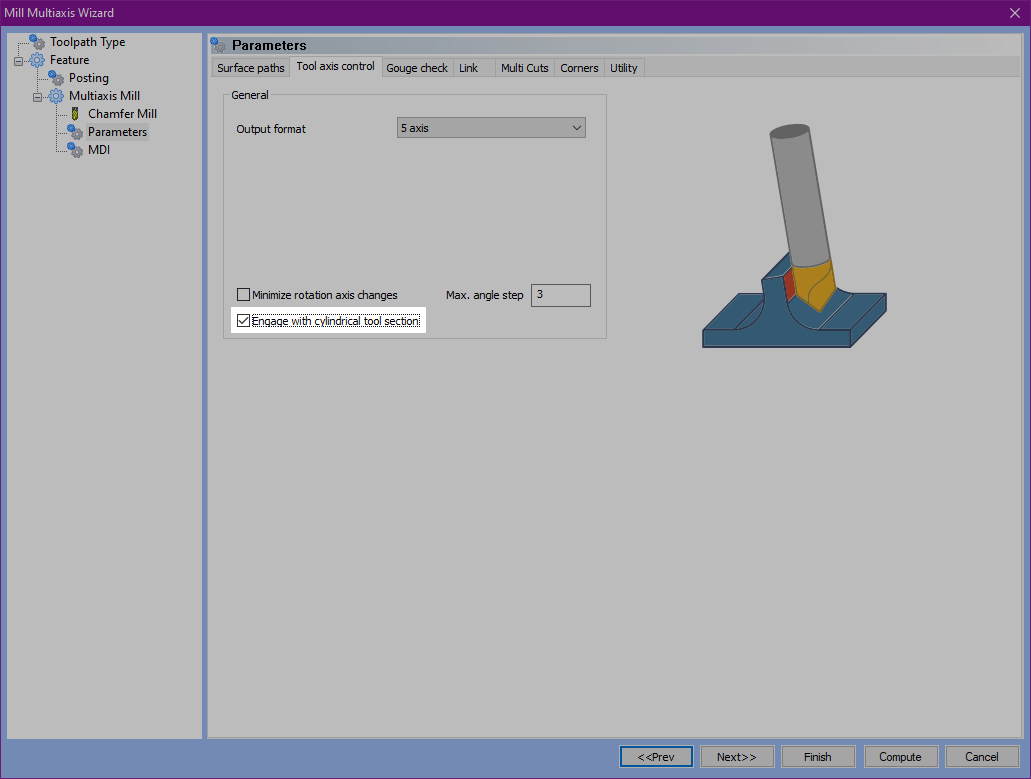
Chamfer tool support
While chamfer mills can be the perfect tool in many situations, this is the first version allowing you to use the cylindrical portion of the tool! This allows you to use the chamfer angle when it's beneficial, and the cylinder when the chamfer angle would lead to too much tilting. This covers your bases in all situations!
Posting Features
New command blocks
Laser, Plasma, Waterjet: on/off
Two new blocks have been added in order to intelligently call on/off codes for laser, plasma, and waterjet machines! Blocks 58 and 59 will output on/off codes respectively based on the next move in the code to ensure the on/off commands are timed properly.
New posting questions
Helix output
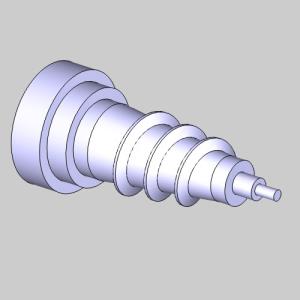
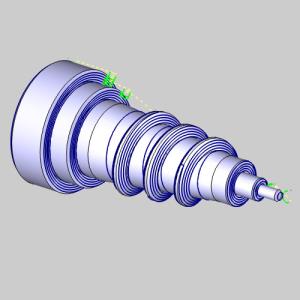
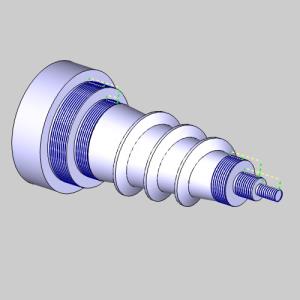
For the first time ever, helix, and 3D arc output for mill threads, tapered threads, and spiral entry is supported! For controllers that accept this output, it's a great way to output clean accurate code in the fewest lines possible!
New post blocks included:
560. Allow Multiple Revolution Helical Move? Y
733. Prefix for Helix Total Angle? "PA"
734. Prefix for Helix Pitch? "KP"
Refine R-value definitions for canned cycles
A new block has been added to control the reference plane type in drilling canned cycles! Since certain controllers define the R-value in their canned cycles differently, the following block gives you the control to refine the output to match!
557. Drill Cycle Reference Plane Type? 0 //(0 = absolute, 1 = signed incremental, 2 = unsigned incremental)
Nested comment handling
Two new posting questions allow you to avoid "Nested comment" errors at the controller by letting you determine if nested comments are allowed, and if not, what character should be substituted to avoid nesting:
558. Allow Nested Comment? n
559. Nested Comment Replacement String? " - "
New Posting Variable
Output Note
The new posting variable output_note allows you to include any notes added to your job in the output code! For the first time, you can output the notes created in your:
-
Jobs
-
Machine Setups
-
Index systems
-
Groups
-
Features
-
Operations
New Multiaxis Posting option
Y-Axis Facing
A new pole handling option in the Multiaxis Post page helps better support Y-Axis facing for Mill Turn jobs and other multi-axis operations. The new Find head or table fixed position to stay in limits option can be found in the Pole Handling group to give you another solution in multi-axis situations.