Emboss Texture from Primitives Example 1
Introduction
This topic explains how to create an Emboss Texture from Primitives feature. The emboss texture features are a great way to add a machinable texture to your models. This example uses an existing BobART model to show you how to use the feature with other existing features as you work towards a finished product.
Example File
The part file for this tutorial is available for download at: http://www.bobcad.com/helpfiles. If you are connected to the Internet, you can click the link provided to download and save the Emboss Art Sign Example.SLDPRT zip file. After downloading the zip file, extract the files on your system in a place that is easy to remember. You can then open the file to use with this tutorial.
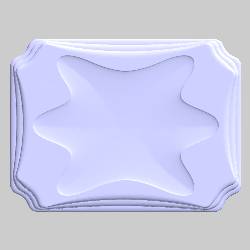
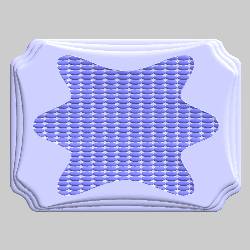
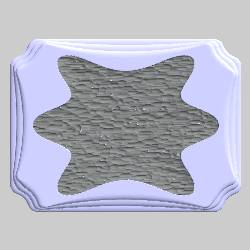
In the example file provided, a few emboss features are already created to make an artistic sign as shown in the following image. In this tutorial, the texture feature is applied to the recessed area of the model.
Part 1) Open the Part File and Save As
-
After downloading the zip file and extracting the files to your system, in the File menu, click Open.
-
In the Open dialog box, navigate to the location/folder in which you saved the example file.
Click Emboss Art Sign Example.SLDPRT, and click Open.
This example part is used for multiple emboss feature tutorials in this help system. For this reason, you save the file with a new name so that you can use the original file with other tutorials. (You can always download the file a second time if you have modified the original example file.) -
In the File menu, click Save As.
Select a location to which you want to save the file. -
In the Save As dialog box, click in the File Name box.
Change the name to Texture from Primitives Example.SLDPRT.
To save the file with the new name, click Save.
Part 2) Add the Feature and Select Geometry
-
In the Manager Pane, click the
 BobART tab.
 -
Right-click
 Emboss
Model, point to Emboss Texture,
and click From Primitives.
Emboss
Model, point to Emboss Texture,
and click From Primitives. -
Before changing any of the default values, click OK to close the dialog box.
Note: For the Emboss Texture from Primitives feature, you can select geometry to define the area in which the texture is applied. If you do not assign any geometry, the texture is applied to the entire model.
-
In the
BobART
tree, under  Texture
From Primitives 4, right-click
Texture
From Primitives 4, right-click  Boundary
Geometry, and click Re/Select.
Boundary
Geometry, and click Re/Select. -
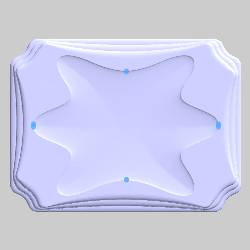
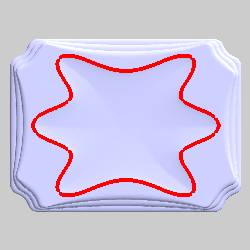
In the Feature Manager design tree, click to select the Texture Boundary feature.
-
To confirm the selection, click
 .
.
After confirming the selection, the feature preview
is shown because the Geometry
item is currently selected in the tree. To view the feature preview, in
the BobART tree, click the ![]() Geometry item of another feature.
(You may need to click
Geometry item of another feature.
(You may need to click ![]() to expand
the feature.) For example, when you click each Geometry item of the 2-Rail
Sweep, the selected geometry is highlighted in the graphics area.
to expand
the feature.) For example, when you click each Geometry item of the 2-Rail
Sweep, the selected geometry is highlighted in the graphics area.
Part 3) Regenerate to Update the Model
Every time that you make changes to an emboss feature, you must Regenerate to update the changes in the model.
-
In the BobART tree, right-click
Emboss Model, and click Regenerate.
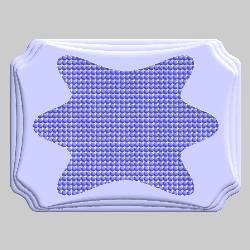
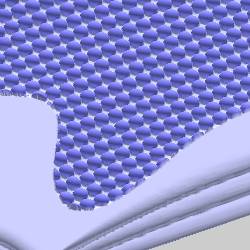
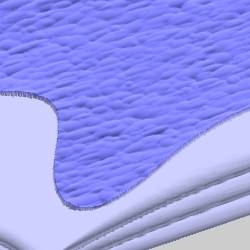
When you view the result, you can see that the texture is created using the previously defined parameters. This is a spherical texture that creates a consistent pattern. In the next part, you learn how to edit the feature parameters. In Part 5, you learn how to make the texture appear more organic or random.
Part 4) Edit the Feature
After adding an emboss feature and closing the dialog box, you use the feature in the BobART tree to open the dialog box and edit the feature parameters.
-
To edit the feature, right-click
Texture
from Primitives 4, and click Edit. -
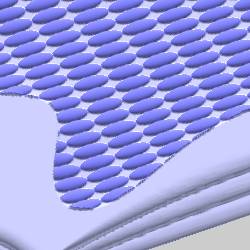
In the Primitive Shape Control group, click the Type arrow, and click Ellipsoid.
-
Type the following values to define the primitive shape that is used to create the texture.
|
Base Size |
|
| X Radius |
0.625 |
| Y Radius |
0.250 |
| Z Height |
0.125 |
-
To close the dialog box, click OK.
-
To update the changes in the model, right-click
Emboss
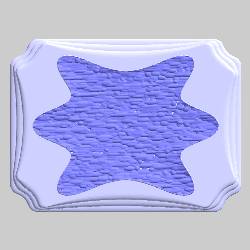
Model, and click Regenerate.
Part 5) Randomize the Texture to Create an Organic Appearance
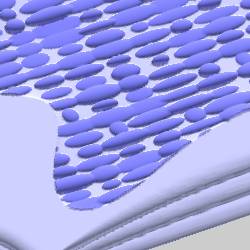
In this part of the tutorial, you first randomize the size of the primitive shape used for the texture. After that, the location control is randomized. Both of these changes help to create a more organic texture appearance.
-
Right-click
Texture
from Primitives 4, and click Edit. -
In the Primitive Shape Control group, select the
 Randomize
the Size check box, and then type the following values.
Randomize
the Size check box, and then type the following values.
|
Variation (%) |
|
| X Radius |
60.000 |
| Y Radius |
30.000 |
| Z Height |
75.000 |
-
Click OK to close the dialog box.
-
Regenerate the feature to update the changes in the model.

-
Edit the feature. In the Pattern Location Control group, select the
Randomized the Location check box.
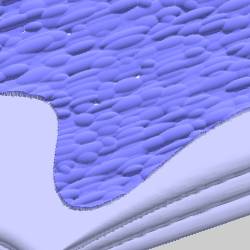
Set the Primitive Density to 25.00. When you Regenerate the model the texture appears as follows.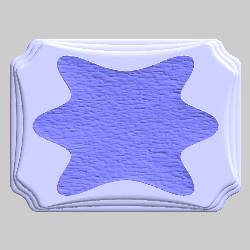
-
Edit the feature, and clear the
 Randomize
the location check box.
Randomize
the location check box.
In the Pattern Location Control group, type the following values.
| Spacing X |
65.00 |
| Spacing Y |
45.00 |
| Rotation Angle |
3.00 |
| Progressive Shift |
14.00 |
-
Click OK to close the dialog box, and Regenerate the feature. The results are shown next.
Part 5) Change the Application Type
For the last modification of the feature, the Application Type is changed. Currently the Application Type is set to Add. This means that the texture is added to the model (positive Z-axis direction). For the sign we are making, we want the pattern to be recessed into the model.
-
Edit the feature.
-
In the Texture from Primitives dialog box, click the Application Type arrow, and click Subtract.
-
In the Emboss Attributes group, click Color. In the Color dialog box, select a gray color and click OK.
-
Click OK to close the Texture from Primitives dialog box.
-
Regenerate the feature. The results are shown next.
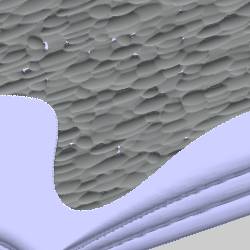
In the previous images, you can see that the feature is now subtracted from the model (in the negative Z-axis direction). The color is updated to better show the pattern and improve the appearance of the model.
Part 6) Save the Model
The result that you have created in this tutorial is used in the How to Create an Emboss from Component topic. You can save the file, as explained in the following steps, to use for the other tutorial (or you can download the prepared file).
-
In the File menu, click Save As.
-
Navigate to the location in which you have stored the example files (or whatever location you prefer).
-
Click in the File Name box, and type My Emboss Texture Done.
-
Click Save to save the file with the new name.
This concludes the tutorial.