The Advanced Rough 3-axis toolpath is available in the BobCAM PRO upgrade.
Used to remove material with successive pocketing passes while taking the topology of a 3D Model into account. Material is removed in a series of defined steps in a by level or by area processing pattern, leaving material for separate semi-finishing and finishing processes. The Advanced Rough strategy also can be used for Rest Roughing which allows you to enter a previous tool diameter, forcing the software to only create toolpaths where the previously larger tool could not reach. When an Advanced Rough feature is added to the CAM tree, the system adds the following items.
Geometry - This item is used to assign geometry used to create the toolpath. Right-click this item to produce a shortcut menu with the following options.
Re/Select - Select this option to enable selection mode and assign the appropriate geometry to this feature.
Remove - Select this option to remove any geometry associated with this feature.
Boundary - This allows you to select an area of a part in which to confine the toolpath. Right-click this item to produce a shortcut menu with the following options.
Re/Select - Select this option to enable selection mode and assign the appropriate 2D geometry as a boundary to this feature.
Remove - Select this option to remove any boundary associated with this feature.
Drill Tip Positions - If it is desired to plunge into a pre-drilled hole, use this item to select the point at the bottom of the hole locations. When using a non-center cutting tool, you must define a drill position in order for the system to allow the tool to plunge into pockets. If the point selected does not reach the bottom of the cavity being machined, the selected ramp type is applied to reach the bottom. Right-click this item to produce a shortcut menu with the following options.
Re/Select - Select this option to enable selection mode and assign the appropriate geometry to this feature.
Remove - Select this option to remove any geometry associated with this feature.
Advanced Rough - Right-click this item to produce a shortcut menu with the following options.
Edit - This opens the feature wizard so you can modify the settings used to create the toolpath. View the Advanced Rough Wizard to learn about the options available for this feature.
Compute Toolpath - When selected, the system calculates the toolpath.
Post Yes/No - This option determines if the feature is included in the posted NC program.
Rough - Right-click this item to produce a shortcut menu with two options for modifying the computed toolpath.
Color - When selected, a dialog box appears allowing you to change the color of the toolpath.
Blank - When selected, the system hides the toolpath if it is visible or shows the toolpath if it is hidden.
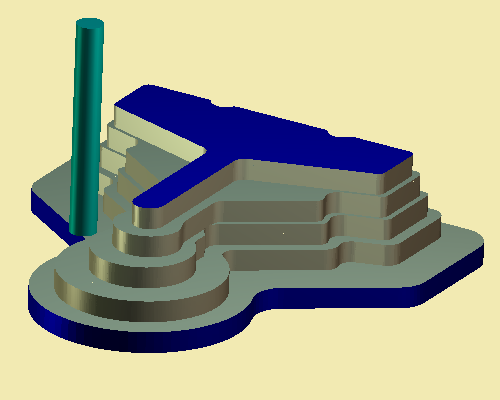
View the following illustration for an example of the toolpath produced.
In the simulation window, the end result looks like this.