Are you programming 3D jobs? Are you curious how BobCAD’s Mill Professional CNC software can help shops like yours reduce cycle time, gain control over toolpath and produce better finishes? Let’s take a look at 4 of the machining strategies that give you an edge when it comes to 3D.
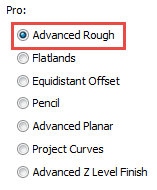
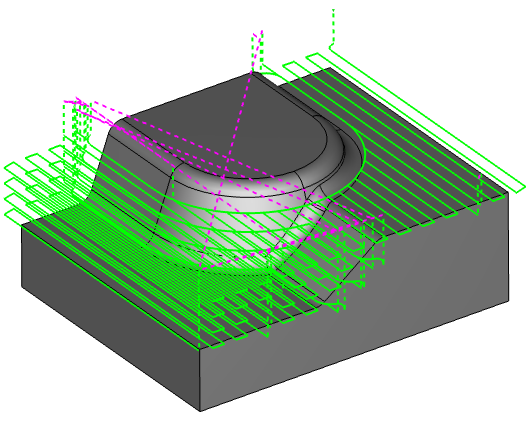
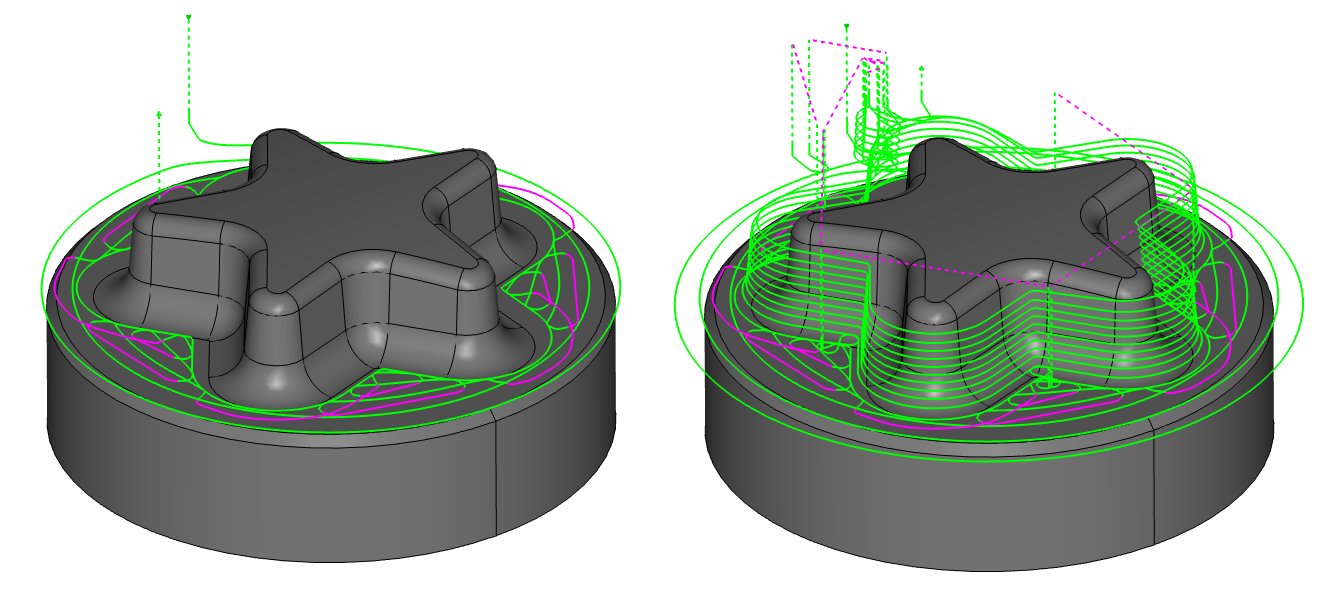
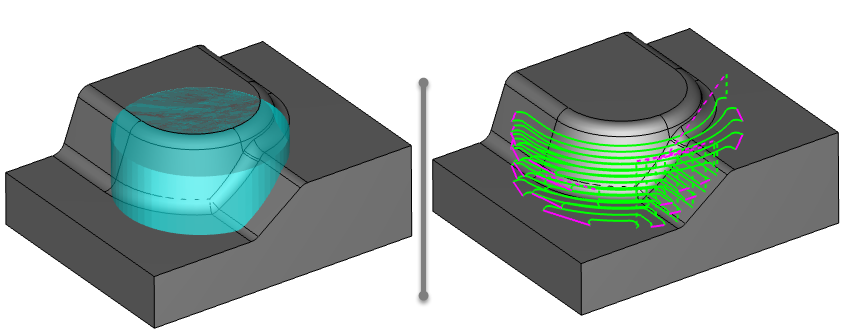
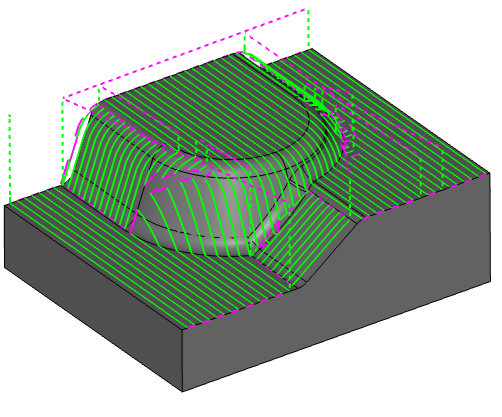
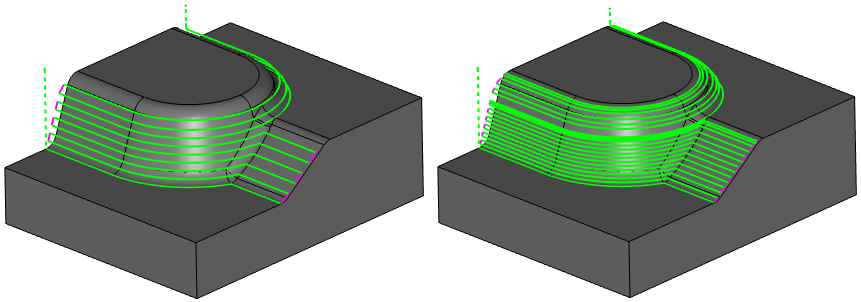
This is a very powerful 3 axis roughing toolpath that offers all kinds of options to optimize roughing cycles for the best results. You’ll use Advanced Rough the same way you would use Z Level Rough, to remove the bulk of the material to prepare your surfaces for semi-finishing or finishing cycles.
Multiple Cutting Patterns:
Our Mill Professional Advanced Rough came with only 3 cut patterns in our previous version. Now, in BobCAD-CAM, we offer users 5 cut patterns to give you the tools to get the job done the way you want.
Offset-In/Offset-Out
Morph Spiral
Parallel
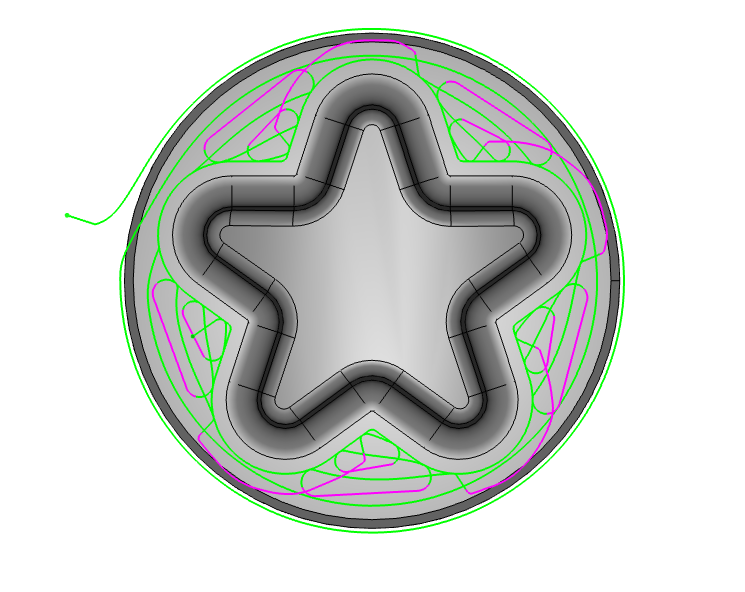
Adaptive
Intermediate Steps:
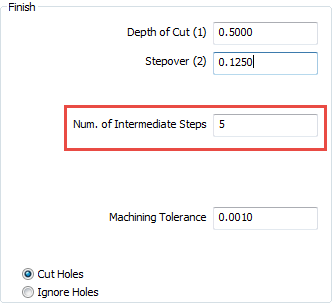
This toolpath option is used to re-rough material that gets left behind. Users can define the number of intermediate steps for every depth of cut. These “step ups” happen either after each depth of cut or after all depth has occurred.
Allowance Options:
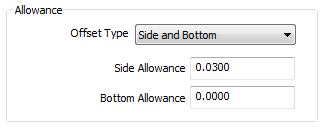
When roughing your parts in 3D, you’ll want to leave stock for the finish. The amount of stock you leave for the finish is the allowance option. Mill Standard users can only use a global allowance value. This leaves the same amount of stock in X, Y and Z. As a Mill Professional user, you can leave different amounts of stock in XY and Z.
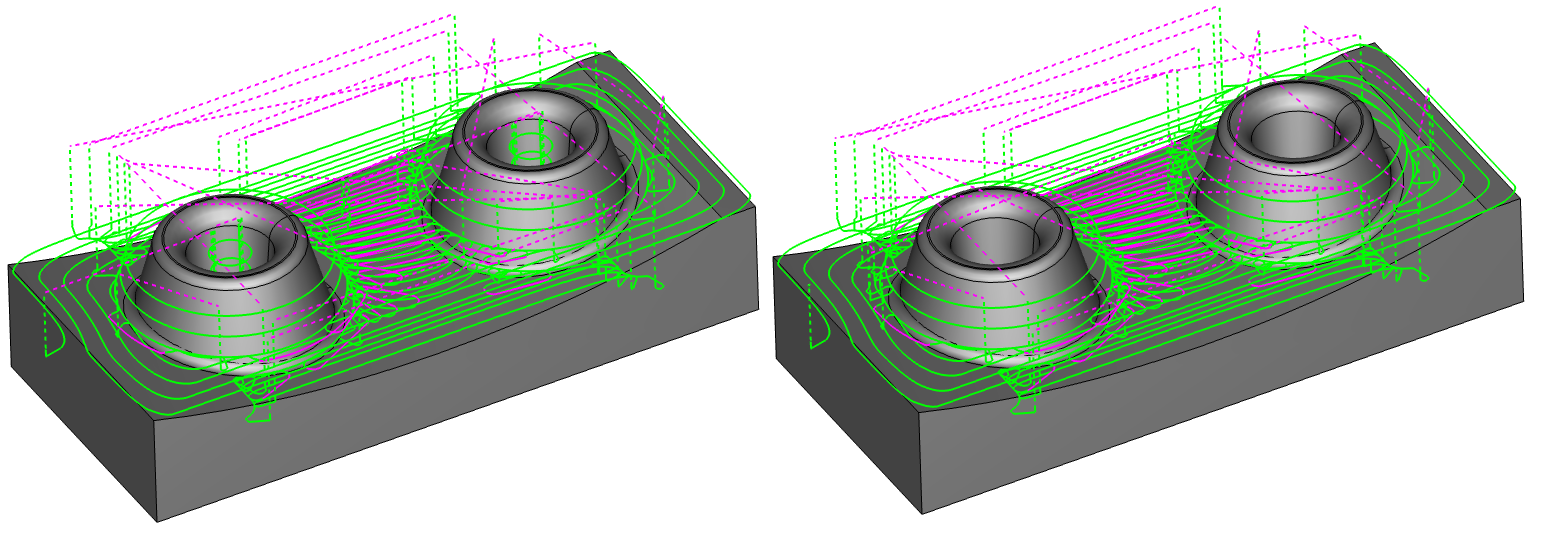
Non-Center Cutting Tools:
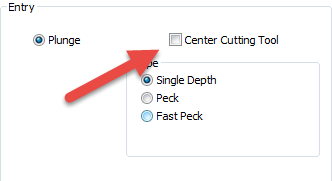
When roughing parts in 3 axis, you may be using tooling that can plunge into the stock or that is non-center cutting. You may just want to avoid the inside pockets of a cavity so they can be machined with different tooling. Instead of editing your part geometry or trying to set up boundaries, Mill Professional users can uncheck the center cutting tool option. This tells the software not to plunge into the stock.
Subscribe to BobCAD-CAM's Tech Tuesday Blog
Join your fellow machinists. Get the latest Tech Tuesday CAD-CAM articles sent to your inbox. Enter your email below:Rest Roughing:
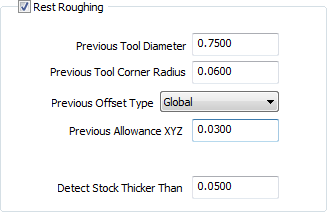
The general rule of thumb is to use as large of a tool as you can when removing material. Then use smaller tools to clean up where the larger tool didn’t fit. So, how do you tell the software where this leftover material is? Rest Roughing is one option Mill Professional has for rest roughing in 3D.
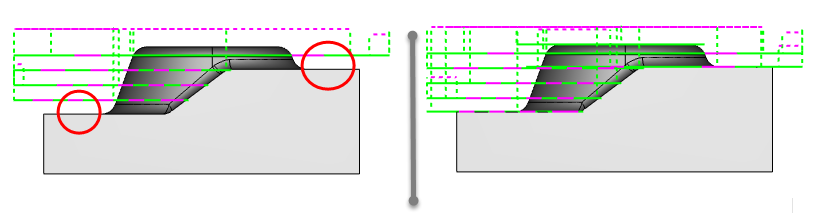
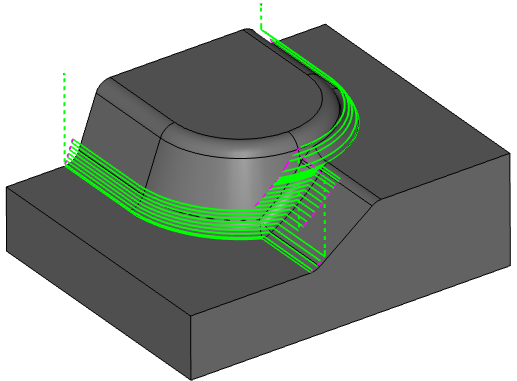
Machine Flatlands:
It’s common for your 3D parts to have shoulders and other flat areas of the part that need to be machined. Using the machine flatlands option, users can target these areas of the part automatically and machine them when roughing. This depends on the part geometry you may want to finish the flats/shoulders of your part when roughing. Checking this option finds the flat areas and makes sure you’re toolpath hits them.
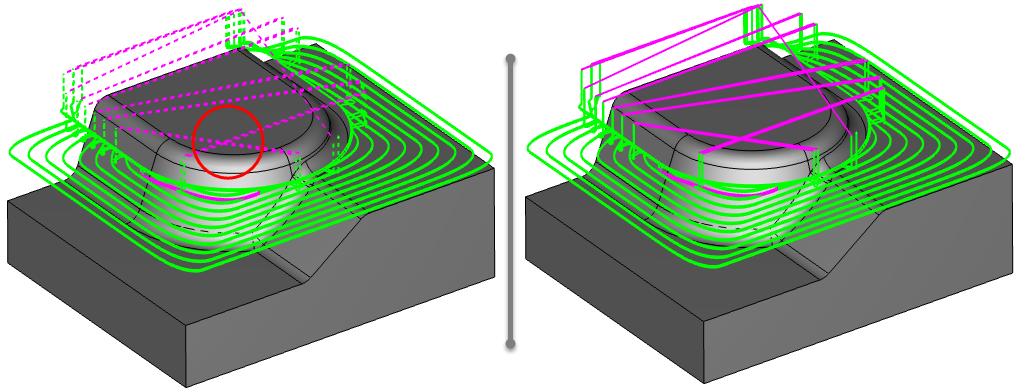
Tool Holder Collision Avoidance:
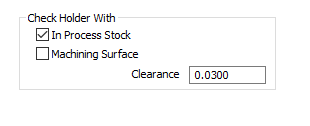
When roughing surfacing models, your tool holder is more likely to be in conflict with your part geometry, especially with deeper pockets.
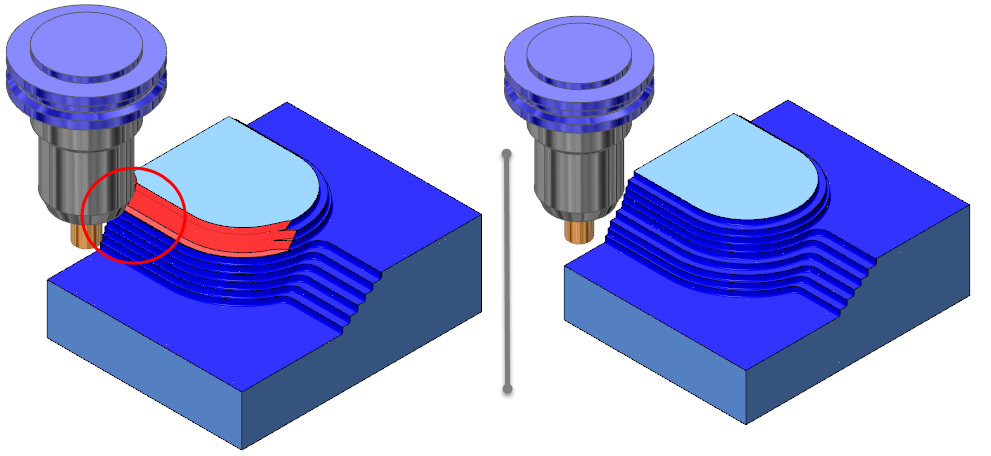
Turning on this option checks for collisions with your tool holder and stock geometry. You define a clearance value and the software takes care of the rest.
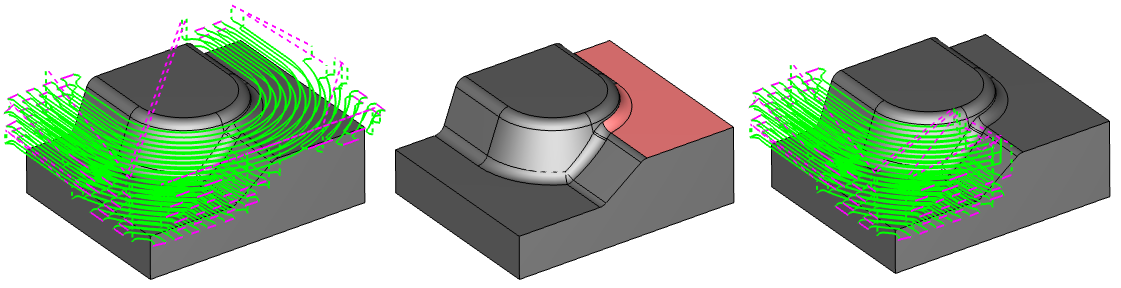
Stock Aware:
Advanced roughing toolpaths use the stock geometry as a 3D boundary. Calculated toolpath will be trimmed to it. Use your stock geometry to control where toolpath is created.
Check Surfaces:

Use gouge checking to avoid user-selected surfaces. The allowance value is used as the “avoid zone”. If your tool or tool & holder comes within the allowance value, the toolpath is trimmed away. You can also use check surfaces to leave different amounts of stock on features of your part or as a way to avoid features, areas of your model when roughing.
Adaptive Feedrates:
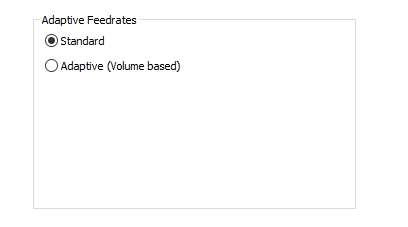
Use feedrate mapping to speed up or slow down the feedrate to fine-tune cycle times. Volume-based feedrates will slow down your feedrate when the tool engagement with stock is greater and will speed up feedrates as tool engagement is lower.
*Radial Chip Thinning is available for adaptive toolpaths.
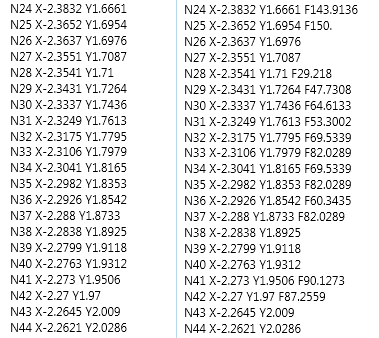
Convert Rapid to Feed:
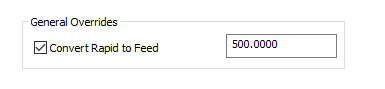
Are you running a machine that uses dogleg rapids? If you’ve ever broken a tool or gouged a part when your tool was repositioning and you didn’t see it in the simulation, then this feature is for you.
This option will covert your rapid moves into a mapped feedrate that you define. By converting your rapids to feeds, you’ll eliminate the doglegs and any potential issues.
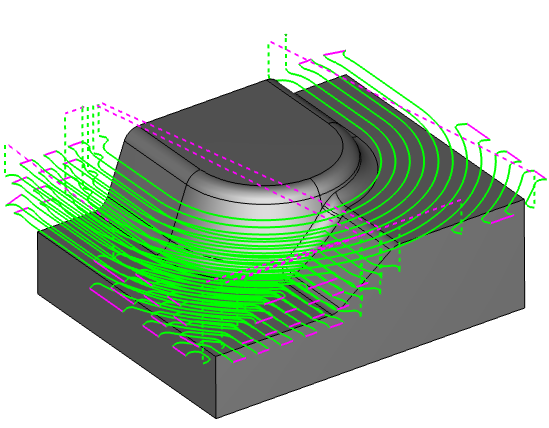
This powerful finishing toolpath is one of the most widely used 3D toolpaths. Also known as raster, parallel or ball tracking. This back and forth toolpath is typically used for shallow areas of your models. Great for finishing, semi-finishing and detailed areas.
Multiple Cutting Patterns:
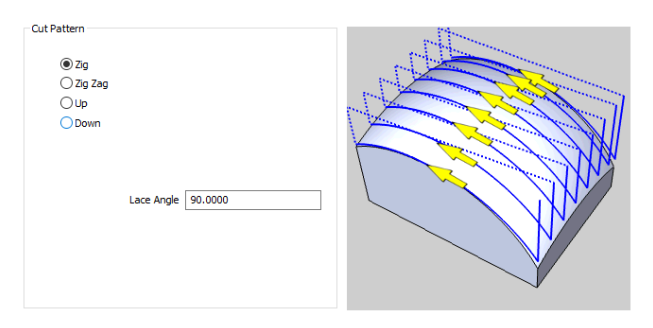
Choose from 4 different cut patterns to get the best use out of your tooling for the most desirable finish. A zig cut pattern is single-direction. A zig-zag cut pattern is bi-directional so the tool will work its way back and forth. Up cutting forces the tool to cut in an upward direction. Down cutting forces the tool to cut in a downward direction.
Start Corner:
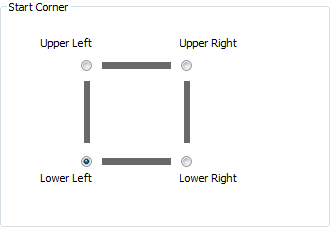
Use start corner control to pick which side of the part you would like the tool to start cutting from.
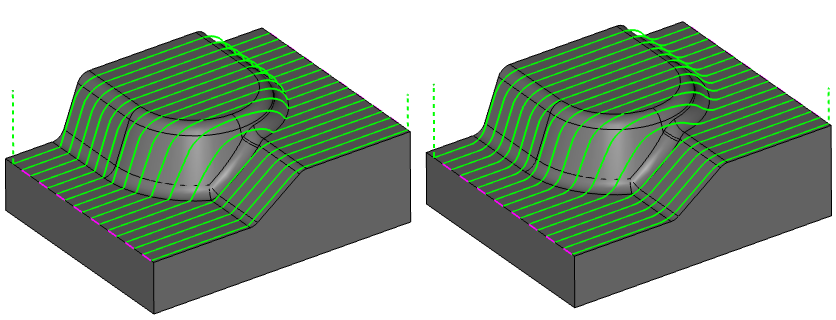
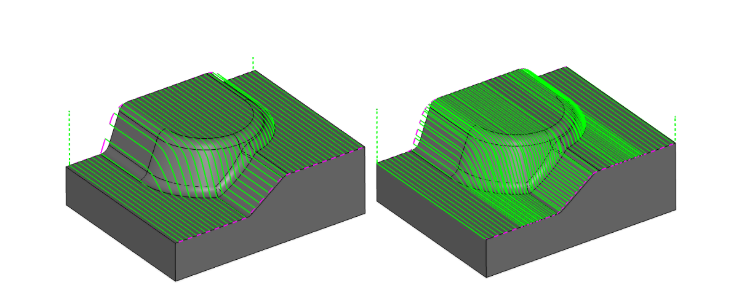
Round Corners:

Use round corners to smooth out your toolpath, allowing you to achieve shorter cycle times when semi-finishing your parts. Round corners will remove the abrupt changes in the direction your toolpath has.
Stepover Options:
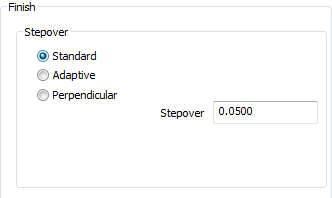
Choose from 3 stepover (width of cut) options when using the advanced planar toolpath. Planar is best for shallow areas of your part. Use one of the 3 stepover options to better target material left behind on more vertical faces.
Using adaptive stepover, your toolpath will adjust automatically to produce a more consistent surface finish.
Using the perpendicular stepover, the toolpath angle changes to target the steep areas of your part. An excellent choice for the semi-finishing of patterns and tooling.
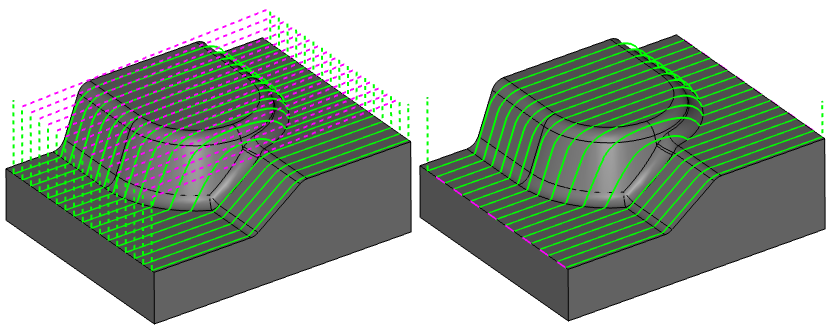
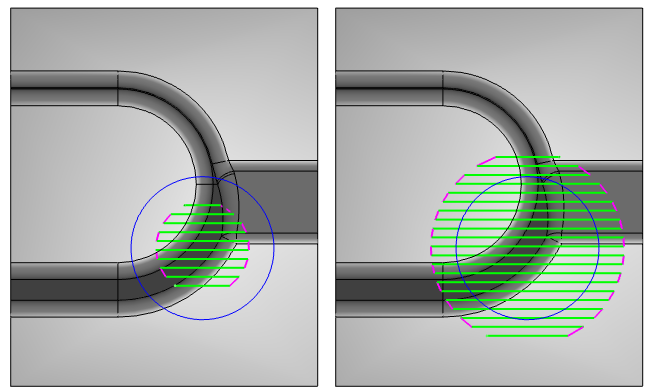
Limits:
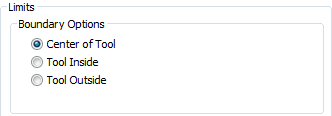
Controlling where your toolpath is generated can be as simple as adding a boundary. Choose to drive the center of the tool to the boundary or keep the tool inside or outside.
Cutting Extents:
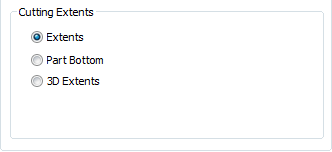
Controlling the “rollover” of the tool is simple as changing your cutting extents settings. Allowing users to control if the tool stays on top of the surface, rolls over the edge or goes all the way to the bottom of the model.
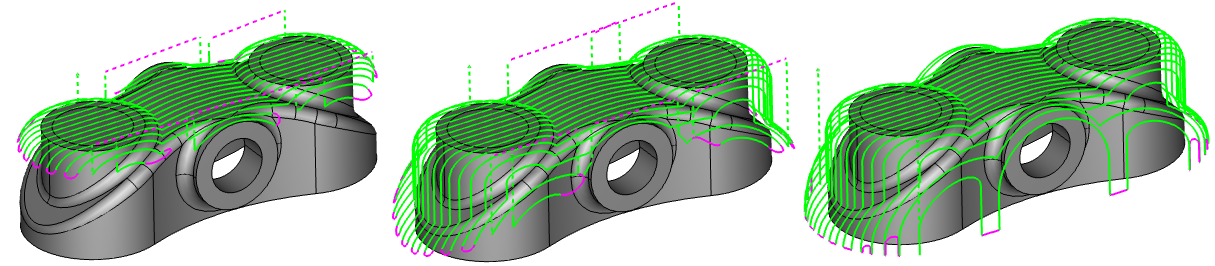
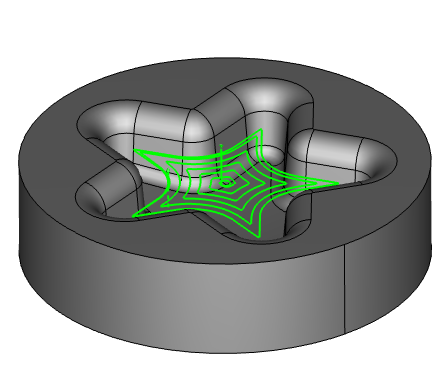
This powerful finishing toolpath is another widely used 3D toolpath. Also known as waterline or parallel, this toolpath is typically used for the steep areas of your models. Great for finishing or semi-finishing of vertical walls.
Choose from 3 cut patterns for single direction cutting, bi-directional cutting or spiral cutting. This toolpath can start from the bottom and work its way up, or start at the top and work its way down.
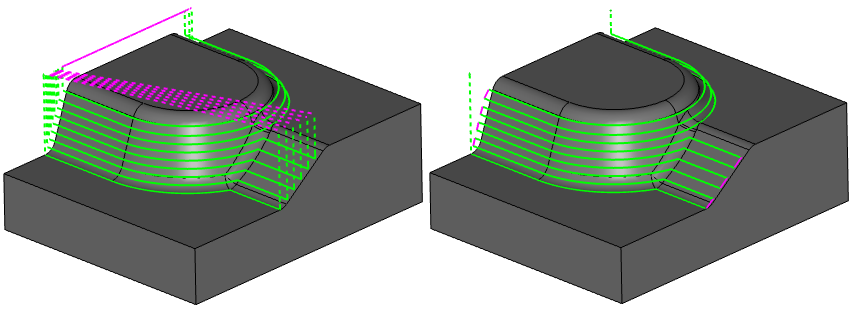
Adaptive Depth of Cut:
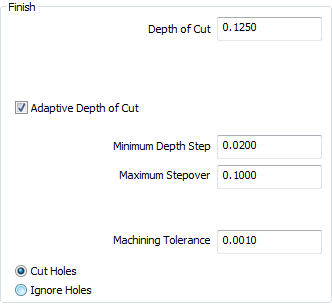
Use adaptive depth of cut to tighten up your stepdown where your part’s surfaces fatten out. Z level finish toolpaths do an excellent job on vertical and near vertical shapes. As your surfaces start to flatten out, the cusp height gets larger. Use adaptive depth of cut to achieve more consistent surface finishes.
Link Position:
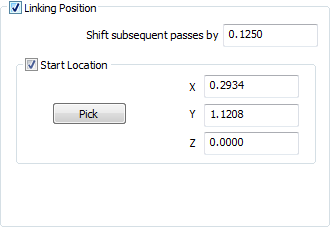
Depending on your part model, you may need to edit the link position of your toolpath. Mill Professional users can pick their start location and shift the link location by a user-defined value.
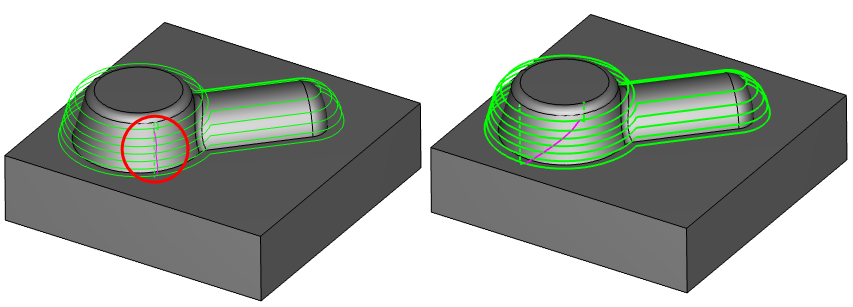
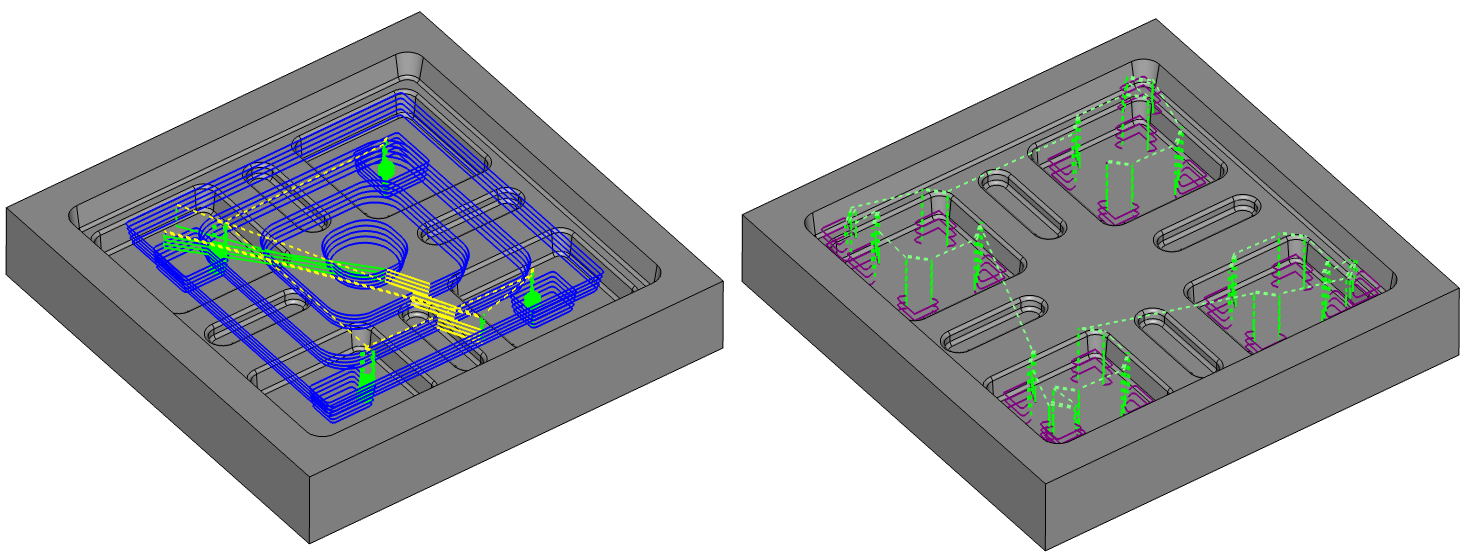
Rest Finishing:
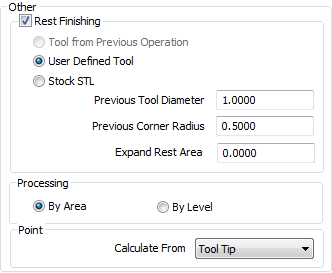
Use rest finishing to target material left behind by larger cutters. To calculate where the material is, use one of 3 options. Either the tool information from a previous operation, a user-defined tool, or load an STL file of your in-process stock.

Use expand rest area to control the overlap of the toolpaths.
This 3D toolpath is used to detect and machine the flat areas of your part. Just select your part model, pick your tool size & type and calculate.
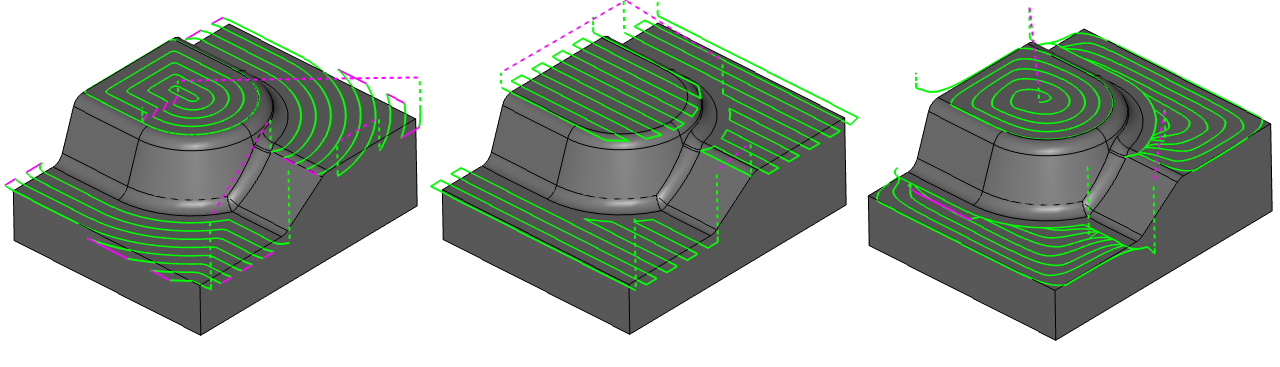
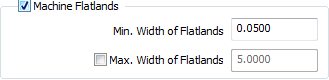
Min/Max Width of Flatlands:
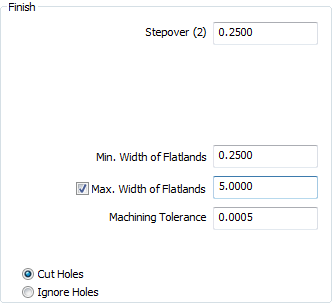
Use this geometry filter to target areas you do and don’t want to machine. This is very useful to eliminate cutting moves that are unwanted or handled by other operations.
Start your Test Drive.
Have questions? Call us at 877-838-1275.

You’re one click away from subscribing to BobCAD’s YouTube channel. Click the link below for tips, how-tos and much more!


What is the price?
Chris, please give us a call at 877-262-2231 x123 OR check out our price page: https://bit.ly/2ItYu84