Initial Setup
There are a few prerequisites to install to get prepared and setup before begin. No one wants to hear any rambling, so let's just dive right into what to do!
Step 1 - Install Visual Studio Code
First make sure you have gone to Visual Studio Code and download the free editor offered from Microsoft and install and run the application.
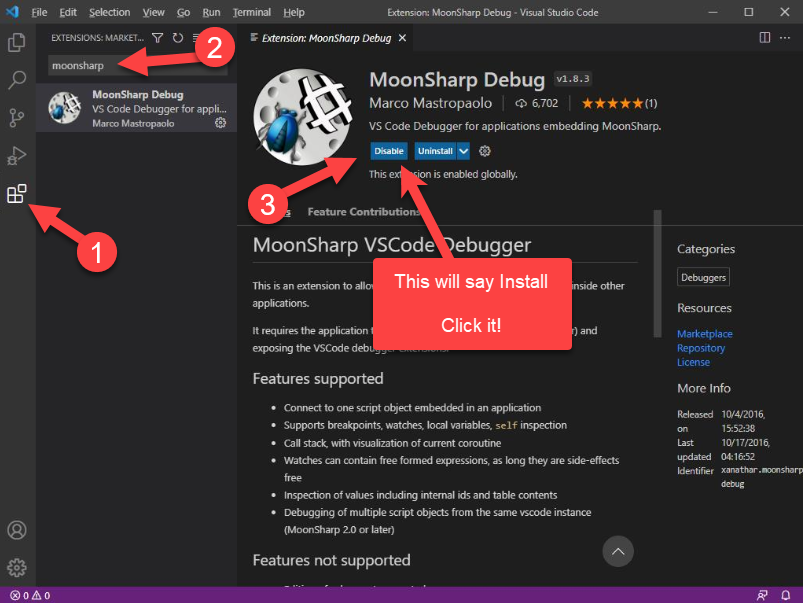
Step 2 - Install the MoonSharp Debug Extension
From within Visual Studio Code, go to the Extensions panel and install the MoonSharp Debug extension.
A direct link to this plugin can be utilized here.
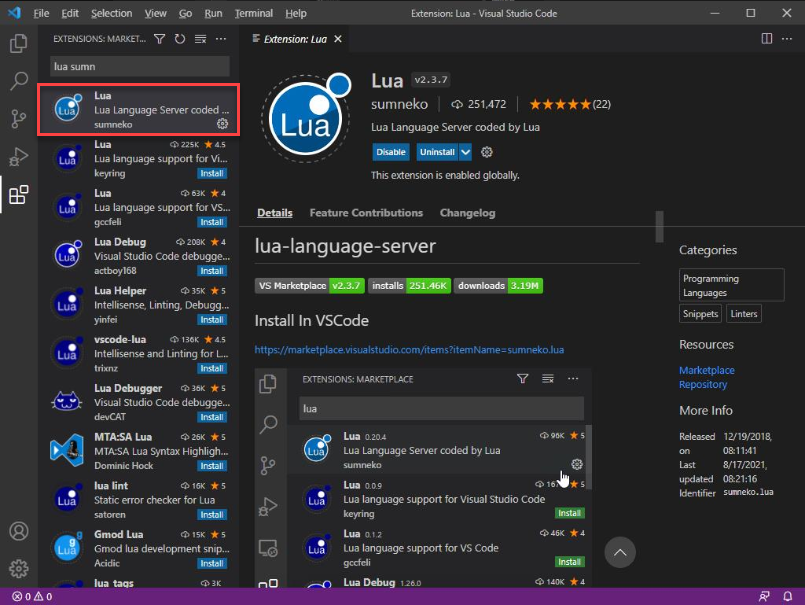
Step 3 (Optional) - Add another good Lua extension
This step is not required by any means, but I have also found the Lua extension by sumneko to be very useful as it offers great functionality for working with Lua files in Visual Studio Code. I just figured while we were installing extensions, you might as well know about this one too!
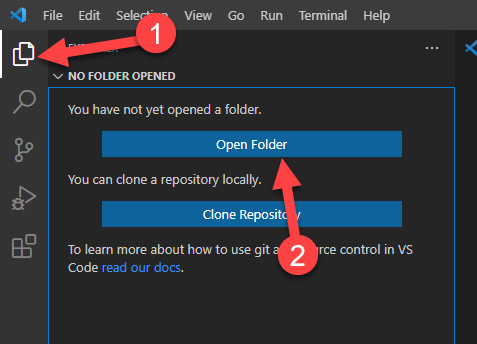
Step 4 - Open up your LuaPlugins directory
From within Visual Studio Code, go to the Explorer panel (or use File > Open Folder), and open your LuaPlugins folder located inside of your products \BobCAD-CAM Data\<BobCAD Product>\ folder. This step also isn't completely necessary, but I recommend this workflow for easy navigation of your Lua scripts from directly within VS Code.
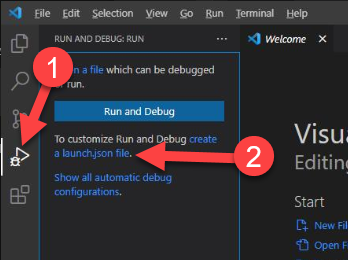
Step 5 - Create the launch.json file
Go to the Run and Debug panel inside Visual Studio and click on create a launch.json file to create the launch.json file in the .vscode folder in your LuaPlugins folder.
After clicking the create a launch.json file, Visual Studio Code may prompt you to select an environment. Choose the MoonSharp environment if this screen is presented: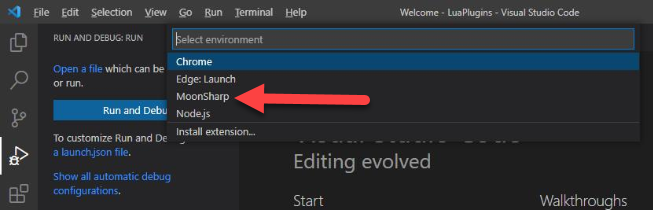
Step 6 - Edit the launch.json file
The launch.json file should now be opened in Visual Studio Code for you to edit.
If it is not open, or you are returning to this step, you can locate this file in your \BobCAD-CAM Data\<BobCAD Product>\LuaPlugins\.vscode\ directory.
Add the 'debugServer': 41912, line as shown below to set up the port in which BobCAD will be communicating. By default, MoonSharp utilizes port number 41912 as seen in the below example:
{
// Use IntelliSense to learn about possible attributes.
// Hover to view descriptions of existing attributes.
// For more information, visit: https://go.microsoft.com/fwlink/?linkid=830387
"version": "0.2.0",
"configurations": [
{
"name": "MoonSharp Attach",
"type": "moonsharp-debug",
"request": "attach",
"debugServer": 41912,
"HELP": "Please set 'debugServer':41912 (or whatever port you ar connecting to) right after the 'request' field in this json."
}
]
}
Click Save to save the changes to your launch.json file, and now your Visual Studio Code application is ready for debugging Lua files for BobCAD-CAM products!
NOTE: If for some very odd reason, this port number is already in use on your PC, you will need to edit this value to an available port, and also complete Step 8 so the BobCAD product knows the appropriate port number as well. Otherwise it will be be utilizing port number 41912 as described earlier.
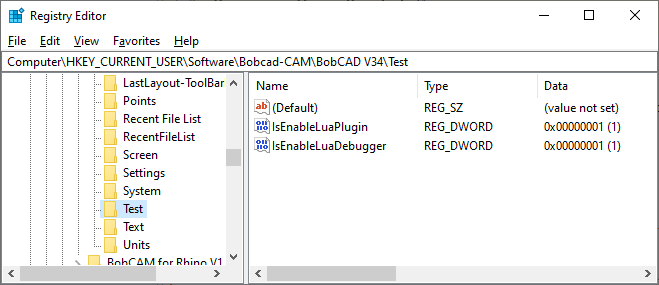
Step 7 - Add the Debug Registry Value
For now prior to the Lua official release, you must add a registry value to enable the debugging server which communicates with VS Code for the debugging.
Inside the following registry key:
Computer\HKEY_CURRENT_USER\Software\BobCAD-CAM\<BobCAD Product>\Test
the value IsEnableLuaDebugger must be created as a DWORD and set to 1
IMPORTANT: It is not recommended to just leave the Lua debugging tool turned on all the time. With debugging active, the Lua script execution will slow down slightly, and extra resources will be utilized on your PC. It is only recommended to leave this registry value set to 1 when actively working on debugging a Lua script. Setting the value of IsEnableLuaDebugger to 0 is the recommended method for disabling
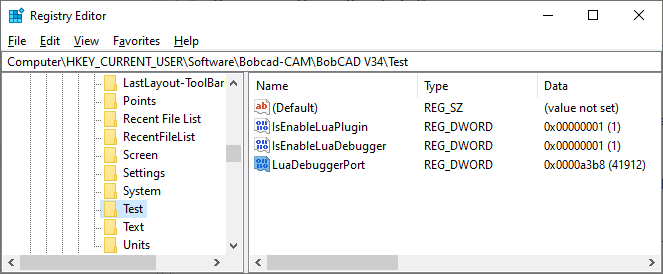
Step 8 - (Optional) Add the Debug Port Registry Value
As mentioned in Step 6 this step is completely optional and typically not required. This step should only be done if for some reason some other application is utilizing port number 41912 on your PC.
You can add the optional registry value in which you can define what port number should be utilized for communication between the BobCAD product and Visual Studio Code. This port number must match what is defined in your launch.json folder described previously.
Inside the following registry key:
Computer\HKEY_CURRENT_USER\Software\BobCAD-CAM\<BobCAD Product>\Test
the value LuaDebuggerPort must be created as a DWORD and set to the appropriate port number as a decimal input.
The setup is now complete! You should hopefully never need to read this topic ever again, unless you need to remember the registry key for enabling and disabling the Lua debugger service!
Next up, take a look at the Beginning Debugging topic to jump into utilizing the debugging tool.