 Ruled Surface
 Ruled Surface
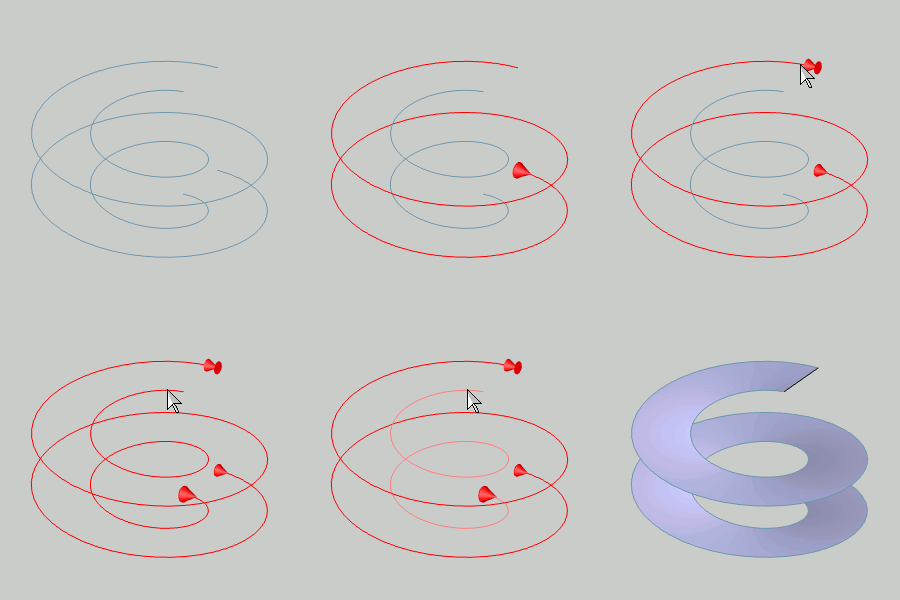
The Ruled Surface function creates surfaces using the selection of two wireframe chains with a linear blending between the entities of each chain. The two chains need to share the same general chain direction to create the proper results. The two chains can be connected to form the boundary of the surface, or the software automatically creates the boundary of two non-connected chains. Generally, the chains should be the same number of entities.

To open the Ruled Surface function, do one of the following:
 icon.
icon.
The parameters display in the ![]() Data Entry tab of the Data-CAM Tree Manager.
Data Entry tab of the Data-CAM Tree Manager.
The function is performed using only geometry selection.
1 Open the function.
2 Chain select the first chain as explained next.
3 Click near the end of the first chain entity to set the start of the chain.
Hold Shift and click near the end of the last entity to set the end of the chain.
Alternatively, you can hold Shift and click near the end of the last entity to set the start and end of the chain in one click.
4 Chain select the second chain as explained in Step 3.
The surface is automatically created when you finish the second chain selection.
5 Repeat this process as needed to create more surfaces.
6 To close the function, click Cancel.
The feature is added to the CAD Tree.