In this Topic Show
This Nesting Parameters page of the Nesting Wizard contains options to control the order and direction of the nesting results, the distance between each part, the distance between parts and the edge of the material, the orientation of the nested parts, and how the part priorities are handled.
The Toolpath Generation section contains the following options that determine how the nesting result is machined. You can also select whether or not the system nests the parts with toolpath.
Generate Toolpath Before Nesting
![]() When selected, the system calculates
the toolpath before nesting the parts.
When selected, the system calculates
the toolpath before nesting the parts.
![]() Clear the check box and the system nests the parts without creating toolpath.
When not generating toolpath, none
of the remaining parameters in this section apply to the nested result.
Clear the check box and the system nests the parts without creating toolpath.
When not generating toolpath, none
of the remaining parameters in this section apply to the nested result.
Cut Compensation - Determines the cutting direction for inner and outer profiles in the nest.
Climb Mill - In this case the outer profiles will be assigned clockwise cuts and inner profiles will be assigned counterclockwise cuts.
Conventional Mill - In this case the outer profiles will be assigned counterclockwise cuts and inner profiles will be assigned clockwise cuts.
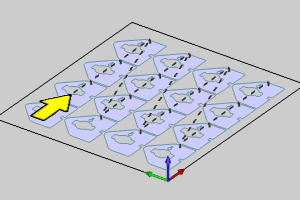
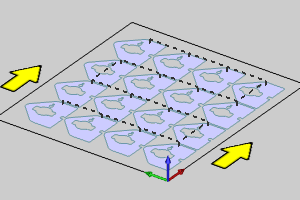
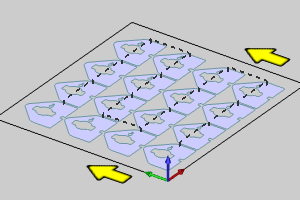
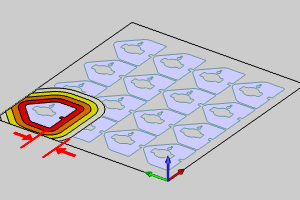
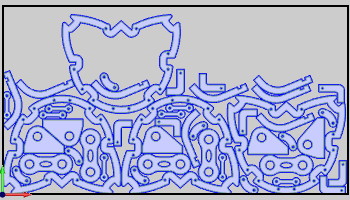
Sets the starting position and cutting direction of the nested results. Select from the lists to determine the corner to start from, and then select either the up and down direction or left to right direction option.
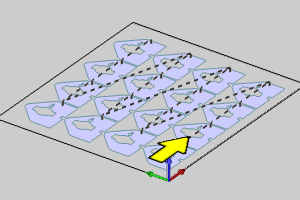
Start Corner - allows you to decide where the cuts should begin on the nested sheet.
Upper Left |
Upper Right |
|
|
|
|
Lower Left |
Lower Right |
|
|
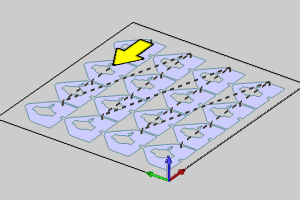
Cutting Direction - is the direction the sheet will be cut in. This can be thought of as the direction the wave of completed parts is moving in.
Horizontal (X)
- sets line of completed parts to move horizontally.
Vertical (Y)
- sets line of completed parts to move vertically.
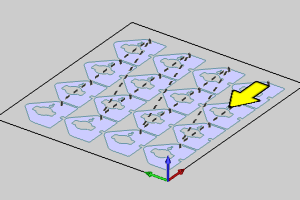
Cut Pattern
Parallel - the rows or columns are cut in opposite directions.
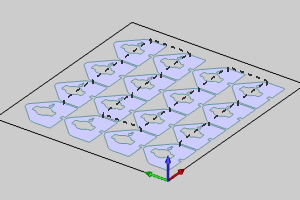
Zigzag - the
rows or columns are cut in one direction.

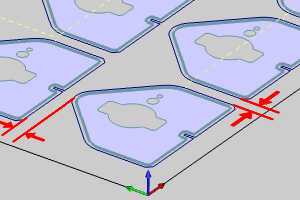
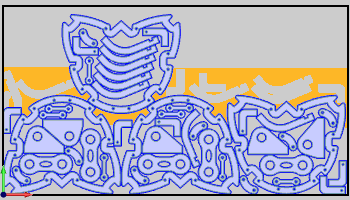
Max Part Distance - allows you to set a maximum distance to jump between the lead out of the current part, to the lead in of the next. In most cases, this is used to make sure that the cuts are kept as close together as possible.
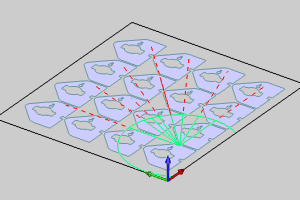
Thermal Distance - allows you to set a minimum distance to jump between the offset value of one toolpath to the offset of another. In most cases, this is used to make sure that the distance between one completed part and the next are far enough away that the heat from the cuts does not build up enough to cause warping. For more information on Thermal Distance, click here.
Cut Large Parts Later
![]() When cleared, the size of a part will
not affect the cutting sequence.
When cleared, the size of a part will
not affect the cutting sequence.
![]() When selected, the ration between the part area and the sheet area can
affect the cutting sequence within the Max Part Distance.
When selected, the ration between the part area and the sheet area can
affect the cutting sequence within the Max Part Distance.
Large Part Percentage - This value is the area of the part (P) divided by the area of the sheet (S), multiplied by one hundred. (P/S)*100
The Parameters section contains the following options to determine how the system calculates the nesting result.
Bridge Distance - is the distance added between the toolpath for each part in the nested result.
Resolution - is the tolerance setting for the nest.
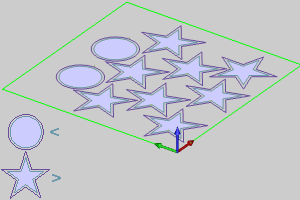
Sequencing - For parts with no priority assigned, this is a way to set which parts will be nested first.
By Area - parts whose toolpath creates
a greater surface area will be nested first.
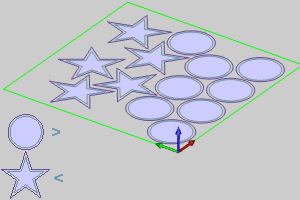
By Perimeter - parts whose toolpath
creates a larger perimeter will be nested first.
Allow Part in Part
![]() By default, this check box is cleared. When cleared parts will not be
nested inside the inner profiles of other parts, even when sizes permit.
By default, this check box is cleared. When cleared parts will not be
nested inside the inner profiles of other parts, even when sizes permit.
![]() When selected, parts will be nested inside of other parts when possible.
When selected, parts will be nested inside of other parts when possible.
Preferential Hole Filling
![]() By default, this check box is cleared.
When cleared, no priority will be given to filling inner profiles.
By default, this check box is cleared.
When cleared, no priority will be given to filling inner profiles.
![]() When selected, the space inside the inner profiles of parts will be given
priority in the nested results.
When selected, the space inside the inner profiles of parts will be given
priority in the nested results.
![]() When cleared no additional optimization
tools will be used.
When cleared no additional optimization
tools will be used.
![]() When selected, you will be able to launch the Nesting Optimizers dialog
box.
When selected, you will be able to launch the Nesting Optimizers dialog
box.
![]() When cleared, remnant sheets will not
be used.
When cleared, remnant sheets will not
be used.
![]() When selected, you will be able to launch the Remnant Sheet dialog box.
When selected, you will be able to launch the Remnant Sheet dialog box.
After defining all Nesting Parameters, click Next>> to go to the Default Profile page.