How to Create Keyboard Shortcuts
Introduction
This topic will show the default keyboard shortcuts, and explain the process of creating new keyboard shortcuts in the Settings dialog.
Default Keyboard Shortcuts
Many keyboard shortcuts exist by default. Below is a table showing all of the default shortcuts. You can revert to using only these shortcuts at any time by using the Reset All... option in the Customize Shortcuts page of the System tab in the Settings dialog.
| Keyboard Shortcut | Function | ||
|---|---|---|---|
|
Help Topics |
||
|
Spacebar |
OK (used to accept geometry selections; the same as right-click in the graphics area and click OK) |
||
|
Esc |
Cancel (the same as right-click in the graphics area and click Cancel) |
||
|
N |
Turn Normal Display On/Off |
||
|
T |
Turn Transparency On/Off |
||
|
S |
Turn Surface Shading On/Off |
||
|
W |
Turn Wireframe On/Off (V21 Interior Lines) |
||
|
F |
View Fit All |
||
|
+ |
Zoom In |
||
|
- |
Zoom Out |
||
|
Ctrl+Shift+A |
Clear Selection |
||
|
CTRL + A |
Select All |
||
|
Copy |
||
|
CTRL + N |
Open New File |
||
|
CTRL + O |
Open Existing File |
||
|
CTRL + P |
Print Active graphics area |
||
|
CTRL + S |
Save Active graphics area |
||
|
Paste |
||
|
Cut |
||
|
CTRL + Y |
Redo |
||
|
Undo |
||
|
CTRL + 1 |
View Top |
||
|
CTRL + 2 |
View Front |
||
|
CTRL + 3 |
View Back |
||
|
CTRL + 4 |
View Bottom |
||
|
CTRL + 5 |
View Right |
||
|
CTRL + 6 |
View Left |
||
|
CTRL + 7 |
View ISO2 |
||
|
CTRL + 8 |
Normal (View normal to a selected surface) |
||
|
Left Arrow |
Rotates the view 90° to the left along the vertical axis of the current view |
||
|
CTRL + Left Arrow |
Rotates the view 90° to the left along the current view |
||
|
Shift + Left Arrow |
Rotates the view 15° to the left along the vertical axis of the current view |
||
|
ALT + Left Arrow |
Pans the view to the left |
||
|
Right Arrow |
Rotates the view 90° to the right along the vertical axis of the current view |
||
|
CTRL + Right Arrow |
Rotates the view 90° to the right along the current view |
||
|
Shift + Right Arrow |
Rotates the view 15° to the right along the vertical axis of the current view |
||
|
ALT + Right Arrow |
Pans the view to the right |
||
|
Up Arrow |
Rotates the view 90° up along the horizontal axis of the current view |
||
|
Shift + Up Arrow |
Rotates the view 15° up along the horizontal axis of the current view |
||
|
ALT + Up Arrow |
Pans the view up |
||
|
Down Arrow |
Rotates the view 90° down along the horizontal axis of the current view |
||
|
Shift + Down Arrow |
Rotates the view 15° down along the horizontal axis of the current view |
||
|
ALT + Down Arrow |
Pans the view down |
Adjusting the View with Keys Examples
Arrow Keys
By using the Arrow Keys you can automatically rotate in 90° increments. Use the left and right arrows to rotate around the vertical axis of the current view, and up and down arrows to rotate around the horizontal axis of the current view.
|
Up Arrow 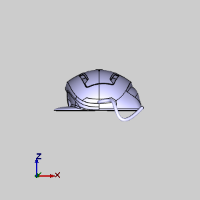
|
||
|
Left Arrow 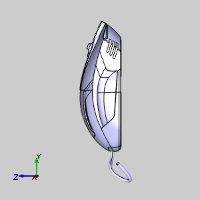
|
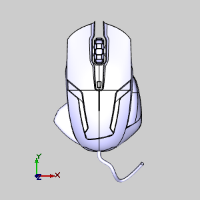
|
Right Arrow 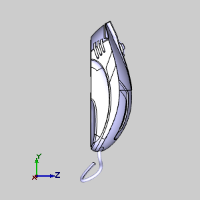
|
|
Down Arrow 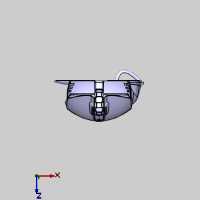
|
Shift + Arrow Keys
By using Shift with the Arrow Keys you can automatically rotate in 15° increments. Use Shift with the left and right arrows to rotate around the vertical axis of the current view, and with the up and down arrows to rotate around the horizontal axis of the current view.
|
Shift + Up Arrow 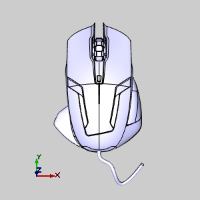
|
||
|
Shift + Left Arrow 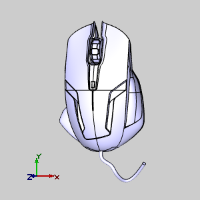
|

|
Shift + Right Arrow 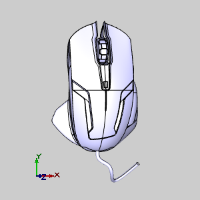
|
|
Shift + Down Arrow 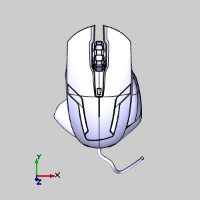
|
Ctrl + Arrow Keys
By using Ctrl with the left and right Arrow Keys you can automatically rotate in 90° increments along the current view.
|
Ctrl + Left Arrow 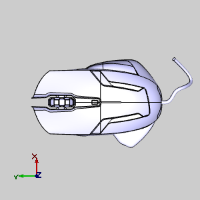
|

|
Ctrl + Right Arrow 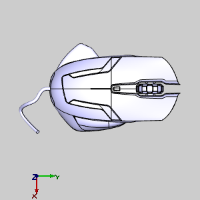
|
How to Create Keyboard Shortcuts
To create a shortcut key
-
In the Settings dialog, move to the Customize Shortcuts page, of the System tab.
-
Select a function from the Commands list.
-
Click in the Add New Shortcut Key text box.
-
Press the key combination that will be assigned as the shortcut.
-
Click the Assign button to set the selected key combination as the shortcut.
-
Steps 2-5 can be repeated to create any number of shortcuts.
-
Click OK to close the Settings dialog.
| Shortcut Creation Rules | |||||
|---|---|---|---|---|---|
|
Valid |
|||||
| Function Keys only |
|
||||
| Alt + Function Keys |
|
||||
| Ctrl + Function Keys |
|
||||
| Alt + Alphanumeric Keys |
|
||||
| Ctrl + Alphanumeric Keys |
|
||||
| Ctrl + Shift + Single Key |
|
||||
| Ctrl + Alt + Single Key |
|
||||
| Alt + Shift + Single Key |
|
||||
| Ctrl + Shift + Alt + Single Key |
|
||||
| Shift + Alphanumeric Keys |
|
||||
| Keyboard Areas | |||||
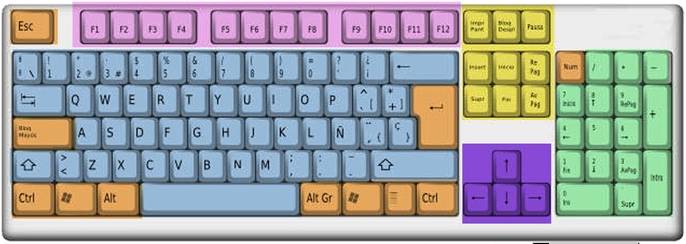
|
|||||
|
|
||||
|
|
||||
|
|
||||
To delete a shortcut key
-
In the Settings dialog, move to the Customize Shortcuts page, of the System tab.
-
Select a command from the Commands list.
-
Choose an assigned shortcut from the Current Keys field and click the Remove button.
The shortcut key is deleted. -
Click Cancel to close the Settings dialog.
Example
-
In the Settings dialog, move to the Customize Shortcuts page, of the System tab.
-
In the Commands list, left click on the 3 Entities function.
-
Click in the Add New Shortcut field.
-
Hold the Ctrl key on the keyboard and press G.
The input field now shows Ctrl + G.
The Assign button becomes available. -
Click on the Assign button.
Ctrl + G shows in the Current Keys list. -
Click OK to close the Settings dialog.
-
When the Ctrl key is held down and G key is pressed, the 3 Entities function is activated.


