The Mill 2 Axis Wizard Posting Settings

Introduction

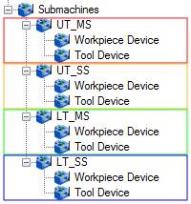
The fourth step of the Milling Wizard is to define a few posting parameters for the feature. This includes the work offset number, indexing output, and a few tolerance settings for the output program code. For Mill Turn jobs, the posting mode and submachine settings also display.

Posting

Posting Parameters

  • Work Offset # - select the work offset code to use for this feature in the posted NC program. The post processor must be configured to support the work offset selected.


Note: The Output Rotary Angle option is only available with the 4 Axis Standard, 4 Axis Pro, 5 Axis Standard, and 5 Axis Pro modules. These parameters are used to create indexing programs without using index systems.


  • Output Rotary Angle

    Select the check box to have the Rotation Angle output in the posted NC program.
    Clear the check box when not outputting a rotary angle.

    • Rotation Angle - type the rotary angle of the feature for indexing.


Contour Ramping Output

  • Line Moves - the toolpath is output as linear segments. This option is used if the machine controller does not accept helical arc segments.

  • Arc Moves - the toolpath output includes helical arc segments.


ClosedClick here to see the Mill Turn Posting Settings


Note: The following settings are available when inside of a Mill Turn job.


Posting Mode

The Posting Mode settings determine how the code is output based on the type of feature and tool orientation for the operations in the feature (generally, these settings only display for face milling or cross drilling). These settings are used together with the Multiaxis Posting settings for the feature (updating these settings automatically makes certain selections in the Multiaxis Posting page).


Longhand Code

When selecting this option, the code is output using the X, Z, and C axes (with Y-axis being set to zero for the entire operation). This option may be used for machines that don't support polar interpolation or have a Y-axis.


Tip: The Point Interpolation settings in the Multiaxis Posting page of the wizard are important when using the Longhand Code output. Generally, the Interpolation Type should be set to By Machine Angle.


Auto/Y Axis Mode

When selecting this option, the code is output using the X, Y, and Z axes (with the C-axis remaining at a fixed value for the entire operation). The tool uses the Y-axis travel available instead of rotating the C-axis.


Tip: The Pole Handling settings in the Multiaxis Posting page of the wizard are important when using the Auto/Y Axis Mode output. You can set the option to Freeze Angle Around Pole to use Y-axis motion, and all other options can be used to not output Y-axis motion.


Polar Interpolation (G112/G12)

When selecting this option, the code is output using the X, Y, and Z axes, but the machine controller then converts the values to use the X, Z, and C axes. This option is only used for machine controllers that support polar interpolation and may provide superior accuracy and part finishes as the machine controller optimizes the code for the machine.


Important: Your machine controller must support and be configured for polar interpolation to use the Polar Interpolation posting mode properly.


Submachine

The submachine group determines the submachine, or work zone, that is used to perform all operations in the feature. You can use the Submachine list to change the submachine for the feature from the default submachine that is selected in the CAM Tree.


  • Submachine - displays all submachines (work zones) from the current machine. The submachines display with the name defined in the submachine definition of the Current Settings. Select the submachine, such as UT_MS (upper turret, main spindle) to determine which work zone performs all operations in the feature.


Submachine Tree

Submachines - Device Grouping


Next Topic

If the machine selected for the job has 3 or fewer axis, click Next>> to go to Tool Page.


If the machine selected for the job has 4 or more axis, click Next>> to go to The Multiaxis Posting Dialog Box.