Creating Revolved Stock
Introduction
In this example you learn how to create stock by revolving wireframe geometry. This example will also provide links to related topics.
Creating the Stock
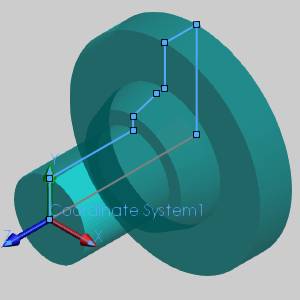
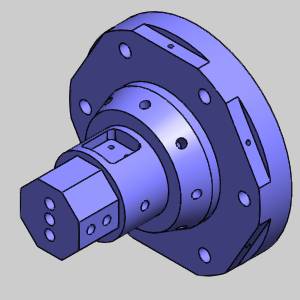
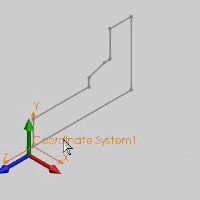
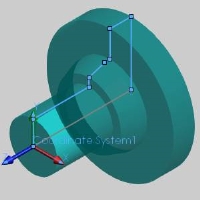
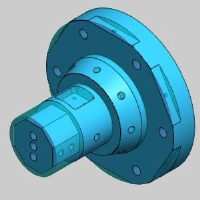
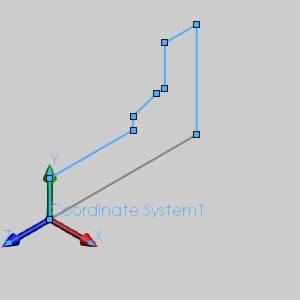
The following images show our example part and the profile that we created to revolve for our stock geometry. For this lesson, imagine we have already turned the part on our lathe and now we want to do some milling, so we need create stock that represents our current part.

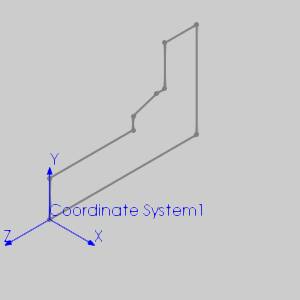
Note: Notice that we have a coordinate system. This should be created beforehand to define the stock origin which will be used to rotate the stock around Z.
Part 1) Select the Stock type
By default rectangular stock is selected.

- In order to create revolved stock, under Stock
Type, select


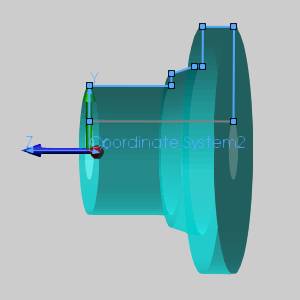
Note: Notice the stock origin is using the same position as it was for the default rectangular stock type. This will be changed in the next step.
Part 2) Set the Stock Origin Location (Stock Coordinate System)
Note: The stock origin is only used for determine the orientation and location of the stock. Although the stock origin is not related to the machine setup origin, you can use the stock origin location and orientation to set the machining origin in the Machine Setup (by using the Reset to Stock Coordinate button).
-
With the Stock Coordinate System list box highlighted, pick the appropriate coordinate system.

The stock origin jumps to the selected coordinate system.


Part 3) Select Geometry
Now that we have adjusted the stock origin location, we are ready to select the geometry.
-
Click inside the Size list box to give it focus, and select all applicable geometry.

The geometry is added to the Size list box as it is selected. f -
Click Calculate Stock and create the stock preview.
-
The stock geometry is finished. Click
 next to go to the Machine Setup.

Mill Turn Revolved Stock Tips
The process of creating revolved stock for Mill Turn jobs is the same as for Mill jobs. The following section describes a few key points of using the revolve stock type for Mill Turn jobs.
Drawing Plane
The geometry that you create for revolved stock does
not have to be drawn in the XZ plane, but if you are going to use
the same geometry to create turning features, then draw it in the XZ plane
of the machining origin (Machine Setup coordinate system) so you do not
need to modify the geometry later. (Wireframe geometry for turning features
must be drawn in the XZ plane of the machining origin.)
Creating an Internal Diameter
To create an internal diameter using the revolved stock type, you simply move the stock origin location away from the center line of the profile that you draw.