In this Topic Show
The snap increment in BobCAD-CAM allows you to perform accurate sketching and dynamic drawing to a specified distance or rotation increment. The snap increment value determines the available snap locations in reference the WCS. This allows for a greater accuracy in drawing and allows you to get exact values with less modifying of data entry parameters. The snap increment acts as a uniform grid of snap locations in the graphics area to which entities (snap points), sketch handles, and origins can be snapped.
CAD Functions with Snap Increment
There are only two snap increment values utilized for the entire system: Distance and Angle. The following information explains all locations in which snap increment values are stored and can be modified.
The default snap increment values for all files are set in the Settings Default dialog box (System tab) of the Preferences menu. These values are automatically copied to the Settings Part values when you create a new file.
There are two locations in which the snap increment values for the current file are modified:
1 The Settings Part dialog box (System tab) of the Preferences menu contains the snap increment values for Distance and Angle.
This location is used to change the snap increment values from the default values set in Settings Default. You can also change the snap increment Angle value here for the current file.
2 The
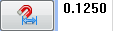
Snap Increment box in the Status
Bar.
|
This location is used to update the snap increment Distance value while you are drawing. You can click the Snap Increment button to turn on and off the snap increment for drawing. You can type a new value in the box and press Enter to update the current snap increment Distance value.
TIP: You can use the shortcut key, Q, to turn on and off the snap increment for drawing. You can tell if the snap increment is on when the distance value can be edited, and when the distance is unavailable (greyed out), the snap increment is not active.
It is helpful to understand that when using the snap increment, the snap points of other entities holds priority over the snap increment. For example, if you click the snap point of an entity that does not lie on the snap increment, the snap point is used instead of the snap increment.
The following section describes a few basic examples to help get you started using the snap increment in BobCAD-CAM.
For our first example, we explore how the snap increment works with sketching.
This example illustrates the following key points:
1 In the File menu, click New.
2 In the Lines menu, click Sketch.
The snap increment distance value displays in the status bar on the lower-right side of the user interface.
|
3 Double-click the current value in the distance box to select the entire value.
 |
Type 1 and press the Enter key to update the value.
 |
IMPORTANT: After modifying the snap increment distance value in the status bar, you must press the Enter key to update the value.
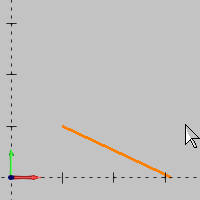
4 Move the mouse pointer near X1 Y1 and click to place the start point of the line.
Note that you can use the XYZ mouse position indicators in the Status Bar to view the current mouse pointer position.
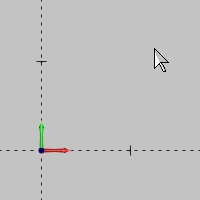 |
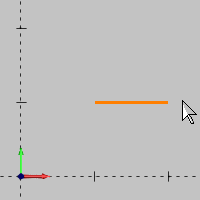
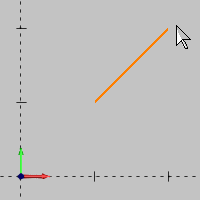
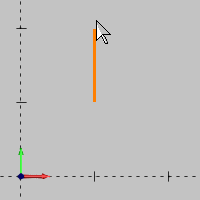
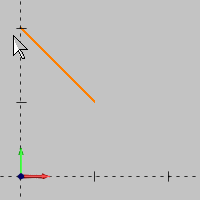
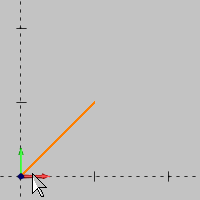
5 Move the mouse pointer away from the start point to display the CAD preview and move it in a circle.
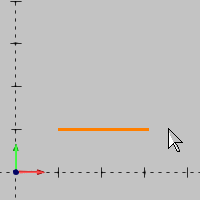
Notice how the preview snaps only to 1 unit increments (and that the start point snapped to X1 Y1).
 |
 |
 |
 |
 |
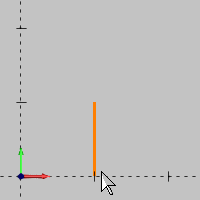 |
TIP: Note that the snap increment distance does not specify the length of the line we are sketching, but rather the distance between snap increment locations in the graphics area (in reference to the WCS). You can see in the previous images that the preview of the line is longer when angled than when it is vertical or horizontal.
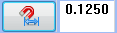
6 Next we update the snap increment during the sketch to get the exact value needed. Without clicking anywhere else, double-click in the snap increment distance box, type 3.125, and press Enter to update the value.
 |
Move the mouse pointer close to X3.50 Y1 and notice that the preview snaps to X3.125 Y0 (this is our current snap increment from the WCS).
 |
We can now force a horizontal line using the Data Entry parameters.
7 In the Data Entry Manager, click the Horizontal/Vertical check box.
Move the mouse pointer near X3.5 Y1 and click to place the end point of the line.
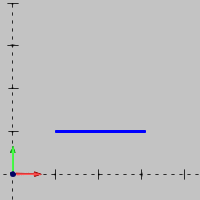
The end point of the line snaps to X3.125 Y1. The length of the line is 2.125 units.
Final Notes
While this example is provided to show a few key points, in actual practice, you can simply set the snap increment value to the smallest division to which you need to sketch. For this example, we could have set the snap increment to 0.125 and sketched the same line without the need to turn on the Horizontal/Vertical option in the Data Entry Manager.
An important note about the snap increment is that you can turn it on and off while sketching, in the event that you want to sketch freely or to non-exact values.
1 The snap increment is active by default. To turn the snap increment off, use one of the following methods:
(1) Click
the  Snap Increment button in the status bar.
(2) Press the shortcut key Q.
2 The snap increment distance value becomes unavailable when the snap increment is not active (turned off).
 |
3 To activate the snap increment again, either press the Q key or click the Snap Increment button again.
|
There are two main points to understanding how to use the snap increment when sketching arcs. When sketching arcs, the first click sets the arc center and the second click sets the arc radius. The arc center uses the snap increment in reference to the WCS, but the arc radius applies the snap increment in reference to the arc center.
This example illustrates the following key points:
1 In the File menu, click New.
2 In the Arcs menu, click Sketch.
3 Double-click in the snap increment box in the status bar to select the entire current value.
 |
Type 0.5000 and press the Enter key to properly update the value.
IMPORTANT: After modifying the snap increment distance value in the status bar, you must press the Enter key to update the value.
4 Move the mouse pointer near X2 Y2 and click to place the arc center. Note that you can use the XYZ mouse position indicators in the status bar to view the current mouse position or use the hash marks on the X and Y axes in the graphics area.
 |
Notice that the arc center values update in the Data Entry Manager (X2 Y2 Z0).
5 Now, slowly move the pointer away from the arc center and watch the Radius value in the Data Entry Manager.

You can see that the Radius value only updates to increments of the snap increment distance value.
When you click to place the radius, the closest increment is applied (the current value in the Radius box).
 |
This concludes the arc sketching example.
The snap increment applies to the following for surface and solid functions:
TIP: When using the snap increment with solid and surface functions, the Data Entry parameters automatically update as you move the mouse pointer to show the current increment value, for example, a distance or dimension.
The snap increment applies to the following for wireframe functions:
TIP: You can use the XYZ mouse position indicators in the status bar to view the current position of the mouse pointer in the graphics area. You can also use the hash marks of the axes display in the graphics area.
The snap increment applies to the following for Utilities functions:
IMPORTANT: For the Rotate and Rotate 3D functions, the snap increment Angle value is set in the Settings Part dialog box of the Preferences menu (for the current file), not in the status bar.
TIP: When using the snap increment with the utility functions, the Data Entry parameters automatically update as you move the mouse pointer to show the current increment value, for example, the origin, distance, or angle.