Mill Tool Page
In this Topic ShowHide
Introduction
This topic serves to describe the various tool pages available going
through Mill and Mill Turn jobs. It is good practice to have all the tools
for the job loaded into the Tool Crib at the start of the job. If you
do, the tools for the job will already be in the Tool Crib, and the system
will have pulled appropriate tools for each operation from the Tool Crib.
From this tool page, you can either, choose a different tool from the
Tool Crib, go into the Tool Crib to add tools from your Tool Library,
or enter tool specific data manually into the Tool Data Section of the
page.
This page will also assist in assigning Tool Numbers and Offsets, and
Coolant options, as well as Speeds and Feeds.
Tool Crib - opens the Tool Crib for you to select a tool
that you have already loaded for the job. Click to select a tool in the
tools list, and click OK to assign the tool to the operation. (For Mill
Turn jobs, view Mill Turn Tool Crib.)
Assign Tool Holder (Mill and
Lathe Drilling) - opens the Milling
Tool Holder Library to assign a tool holder to the tool. In the Tool
Holder list on the right, select a tool holder/arbor, then click OK. The
name of the selected tool holder appears in the Holder Label box. This
holder is now the default tool holder for the tool, meaning that it is
automatically assigned to the tool when you create an operation with this
tool.
Tool Data
To select a tool for the feature,
you can use the following option in one of two ways.
 Select this check
box to allow the software to automatically select tools from the Tool
Crib that match the machining
operation. In the case of end mills, you may alter the diameter and corner
radius allowing the software to find the appropriate tool from the Tool
Crib. In the case the appropriate tool sizes are not found, the software
searches for a matching tool in the Tool Library. If a matching tool is
found, it is added to the Tool Crib. If a matching tool is not found,
a new tool is automatically created and added to the Tool Crib.
Select this check
box to allow the software to automatically select tools from the Tool
Crib that match the machining
operation. In the case of end mills, you may alter the diameter and corner
radius allowing the software to find the appropriate tool from the Tool
Crib. In the case the appropriate tool sizes are not found, the software
searches for a matching tool in the Tool Library. If a matching tool is
found, it is added to the Tool Crib. If a matching tool is not found,
a new tool is automatically created and added to the Tool Crib.
 When this check
box is cleared, you can edit all tool information directly in the dialog
box. In this case, the defined tool is added to the Tool Crib.
When this check
box is cleared, you can edit all tool information directly in the dialog
box. In this case, the defined tool is added to the Tool Crib.
NOTE: Although
the Machining Data group remains the same regardless of the tool selected,
The available Tool Data, and the Speed and Feed parameters vary depending
on the type of tool selected. Click on a tool to display the Tool Data
for that particular tool. Once open, click on Machining Data and Feeds
and Speeds to see the corresponding variables.
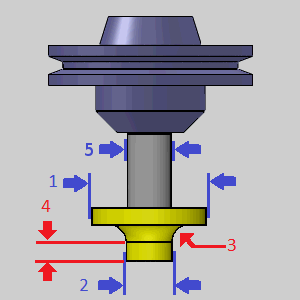
Drill
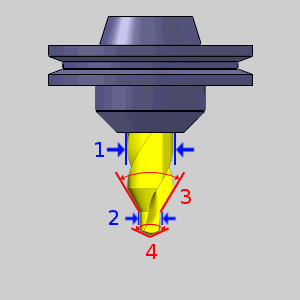
Center Drill
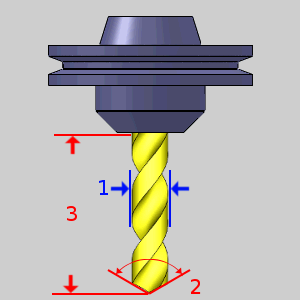
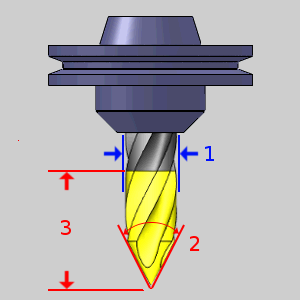
Drill
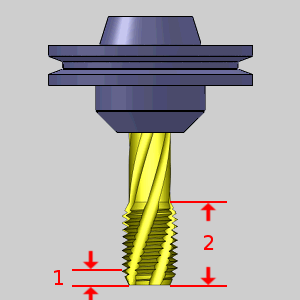
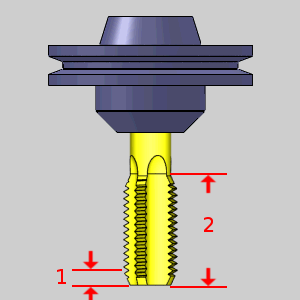
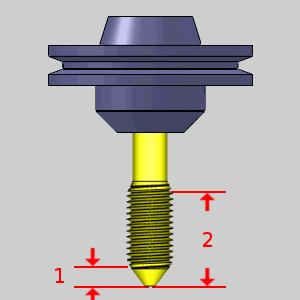
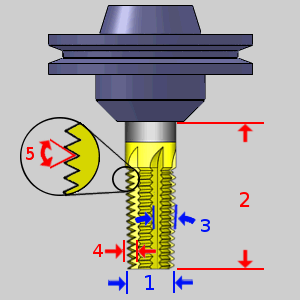
Spiral Tap
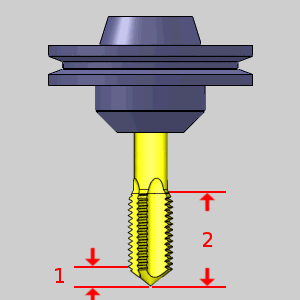
Point Tap
Hand Tap
Rolling Tap
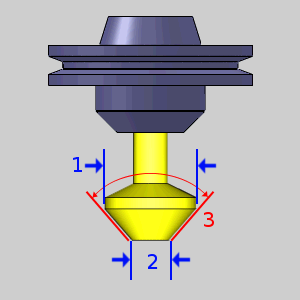
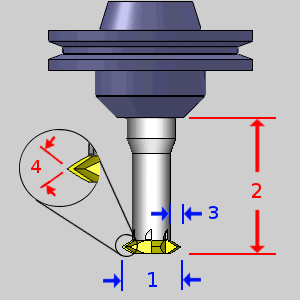
Chamfer Tool
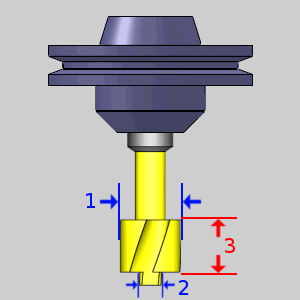
Counterbore
Reamer
Boring
Mill
Endmill Rough
Endmill Finish
Chamfer Mill
Corner-Round
Thread Mill
Single Point Thread
V-Tool
Tapered
T-Cutter
Dove Mill
Lollipop
Next Topic
Once the Tool variables have been set, clicking  will take you to the next page of the given operation.
To move the appropriate next topic, click the type of feature that has
been chosen below and then the link for the desired operation.
will take you to the next page of the given operation.
To move the appropriate next topic, click the type of feature that has
been chosen below and then the link for the desired operation.
Hole
Wizards
2 Axis
Feature
3 Axis
Feature
4 Axis
Rotary
Mill
Thread
3 Axis
Wireframe
V-Carve