On the CAD toolbar,
click the ![]() icon.
icon.
This topic provides an example of how to use the 2D Boolean function. This example is supplemental to 2D Boolean.
A BobCAD file installed with the software can be opened to follow along with this example.
1 In the File menu, click Open.
2 Navigate to: C:\BobCAD-CAM Data\**Current Version**\Examples, and select 2D Boolean Example.bbcd.
3 With 2D Boolean Example.bbcd displaying in the File Name box, click Open.
To open 2D Boolean, do one of the following:
In the Utilities menu, click 2D Boolean.
On the CAD toolbar,
click the ![]() icon.
icon.
Right-click anywhere in the Workspace, point to Utilities, and click 2D Boolean.
The parameters display in the ![]() Data Entry tab of the Data-CAM Tree Manager.
Data Entry tab of the Data-CAM Tree Manager.
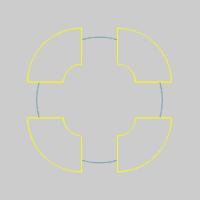
In this part, we add the two groups of wireframe chains.
1 Confirm that the default option, Add, is selected in the Data Entry Manager.
2 Click to select the circle as the first group of chains.
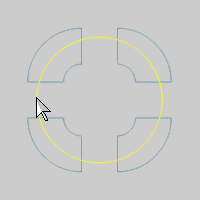
3 Click OK to confirm the selection.
4 Drag a window to select all of the wireframe.
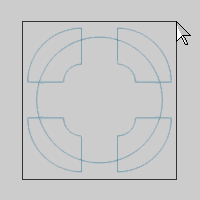
5 Click the circle to remove it from the selection. Note that you can drag a small window across the circle to select it, as an alternative method to clicking it directly.

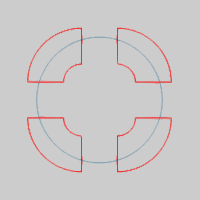
6 Click OK to confirm the second group and boolean add the two groups of chains.
7 Click Cancel to close the Data Entry Manager.
The 2D Boolean function is retained in the CAD Tree. This allows for modifications and more as explained in the CAD Tree. Next we use the feature to modify the result.
When you cancel the function, the CAD Tree Manager automatically displays. Notice the 2D Boolean feature in the CAD Tree.
1 In
the  CAD Tree,
click 2D Boolean to highlight
the result of the feature in the Workspace.
CAD Tree,
click 2D Boolean to highlight
the result of the feature in the Workspace.
2 Next
to 2D Boolean, click  to expand the feature.
3 Click
each of the  Geometry
items and notice that the selected group highlights in the Workspace.
Geometry
items and notice that the selected group highlights in the Workspace.
TIP: You can update the geometry for the selected groups using the right-click shortcut menus for each Geometry item.
4 Right-click 2D Boolean, and click Edit Parameters.
The Data Entry Manager opens and the geometry is preselected for the 2D Boolean function. (Using the Edit option would require you to make the geometry selections again.)
A preview now displays the result of the selected boolean type.
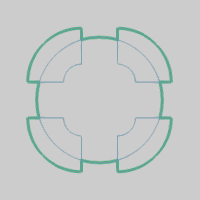
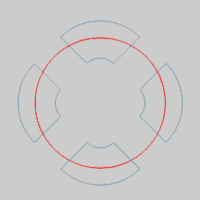
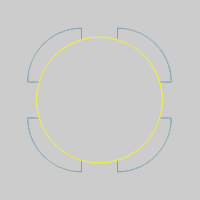
5 In the Data Entry Manager, click Intersect.
This updates the preview to show the result of the Intersect boolean type. You can see that this results in only the shared regions of the two groups.
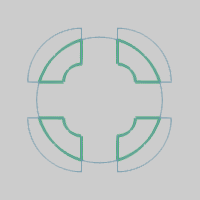
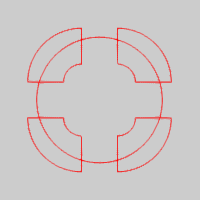
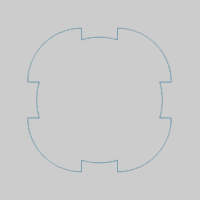
6 Click Subtract to update the preview.
7 Click OK to update the feature.

TIP: The Subtract boolean type subtracts the second group from the first, so the order in which you select the groups determines the result. For both the Add and Intersect boolean types, the result is the same regardless of the order in which the groups are selected.
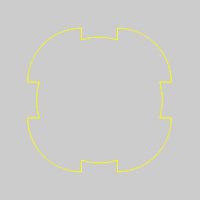
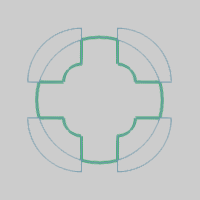
Next we use the Edit option to modify the geometry selections and show the difference in the result when reversing the selection order with the Subtract boolean type.
1 In the CAD Tree, right-click 2D Boolean, and click Edit.
This option allows you to completely recreate the feature, including geometry selection.
2 In the Edit menu, point to Select Entities, and click Pick by Layer.
In the Select Layer dialog box, click Group 2 and click OK.

3 Press Spacebar to confirm the selection.
4 Select the circle.
5 Click OK.

The result shows the difference of selecting the two groups in the opposite order when using Subtract.
This concludes the example.