


The Tool Crib
Introduction
This topic will explain the Tool Crib, the options found in it, will describe how to access it, and will provide links to related topics.
The Tool Crib
The Tool Crib is comparable to the tool changer on a machine. It adds
two advantages to the CAM system. First, the Tool Crib can be loaded and
saved before you create machining features. When the feature operations
are created, the system automatically selects the appropriate tool from
the Tool Crib. Second, when selecting tools for feature operations,
the tool crib shows all tools that are currently defined. By having the
tools already defined, you can eliminate the need to search the Tool Library.
Tip: To learn about all the functionality available in the Tool Library, see the Tool Library Functionality topic.
When tools are created in the Tool dialog of a CAM wizard that
are not pre-loaded into the Tool Crib, they are automatically added.
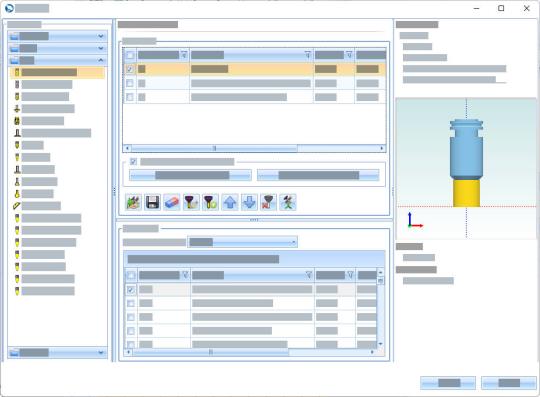
Tool Crib Structure
Tool Types
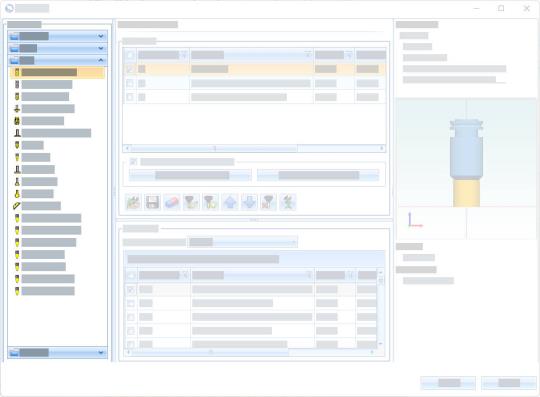
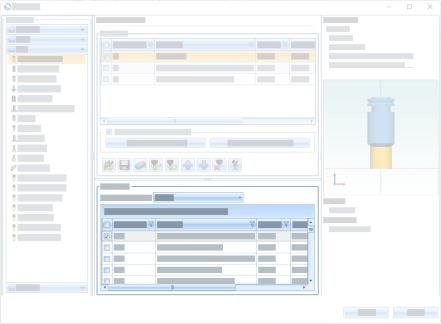
The left side of the dialog contains the All Tools list and the tools are grouped by Tool Category: Drill, Mill, Lathe, Laser, Plasma, or Waterjet. When a tool is selected from a tool category on the left, all pre-loaded tools for that tool type are displayed in the Tool Crib group, and the Tool Library group under that.
Note: When the Tool Crib is accessed by clicking Tool Crib from a CAM Wizard Tool dialog box, the list automatically shows only the available tools for that operation type.
Tool Library
| Library Selection | Available tools in the Selected Library |
|
|
It is important to note, this section is not the tool crib, which contains all the tools assigned for use in the job, but a window view into the Tool Library itself. To assign tools to the job, select the tool type to see which tools of those type are available in the library. You can then drag and drop those tools into the above Tool Crib, or highlight them and click ![]() Add tools from library to move them into the crib.
Add tools from library to move them into the crib.
Tool Crib
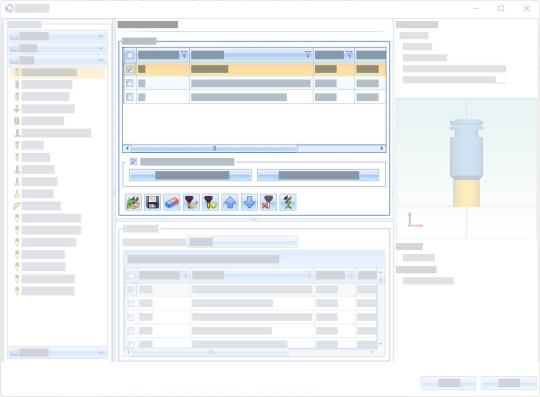
This area contains all tools assigned to the job. You can select a tool in the crib to modify it, create new tools, and even add those new tools to the Tool Library.
Navigation
To access the Tool Crib, do one of the following:
- In the CAM Tree, under
 Job
Folder (Milling Job, or Turning Job), right-click
Job
Folder (Milling Job, or Turning Job), right-click  Milling Tools or
  Turning Tools, and click Tool
Crib. For Mill Turn jobs, view the Mill
Turn Tool Crib.
Turning Tools, and click Tool
Crib. For Mill Turn jobs, view the Mill
Turn Tool Crib.
Use this method to view all the tools currently loaded in the Tool Crib.
- In any CAM Wizard Tool dialog box, click Tool Crib.
Note: This method lists only the tools that are available for the selected operation type. For example, clicking Tool Crib from a Profile operation the Tool page lists end mills, and not threading tools.
The Dialog Parameters
When using the Tool Crib, select a category on the left side of the dialog, and then select a tool type under that category. You can also click All Tools. The available tools are displayed in the Tool Parameters list on the right side. The Tool Parameters list shows the parameters of each tool as defined in the Tool Library.
Note: When opening the from a job or operations, a filtered version of the Tool Library is opened which only displays Tool Categories applicable to the current job or operation.
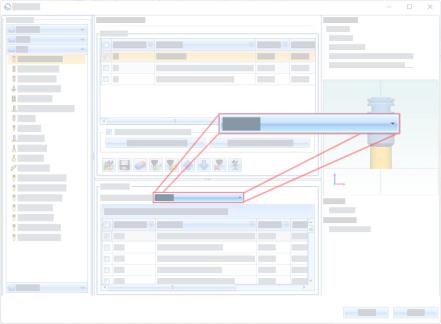
Tool Parameters
- Use automatic
tool numbering - The default setting for this option can be controlled in the Settings Dialog.
 - Select this check
box to allow the system to number the tools in the order they are added to the Tool Crib. This option ignores the tool numbers assigned in
the Tool Library.
- Select this check
box to allow the system to number the tools in the order they are added to the Tool Crib. This option ignores the tool numbers assigned in
the Tool Library.- Renumbering By Usage - Click this option to update tool numbers by the order they are used in the operations.
- Renumbering By Tool Crib - Click this option to update the tool numbers by the order in which they were added to the tool crib.
- Renumbering By Usage - Click this option to update tool numbers by the order they are used in the operations.
![]() - Click to clear this
check box to use the number assigned to the tool in Tool Library by default. To update the tool number used in the job:
- Click to clear this
check box to use the number assigned to the tool in Tool Library by default. To update the tool number used in the job:
- Click the desired row twice (two slow clicks) - The tool number
box becomes available for you to enter a new number.
- Double-click the desired row (two quick clicks) - The Edit Tool Parameters dialog appears. This allows you to edit the Tool Number, or any other values associated with the tool.
Important: Renumbering tools from this location does not change the tool number stored in the Tool Library.
Warning: The software can't eliminate duplicate tool numbers when renumbering tools manually, it is your responsibility. You must confirm that all tools are using the desired tool number before posting the final NC program.
-
 Import
- displays the Open dialog box for you to navigate to and load a previously
saved Tool Crib file (.mtcribs), or to the previously exported MachiningCloud export file (.zip). Using a Tool Crib file, your tool crib will automatically open in the Tool Crib. When using the MachiningCloud .zip file, selecting and opening the file will launch the MachiningCloud Import dialog.
Import
- displays the Open dialog box for you to navigate to and load a previously
saved Tool Crib file (.mtcribs), or to the previously exported MachiningCloud export file (.zip). Using a Tool Crib file, your tool crib will automatically open in the Tool Crib. When using the MachiningCloud .zip file, selecting and opening the file will launch the MachiningCloud Import dialog. -
 Save
- displays the Save As dialog box for you to create and save all current
tool information from the Tool Crib in a .mtcribs file.
Save
- displays the Save As dialog box for you to create and save all current
tool information from the Tool Crib in a .mtcribs file. -
 Delete
:
Delete
: - Tool is assigned to one or more operations - The tool is currently used by at least one operation. It cannot be deleted from Tool Crib! Click OK. Assign another tool to the applicable operations if necessary.
- Tool is not assigned to any operations - Are you sure you want to delete this tool?
- Yes - The tool is removed from the Tool Crib.
- No - The tool is left in the Tool Crib.
- Yes - The tool is removed from the Tool Crib.
- Tool is assigned to one or more operations - The tool is currently used by at least one operation. It cannot be deleted from Tool Crib! Click OK. Assign another tool to the applicable operations if necessary.
-
 Modify - opens the values of the selected tool in the Edit Tool Parameters dialog allowing you to edit all tool values, creating a manual tool.
 - OK - saves the edited tool values.
- Cancel - discards the edited tool values.
- OK - saves the edited tool values.
-
 Create - opens the Edit Tool Parameters dialog allowing you to create a new tool in the Tool Crib. This can then be added to the Tool Library.
 - OK - saves the new tool to the Tool Crib.
- Cancel - discards the new tool.
- OK - saves the new tool to the Tool Crib.
-
 Add
tools from library - adds the highlighted tools from The Tool Library section into the Tool Crib.
Add
tools from library - adds the highlighted tools from The Tool Library section into the Tool Crib. -
 Add tools to library - adds the highlighted tools from the Tool Crib into the Tool Library.
 -
 Remove all unused tools - eliminates all tools currently in the Tool Crib that have not yet been assigned to an operation.
 -
 Merge - allows you to add previously saved tool cribs or machining cloud jobs to the current Tool Crib.
Warning: Tool deletion and modification is finalized once you click OK. Canceling out of the Tool Crib after deleting or modifying a tool does not return the tool to the Tool Crib or return it to its previous values.
Note: Adding custom geometry to a tool must be done in the Tool Library.