You are viewing features found in an older version of BobCAM for Solidworks. The latest version is V9.
Click Here to the view What’s New in BobCAM for Solidworks V9.
The New BobCAM for SOLIDWORKS™ CNC CAM Programming Software
In this latest version of BobCAM for SOLIDWORKS™ Gold Partner CAM solution, we’ve packed more features, modules, and all around system improvements than ever before. We’ve added two completely new modules, Mill Turn and BobART, and made numerous system improvements including better surfacing toolpaths, smarter hole making capabilities, more tool types, improved simulation, and more. With revamped mill drilling, the addition of custom tools, tabbing for profiling, and wrapped/4-axis toolpath enhancements, this is the most versatile version of BobCAM for SOLIDWORKS™ yet.
The New Features of V5 CAM Software for CNC Programming
New BobART Module
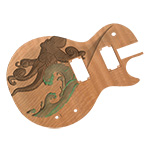 The powerful artistic modeling module, BobART, is now available directly inside of SOLIDWORKS™ with the BobCAM for SOLIDWORKS™ V5 product. From engraving customer logos, creating raised or sunken text, all the way to sculpting and texturing, creating artistic models has never been easier inside of SOLIDWORKS™. Use all of the powerful machining features available in BobCAM for SOLIDWORKS™ on your BobART models to create unique parts and machine them quickly and efficiently.
New Mill Turn Module
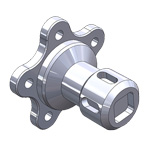 BobCAM for SOLIDWORKS™ V5 marks the release of a brand new module for mill turn machining. Mill Turn may also be called turn milling, multitasking, or it can refer to a lathe equipped with live tooling (a turret that can drive milling tools). Support is provided for all types of mill turn machines, including machines with Y axis capabilities as well as multiaxis machines that include a milling spindle. BobCAM for SOLIDWORKS™ can create programs for most available mill turn machine configurations from single spindle/single turret to multiple spindle/multiple turret machines.
IMPROVED CNC MILL HOLE DRILLING, TAPPING, & THREADING
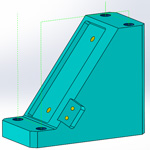 Drill Multiple Depths in a Single Feature – All mill hole drilling, tapping, and threading features now use Hole Groups, which allow you to define more than one drilling depth within a single machining feature. BobCAM for SOLIDWORKS™ automatically groups all holes that share the same diameter, top of feature, feature depth, and through or blind hole status, greatly minimizing the number of features needed to get the job done. Make your drilling features more efficient then ever before, edit faster, and gain greater control of the rapid movements between hole groups using the new Group Retracts. Watch Video
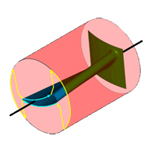 Advanced Retract Options – The new Group Retracts feature provides advanced options for defining the rapid movement between hole groups. You can now create planar, cylindrical, or spherical retract areas for all types of drilling scenarios. You can even create the rapid movement to follow the tool orientation or the shortest distance to keep your toolpath clean and efficient.
Drilling Types
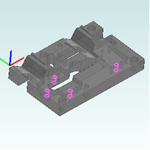 Standard Drilling – The default drilling type, standard drilling, handles 2.5 axis drilling for 3-axis machines, including face drilling for Mill Turn machines.
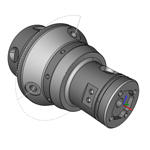 Multiaxis Drilling – – Multiaxis drilling is a completely new drilling type for Mill and Mill Turn jobs that handles all drilling for 4 or 5-axis machines with up to 5-axis positioning. This allows you to drill holes of the same diameter in any orientation within a single feature, eliminating the need to create index systems for each orientation.
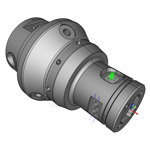 Cross Drilling – Cross drilling is a completely new drilling type that handles radial drilling for Mill Turn jobs. The software filters your geometry selections so you can easily recognize what holes can be drilled on a mill turn machine that does not have Y-axis capabilities.
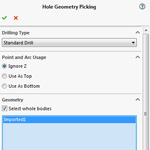 Hole Geometry Selection Manager – The new selection manager for all mill hole features makes it easy to define the drilling type and manage geometry selections. Calculation options are also provided to determine how the toolpath is calculated for different geometry types, allowing you to be more efficient in all selection scenarios.
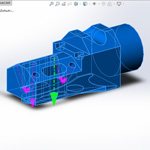 Smart Filtering of Geometry Selections – BobCAM for SOLIDWORKS™ automatically filters the geometry that you select in one of two ways. First, any duplicates that would result in drilling a hole twice are automatically removed. Second, BobCAM for SOLIDWORKS™ automatically filters your geometry selections based on the drilling type. When you confirm the selection, all holes that do not have the proper orientation for the selected drilling type are removed.
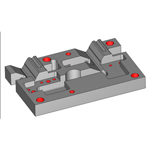 Use Hole Feature Recognition to Automatically Set Drilling Parameters – When you select cylindrical surfaces, CAD features, or Whole Bodies, the software automatically sets the diameter, top of feature, and feature depth values for you. Select cylindrical surfaces to speed up your Mill Hole feature creation. The recognition works for both hole drilling and counterbore hole drilling, depending on the feature type, greatly speeding up your programming time!
MILL ENHANCEMENTS
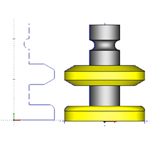 Custom Tool Shapes for Milling Tools – When creating milling tools, you can now assign geometry to define custom shaped tooling or form tools. You can even define the cutting and non-cutting portions making it easy to create tools that have more than one cutting area. Just create half of the profile to revolve, assign it to the tool, and get accurate program simulation for all your custom tooling. Watch Video
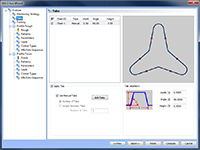 Tabbing for 2 Axis Profiling – The 2 Axis Wizard now contains a Tabs page, which allows for manual or automatic tab creation for profiling operations. You can allow the software to calculate evenly spaced tabs using a number or distance, or you can use manual tabs to select the tab locations directly from the chains in the workspace. Powerful tab parameters allow you to define the distance, height, and angle so you create each tab exactly the way you want it. A preview window displays right inside the Mill 2 Axis Wizard so you can easily confirm the proper tab locations. Watch Video
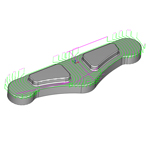 Linking Added to 2 Axis Advanced Pocket – The 2 Axis Advanced Pocket now contains a links page giving you more control over the linking parameters of the toolpath. Use a direct, S-link, or retract move between passes or groups with separate controls for each. You can even use the rapid retract for large gaps option to speed up the retract moves when there are large gaps along the cut.
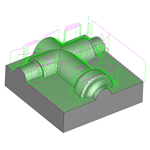 Perpendicular Stepover for Advanced Planar – The Advanced Planar operation is further optimized with a new solution for inconsistent finishing in steep areas. The perpendicular stepover option automatically switches the toolpath direction based on a threshold value to create an improved surface finish in steep areas. Program your jobs faster with this efficient toolpath to get better results and reduced cycle times. Watch Video
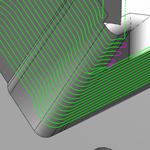 Round Corners for Advanced Planar – You can now smoothen the tool movement at sharp corners created in the Advanced Planar toolpath using round corners. Create a more consistent tool engagement and smoother transitions for your semi-finishing material removal.
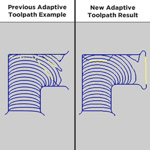 Improved Adaptive Toolpath – The Adaptive (high-speed machining) toolpath has been optimized to provide significantly faster calculation times as well as improved toolpath motion for the entry and exit moves for each cut. This applies to the Mill 2 Axis Advanced Pocket, Mill 3 Axis Advanced Rough, and Mill Multiaxis Roughing operations.
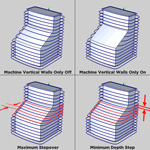 Enhanced Advanced Z Level Finish Operation – The Advanced Z Level Finish operation has been updated to make this toolpath perform even more efficiently for both vertical walls and shallow areas. You can now select to machine the vertical walls of the part by themselves, thus removing the toolpath from non-vertical areas of the model. The previous Adaptive Depth of Cut option now contains two user-defined parameters, Minimum Depth Step and Maximum Stepover, to give you more control over how many toolpath passes are added to improve the finish in shallow areas.
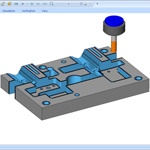 Side and Bottom Allowance – You can now specify the finishing allowance separately for the side (XY) and bottom (Z) in the 3 Axis Pro toolpath strategies. This gives you more control over the roughing toolpath, so you can minimize or even eliminate the semi-finishing process for your 3-axis operations.
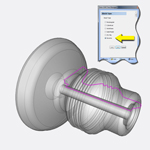 Revolve Stock Type – The Stock Wizard has been upgraded with a completely new stock creation method: Revolve. The revolve stock type, previously only available for lathe jobs, was added to all CAM Jobs to allow you to define stock geometry by revolving a wireframe chain.
LATHE ENHANCEMENTS
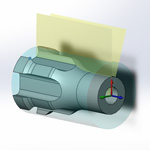 Improved Lathe Profile Detection – The Selection Manager for Turning features has been updated to include the ability to select the section planes (used to analyze the part profile) directly from geometry in the graphics area. The previous method was renamed to Enter Section Angles and the new method is called Pick Section Angles. Just select the Pick Section Angles option and select points or vertices from the model to automatically grab the correct section planes needed to properly analyze the part. The software even displays the selected section angles for your reference. The detection algorithm was also improved to provide better results for complicated part geometry.
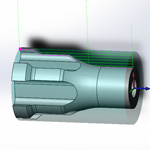 Reverse Direction for Lathe Features – The Reverse Direction command was added to the feature-level shortcut menu of Turning features. This allows you to override the cutting direction of the feature defined by the tool orientation.
MILL 4 & 5 AXIS ENHANCEMENTS
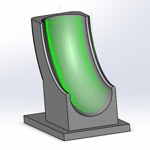 New Flowline Toolpath – The Multiaxis module now includes a Flowline toolpath that requires only a single surface selection, which allows you to get flowline-style toolpath quicker than ever before. The toolpath follows the U or V direction of the selected surface, so just select Direction 1 or Direction 2 to determine the direction of the toolpath.
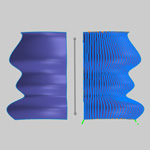 New Mirror Option for Multiaxis Toolpaths – The Mirror option was added to the Roughing tab of the Multiaxis Wizard to allow for mirroring of the toolpath across any axis. This is a great way to save time when creating finishing paths for symmetrical part geometry. Just turn on the mirror option, select an axis, and compute the toolpath. Mirror is available for all Multiaxis toolpaths except Multiaxis Roughing.
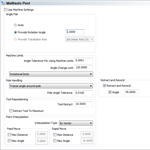 Optimized Multiaxis Posting Settings – The Multiaxis Posting page in the CAM Wizards has been reorganized to simplify the available parameters and make them clearer. The available Angle Pair and Pole Handling parameters are now properly updated based on the machine type (4-axis or 5-axis) and job.
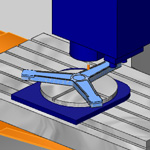 Support for 4 Axis Machines with Rotary Along Z – Full support was added for customers mounting a 4th axis to the table with the rotary around the Z-axis, without the need for custom post scripting. This is a common solution for machining parts that are larger than the work envelope of the machine. This provides the freedom to rotate the part into a region within the machine limits, or even machine completely around the part utilizing the rotary axis.
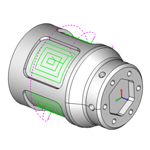 Wrapped Toolpath Improvements – The Wrapping Group for 4-axis wrapped toolpaths now allows for the selection of wrapped geometry. This eliminates the need to unwrap the geometry first. Now you can simply select it right from the solid model. You can also now use the current stock to set the wrapping diameter. New unwrap controls provide a tolerance value and an arc fit option for the background calculations. You can even select whether to show the toolpath as wrapped or flat, giving you a more accurate representation of wrapped toolpaths.
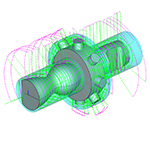 Trim to Stock for 4 Axis Rotary – The extremely popular operation stock, previously only available for the 3 Axis Pro module, is now available for the 4 Axis Rotary toolpath calculation. Trim your rotary toolpath to the stock or a custom .STL file to eliminate air cutting and fully optimize your rotary machining.
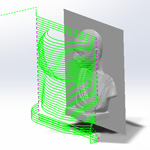 Gouge Checking – Retract Tool Along Tool Plane – A new gouge checking strategy moves the tool out of gouging using the tool plane or at a right angle to the tool axis. When gouges are detected, the software moves the tool away from the cutting direction at a right angle (into the tool plane).
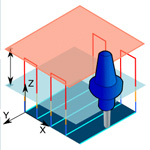 Retract to Incremental Clearance Area – You can now specify an incremental clearance area in addition to the previous absolute clearance height for Multiaxis features. The Links page now has Retract to Incremental Clearance Plane options that are defined in the Retracts dialog box. Make your programs more efficient by reducing the amount of clearance movement when it isn’t needed, without the need to change the standard clearance plane.
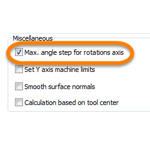 Maximum Angle Step for Rotation Axis – This parameter is used to limit the amount of machine movement on the rotary axes to avoid abrupt position changes that can harm the surface finish or tool. This parameter is found on the Utility page. Just type the maximum allowed angle, and the software automatically adds toolpath points to reduce these movements by the specified angle step.
GENERAL CAM ENHANCEMENTS
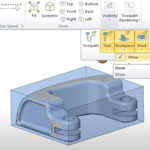 Workpiece Selection for Simulation – You can now assign workpiece geometry (the target part), to determine exactly what geometry displays in the program simulation window, regardless of how much geometry is visible in the workspace. You can assign workpiece geometry during the job setup or using the Workpiece in the CAM Tree. Streamline your simulation and simplify the process of comparing the cut stock to the workpiece for files with more than one model.
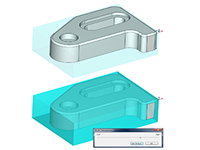 Set Default Stock Transparency – You now have the ability to set a default stock transparency for CAM Jobs. Just open the Stock Transparency dialog box, set the preferred level of transparency and click Set Default. All new files use the customized setting.
 New Simulation Interface – The simulation window now contains a ribbon bar style for a more modern look and feel in the simulation user interface. The buttons in the interface have been reorganized to more logical groupings of similar commands. This also includes a quick access toolbar for some of the most commonly used commands. Most buttons now contain text labels unlike the previous interface, and you can also minimize the ribbon bar to gain more viewing area in the simulation window.