 Parameters
Introduction
This topic explains the options found in the Parameters page of the Chamfer Mill operation found in the 2 Axis Wizard, and provides links to related topics.
 Parameters
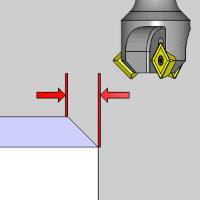
Tool Position
- Cutter Position - sets
the distance away from the center of the toolpath to begin the cut,
in order to use a chamfer tool that does not have flutes that extend
all the way to the tip.
- Small Diameter - sets
the width of the bottom of the chamfer tool when Flat Bottom Tool
is selected.
- Chamfer Angle - sets the
angle of the chamfer for Sharp Tool or Flat Bottom Tool.
-
 Sharp Tool
- is used if the chamfer tool has a sharp point.
Sharp Tool
- is used if the chamfer tool has a sharp point. -
 Flat Bottom
Tool - is used if the chamfer tool has a flat bottom; enables
the Small Diameter box.
Flat Bottom
Tool - is used if the chamfer tool has a flat bottom; enables
the Small Diameter box.
Depth
-
Chamfer
Depth - enables the Depth box to create the chamfer based on
its vertical depth.

- Depth - sets the vertical
depth of the chamfer.
- Pick Bottom - launches the Pick Bottom dialog in the Data Entry Manager to allow you to select geometry to set as the depth.
- OK - confirms the selection.
- Cancel - cancels the selection.
 (Delete) - removes
the highlighted item from the list.
(Delete) - removes
the highlighted item from the list.The list box will list the entity currently selected for the function. - Depth - sets the vertical
depth of the chamfer.
Note: The Pick Bottom option is only available when the Chamfer Mill is a part of a 2 Axis feature. When used in a hole feature, this option will not be available.
-
Chamfer
Length - enables the Length box to create the chamfer based
on the length of the chamfered.

- Length - sets the chamfer
length along the chamfered edge. edge.
- Length - sets the chamfer
length along the chamfered edge. edge.
-
Chamfer
Width - enables the Width box to create the chamfer based on
its horizontal width.
- Width - sets the horizontal chamfer width.
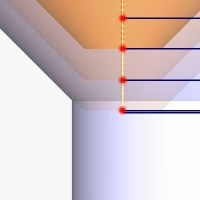
Method
-
Single Step
- the Total Depth value is processed in one pass.
-
Multiple Steps - the
Total Depth and Depth of Cut values are used to generate the number
of equal cuts used to process the profile operation. This enables
the following four options.
- Minimize Retracts
 -
With this check box cleared, before beginning the next pass, the
tool will rapid up to the Rapid Plane, rapid back down nearly
all the way to the last depth before engaging the material at
the Plunge Feedrate. The point it rapids down to will be equal
to the last depth, plus the amount being used for the features
Feed Plane value.
-
With this check box cleared, before beginning the next pass, the
tool will rapid up to the Rapid Plane, rapid back down nearly
all the way to the last depth before engaging the material at
the Plunge Feedrate. The point it rapids down to will be equal
to the last depth, plus the amount being used for the features
Feed Plane value.  - helps prevent the tool from lifting back up
to the rapid height before the next cut.
- helps prevent the tool from lifting back up
to the rapid height before the next cut. - Link with Rapid - will connect the passes with a feed move at depth.
- will connect the passes with a rapid move
at depth.
- Link with Rapid
|
Retracting |
Minimize Retract |
Link with Rapid |
|
|
|
|


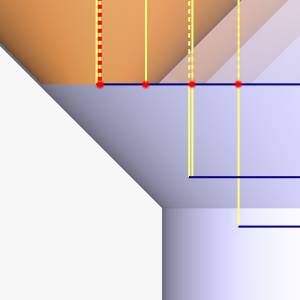
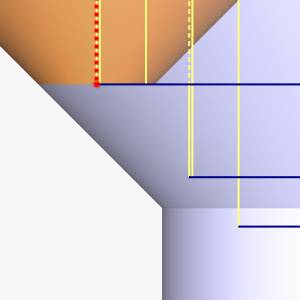
Tip: Normally, at the end of a pass, the tool retracts to the rapid plane, moves to the X, Y position of the next cut, rapids down to the feed plane, feeds to the proper depth, then starts the next pass. Minimize Retracts will help to eliminate moves back to the rapid plane between passes with a few exceptions: If the direct link intersects with any part of the toolpath chain, the toolpath will go to the rapid plane between passes. If the direct link is on the opposite side of the offset direction, the toolpath will go to the rapid plane between passes. When no offset direction is set by system or machine compensation, left side compensation is assumed by the system.
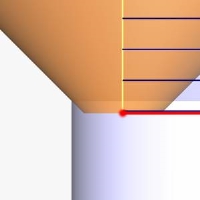
-
Depth of Cut - When using Multiple Steps, this is the depth at which all passes, prior to the final depth, will be taken.
Depth of Cut
Final Depth


- Stepover
-
will add side roughing steps to each Depth of Cut prior to
the final depth. The value entered will set the step over
amount which all steps, prior to the final step, will use.
Stepover
Final Step
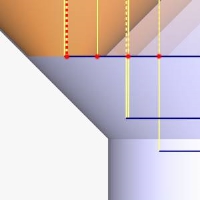
 - With
this check box cleared, no stepover will be used.
- With
this check box cleared, no stepover will be used.
-
Sort by - allows you to choose, in which order, the depths and steps are to be handled.
-
Passes - sets the order to complete all depths on the first step, before moving onto the next step.
-
Slices - sets the order to complete all the steps on the first depth, before moving onto the next depth.
Related Topics
Clicking Next> > takes
you to the next page of the Mill 2 Axis Wizard. To move to the corresponding
topic, click the appropriate link below.
The Profile Rough Leads
page
The Profile Finish Leads page
The Pocket Leads page
The Facing Leads page
The Chamfer Mill Leads page
The Corner Rounding Leads page
The Drag Knife Leads page