The Mill 2 Axis Wizard Machining Strategy
Introduction
This topic will describe the Machining Strategy page and the options found in it. This topic will also describe how to set up a machining strategy and provide a link to the next topic.
The Machining Strategy page
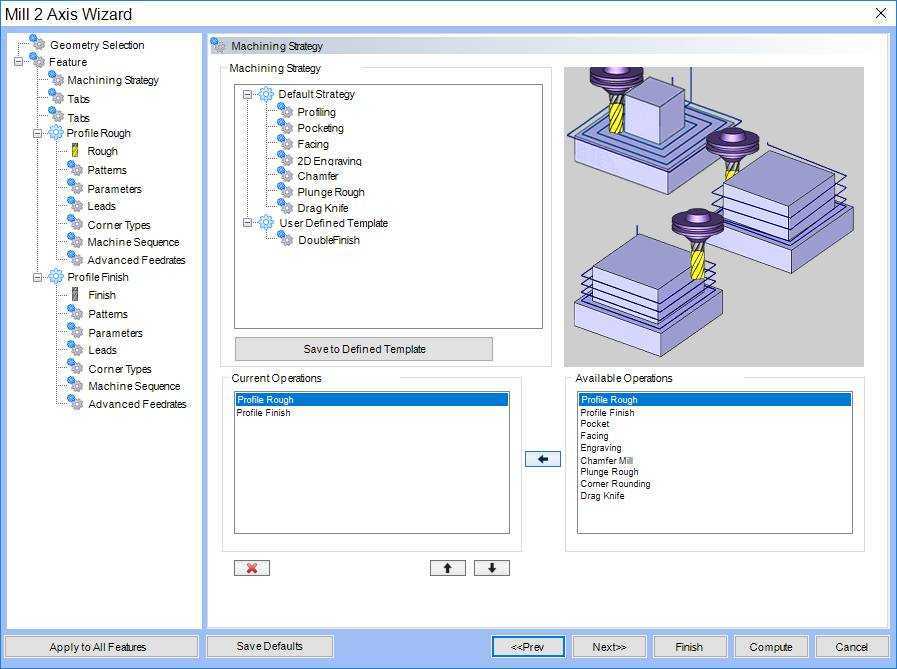
The third part of setting up any Wizard that utilizes it, is the Machining Strategy dialog box. The Machining Strategy contains Templates, Current Operations, and Available Operations. The Templates are predefined sets of operations (that also set the Cutting Conditions for drilling features). The Current Operations list displays the number and order of operations that are applied to the feature. The Current Operations are updated when you select a template and you can also add operations from the Available Operations list, which displays all available operations that can be added for the selected feature type. This topic describes how to use the Machining Strategy to define the number and order of operations created for the feature.
Defining the Machining Strategy
In the Machining Strategy dialog box, there are three groups: Templates, Current Operations, and Available Operations.
-
The Templates provide predefined groups of operations that can be applied to a feature. Select a template to populate the Current Operations list. (You can customize the DMS Defaults to define the default operations for each template.)
Important: When creating Hole or Tap features, the selected Template sets the Cutting Conditions for the feature operations. For this reason, the Template can't be changed when editing a feature. You can still modify the Current Operations, but the Template can't be changed after you click Finish or Compute the first time. When selecting multiple drill hole sizes for a Mill Hole feature, be sure to select the appropriate Template for each feature that is created in the tree on the left side of the Milling Wizard.
-
The Available Operations list displays all operations that exist for the selected feature type. After selecting a template, you can use the Available Operations to ad operations to the Current Operations.
-
Finally, you can reorder and/or remove operations from Current Operations to define all of the operations for the feature. (You can modify this list at any time, for example, when editing the feature.)
To learn more about modifying operations, view Customizing Operations.
When defining the machining strategy, create an order of operations that can be effectively applied to the selected feature geometry.
Machining Strategy Buttons
-
 (Add Operation)
- adds the selected Available Operations to Current Operations.
(Add Operation)
- adds the selected Available Operations to Current Operations. -
 (Delete Operations)
- removes the selected Current Operations from the list.
(Delete Operations)
- removes the selected Current Operations from the list. -
 (Move Up)
- moves the selected Current Operation up one level.
(Move Up)
- moves the selected Current Operation up one level. -
 (Move Down)
- moves the selected Current Operation down one level.
(Move Down)
- moves the selected Current Operation down one level.
Apply to All Features
The Apply to All Features button displays at the bottom of the dialog box. This allows you to apply the current machining strategy to all features in the wizard tree (when there is more than one, for example, when selecting more than one diameter hole for a drilling feature).
Save to Defined Template
In addition to altering the existing Strategies, you can also create your own with the Save to Defined Template option. To learn more, see the Defined Templates topic.
Next Topic
If you are creating tabs, you can click Next>> to go to the Tabs Settings. If no tabs are being used, click Next>> twice to go to The Posting Dialog Box.
The current operations that you selected are created and added to the tree on the left side of the Milling Wizard.