How to Change DNC Settings in NC Editor
In this document, we explain how you can change the DNC settings in the NC editor through a step by step process.
1. Make sure NC Editor is closed.
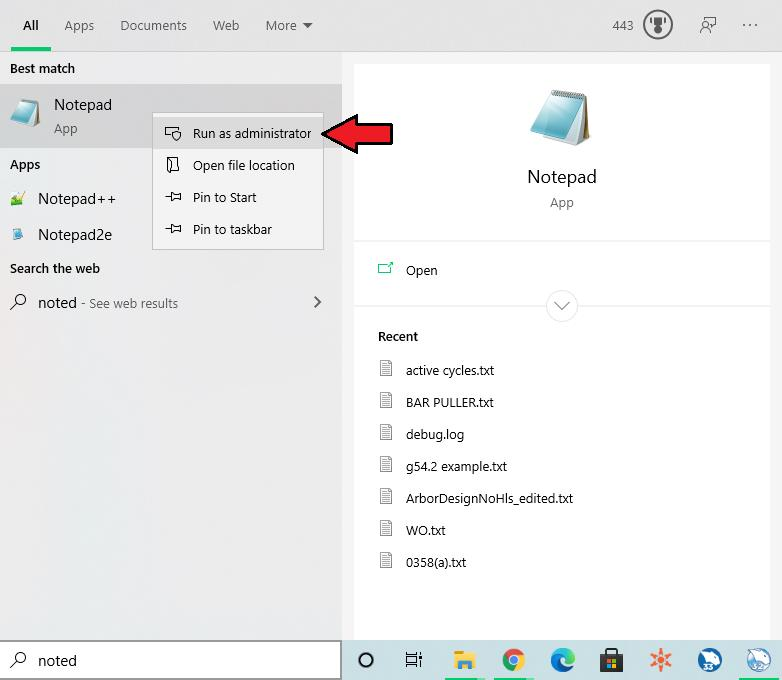
2. Open Notepad in administrator mode (pic. 1).
Pic. 1
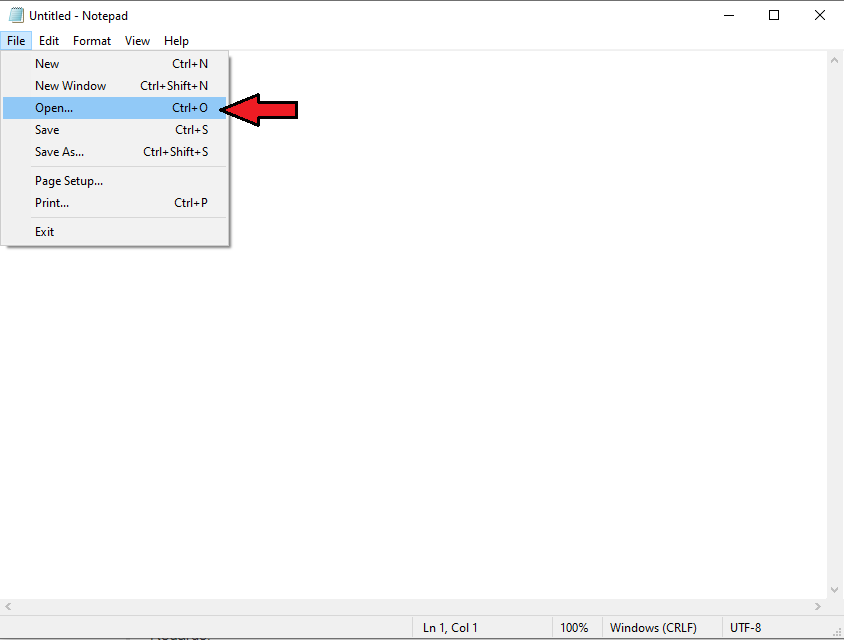
3. Click on open dialog (pic. 2).
Pic. 2
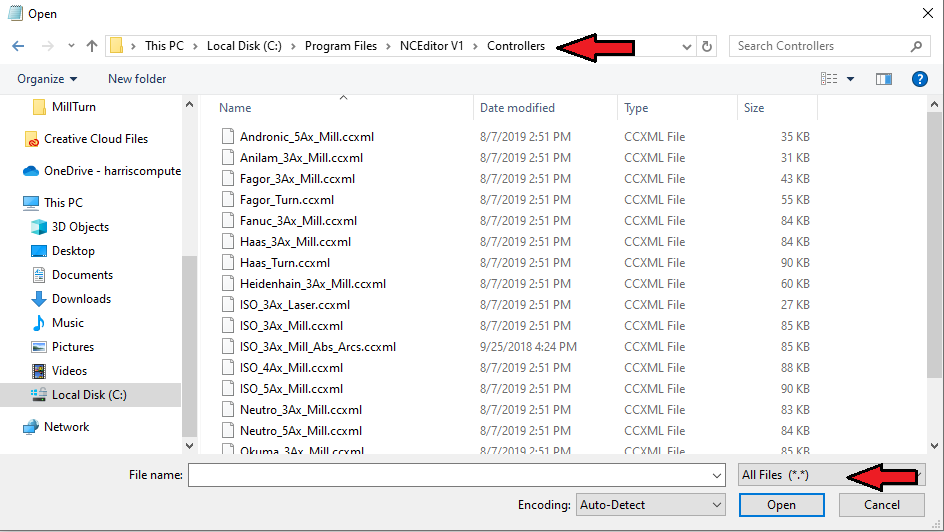
4. Go to C drive -> Program Files -> NCEditor V1 -> Controllers. Make sure All Files (*.*) is selected as the file type (pic. 3).
Pic. 3
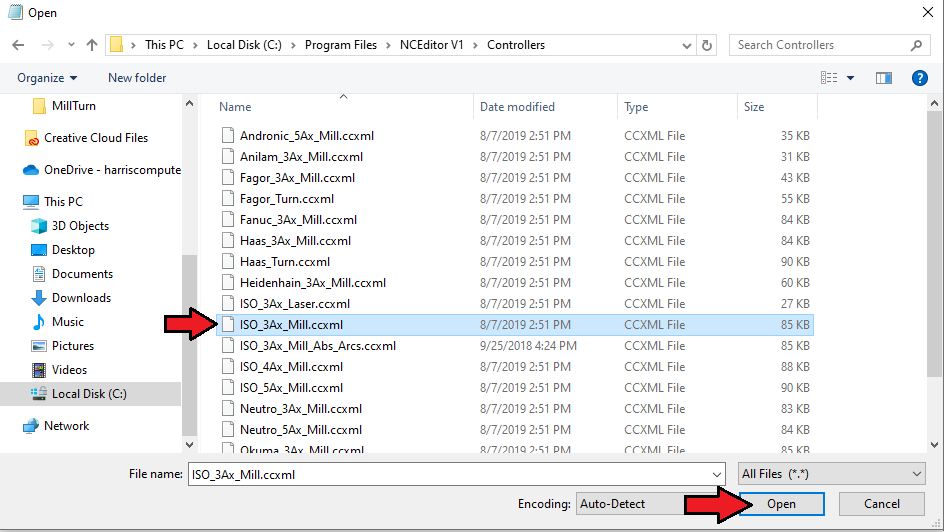
5. Select the controller template that you use in the NC editor for simulation and click open. For example, if you use ISO_3Ax_Mill in NC editor, open ISO_3Ax_Mill.ccxml in notepad (pic. 4).
Pic. 4
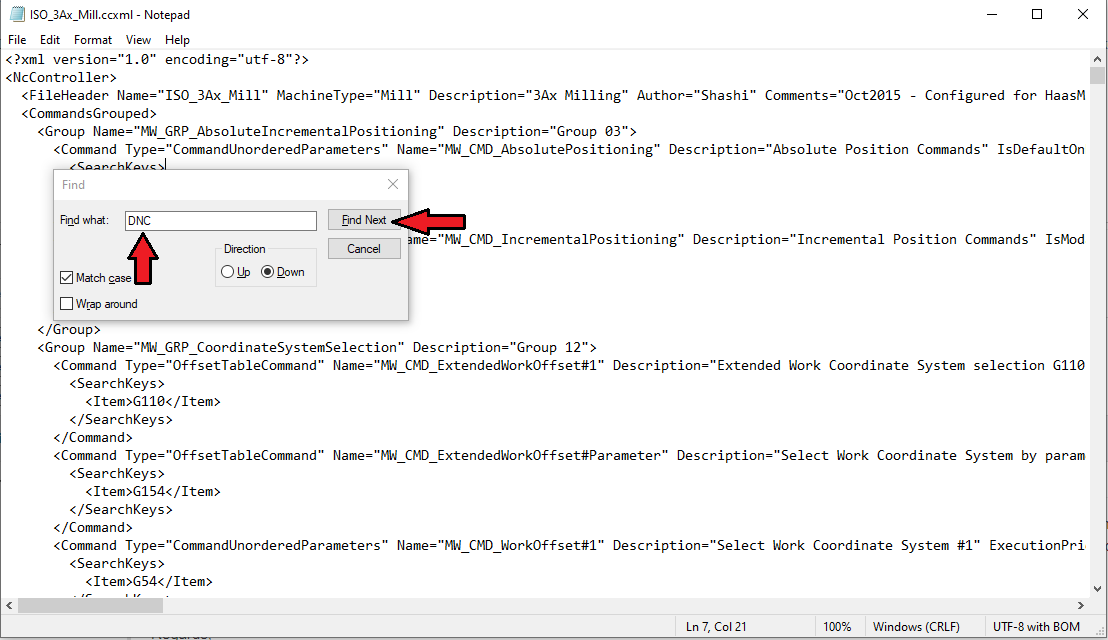
6. Search for DNC keyword (pic. 5).
Pic. 5
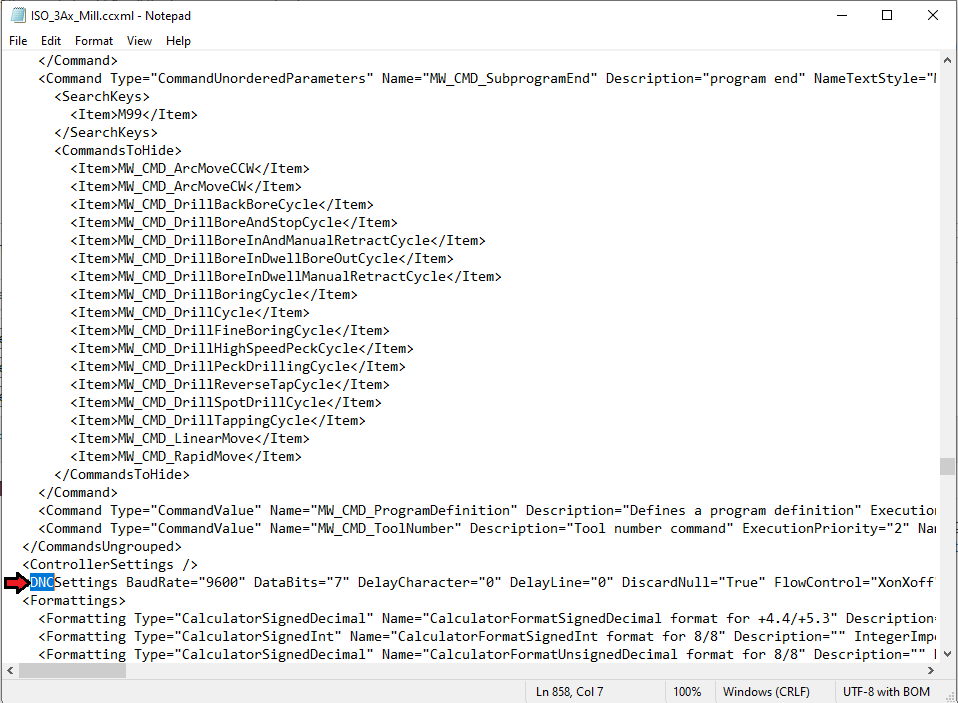
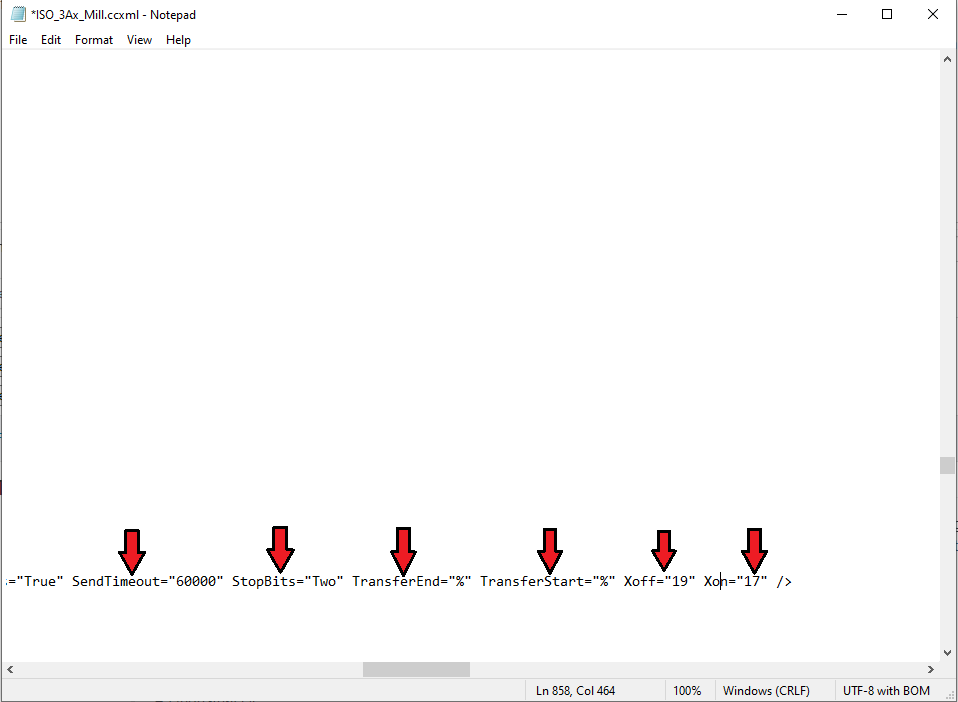
7. Scroll to the right on the DNCSettings line. All settings related to DNC file transfer including Xoff, Xon, Transfer Start, Transfer End, Send Timeout, etc. are there and can be modified (Pic. 6 & 7).
Pic. 6
Pic. 7
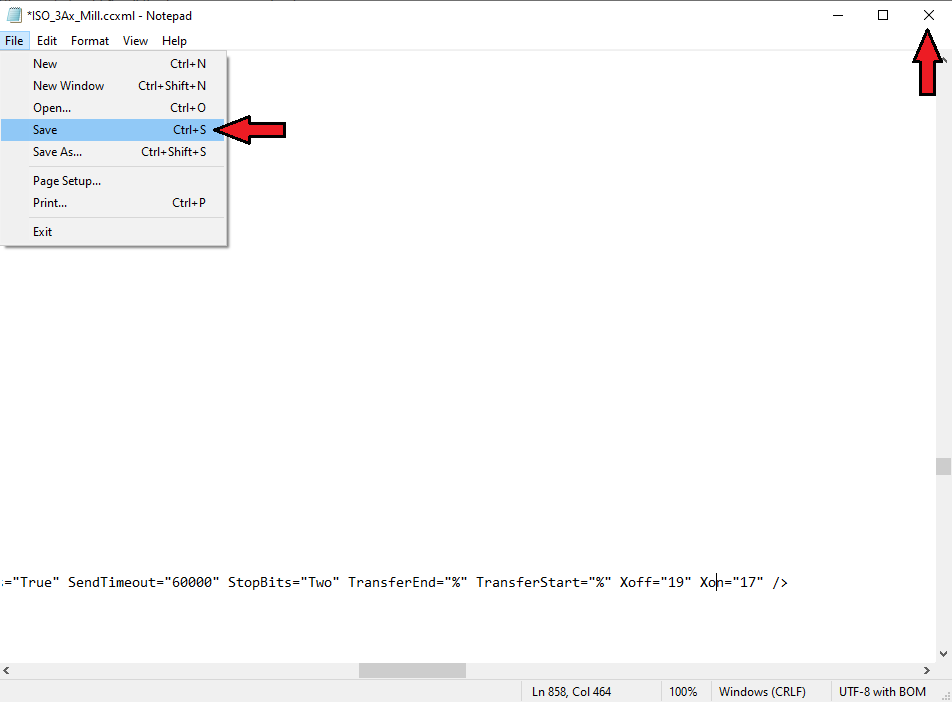
8. Save the controller template file and close it (Pic. 8).
Pic. 8
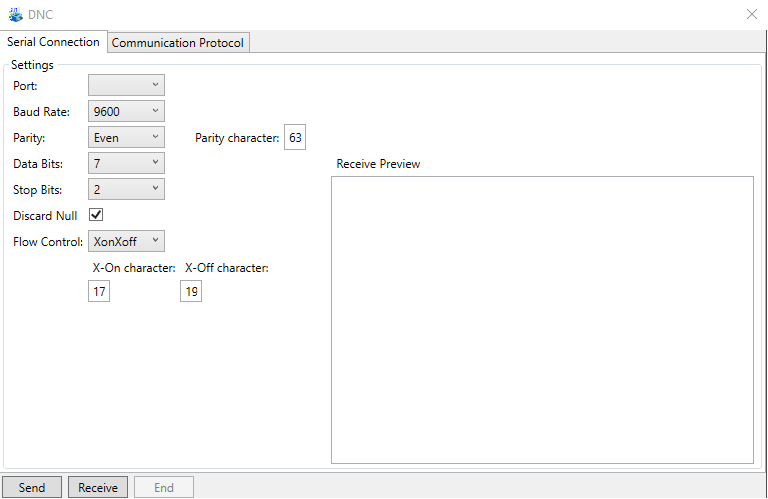
9. Restart the NC Editor and see the changes (pic. 9).
Pic. 9
If you need further assistance, please contact our support team at (727) 489 – 0003 or [email protected]