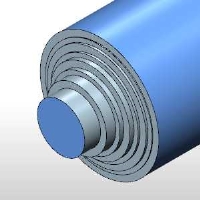
Express
Corner Slowdown
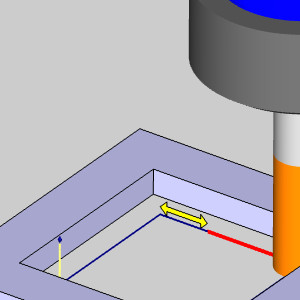
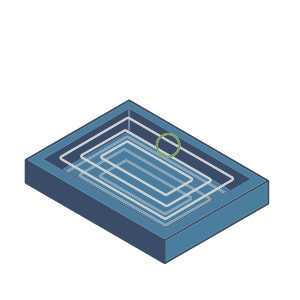
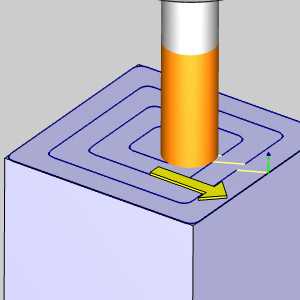
With the new Corner Slowdown option you can cut your feedrate to specified percentage when you approach corners. When programming speeds and feeds many things need to be taken into consideration, especially ensuring the tool does not engage too much material at the same time since this can easily break a tool. When moving around a part, additional stock is always encountered in the corners.
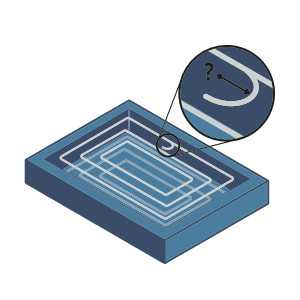
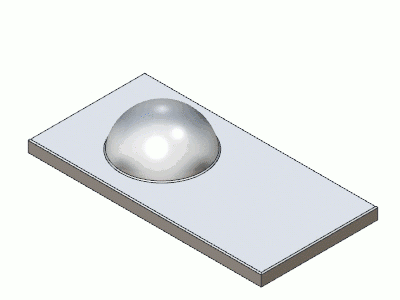
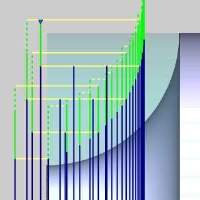
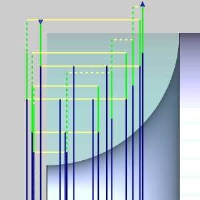
Notice how much additional material this tool engages in the corner. While you want to remove material as quickly as possible, scenarios like this have to be accounted for, and until now, that meant having to slow the speed on the rest of the path as well. Now, with the new Corner Slowdown feature, simply specify how close to get before the corner, and the percentage to slow the feedrate down to and you're done!
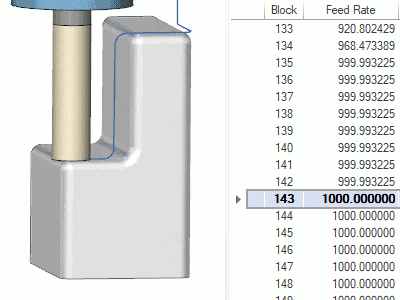
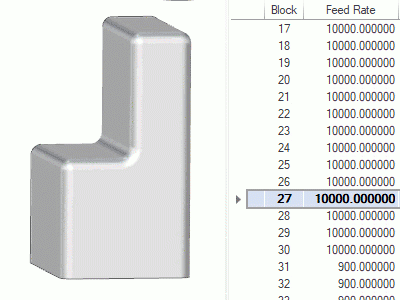
The toolpath is broken and the feedrate is dropped by the specified percentage.
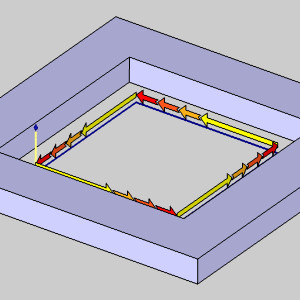
This feature will even allow you to divide the specified distance into a number of segments so the feedrate gradually drops to the specified feedrate percentage! Now, you can finally set your speeds as fast as you can, and handle the corners just how you need them to be.
3 Axis Standard/3 Axis Pro
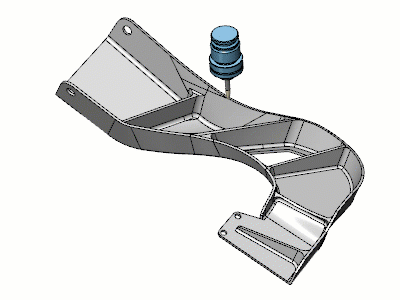
Advanced Rough Operation
Remove Corner Peg Options
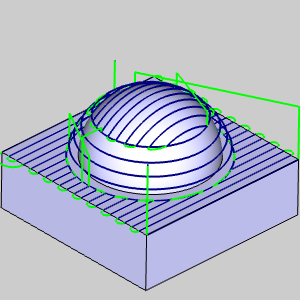
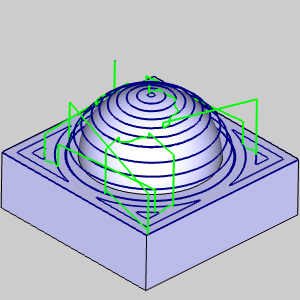
New Smoothing options in the Options page of the Advanced Rough give you a couple new ways to remove corner pegs. Nice big stepovers are great for removing a lot of material fast, but if they get too big, you have an issue with corner pegs. Luckily, the Remove Corner Pegs option creates extra moves in the corners to eliminate these. In the images below, you can see the difference Remove Corner Pegs can make.
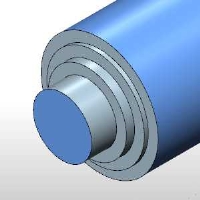
Remove Corner Pegs Off
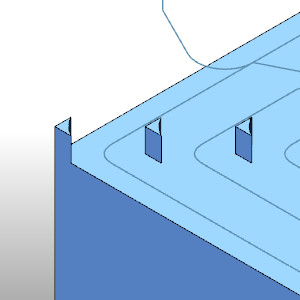
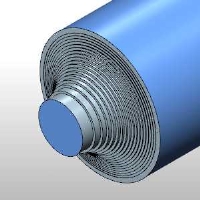
Remove Corner Pegs On
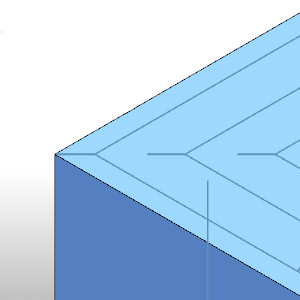
Although we have had this option for a while, there was only one method of creating the corner pegs, this was the Line-Arc-Line method. In this release, we are introducing another two methods of removing corner pegs. The Line, and Arc options provide you with a couple different ways of removing the corner pegs so you can use method that suits you best!
Use Lead-Out
The Advanced Rough now provides control over the Lead-Out option in the Leads page for all patterns but the Adaptive Roughing. Normally, when a wall was encountered on the last pass of the pattern, a lead-out was automatically applied. While this lead-out worked great in most cases, users have requested to have some control over the lead-out. In this version we now provide the controls to customize the size of this lead-out, or even to shut it off completely!
Lead-out Off
Lead-out On

Lead-out size
Wall Clearance
New option allows you to control the distance from the wall at which the tool is lowered back down to the full depth of cut. When using the adaptive roughing pattern, the tool lifts to the link clearance height used and then lowers back down to make the next cut. In the past, there was no way to control how far away from walls the tool was when this occurred. Normally the distance that was used automatically was fine, however, there are cases in which you may need to engage the tool a little further away, and this feature allows you to do just that!
Advanced Z Level Rough
Remove Air Cuts
A new option to help refine what the tool attempts to machine in areas with undercut while using Lollipops, Barrel Mills and T-Cutters. The Remove Air Cuts option can be used to eliminate portions of cut that no longer contact the machining surface. When we first introduced Undercuts for the Advanced Z Level operation, it was huge! Finally, you could utilize your Lollipops and T-Cutters to create undercuts with a 3 Axis toolpath! Since then, we've provided the ability to focus solely on the undercut areas, added Barrel Mill tool support, and now, you can even remove portions of the undercut toolpath that don't contact the surface! Some parts require multiple setups, each with a bit of undercutting to finish the part. In the past, you could create an undercut toolpath, but any areas that didn't contact the final surface could be wasted cuts. With this new option, simply use the Remove Air Cuts option and BobCAM will trim away the unnecessary portions of toolpath, saving you time and money!
 Remove Air Cuts
 Remove Air Cuts
Flatland Operation
Reverse Cutting Order
The Flatlands operation now has a Reverse Cutting Order method for the Offset pattern to allow you to flip from an inward cut to an outward cut. The Flatlands operation is a super handy operation that improved more and more over the years. However, users have requested a way to flip the order of the cuts so they can begin on the inside and work their way out, and in this release we're giving you just that! Select the Reverse Cutting Order check box, and you're done!
Reverse Cutting Order Off
Reverse Cutting Order On
Equidistant Operation
Up / Down Cutting Feedrates
The Equidistant operation has new options in the Advanced Feedrates page to allow you to adjust cutting feedrate based on the direction of cut. This option is designed to optimize the tool loading and allows you to specify different feed rates for upward and downward cutting directions. We all know speed is the name of the game, but we still have to be cautious about how much material we engaging in certain areas, and with how much of our tool is being engaged in the cut. With a single speed for all areas, you would definitely want to choose the safe speed and just deal with knowing you could be going quicker in certain areas. The good news is that this version allows you to set your feedrate for the whole operation, and have additional control on top of that to increase the feedrates in areas of up cutting, and slow them down in areas of down cutting. Your life just got a little easier!
Up Feedrate % - 150
Down Feedrate % - 50
Advanced Planar Operation
Trim Adaptive Passes
Over the years, the Advanced Planar operation has come a long way. In this version, we offer a way to trim off the unnecessary portions of the Adaptive stepover option to leave only what is needed. When we first offered the Adaptive stepover for the Advanced Planar, it was a huge help. Finally, areas of the part, whose steep angle caused large gaps in the toolpath, could be handled in a single operation by creating additional cuts on those areas. The only issue this caused, was the additional cuts were applied across the entire part. This meant if the surfaces that needed those additional cuts didn't go all the way across the part, there were now a bunch of unnecessary cuts on some of the other surfaces of the part. With the Trim Adaptive Passes option, the rest of those unnecessary cuts are trimmed off, leaving the additional cuts only where they were intended.
Trim adaptive passes
Trim adaptive passes
3 Axis Premium
Steep Shallow Operation
BobCAM is proud to introduce the new Steep Shallow operation. This new operation allows you to use two different toolpath styles in the same operation in order to handle the steep features and the shallow areas of the part with the cut styles that were made for them. In the past we offered toolpaths designed for steep areas, and toolpaths for shallow areas, and while we've added options to improve the cuts in the areas the other specializes in, never before have you been able to combine two different specialized toolpaths into a single operation. On top of all that, this toolpath brings some serious calculation speed to the table! While our Advanced Z Level Finish can calculate 8 times faster than our basic Z Level Finish operation, the new Steep Shallow operation is capable of calculations that are 78 times faster than our basic Z Level Finish. Bring some speed to your shop with the new Steep Shallow operation!
Z Level + Planar
Z Level + Equidistant
Deburring
The new Deburring operation allows you to automatically create toolpath to trim complex edges or apply chamfers/fillets to the edges of your parts. For all machined parts, sharp edges have to be dealt with. The burrs on sharp edges are a safety issue for the machinists working on them, and can even affect the functionality of the part. While taking care of these edges on basic 2-3 axis parts is fairly simple, selecting each individual edge can be time consuming! The new Deburring operation makes this vital step of the machining process a breeze with automatic feature detection, automatic linking, automatic lead in and even automatic collision detection! Simply select your tool, select your geometry, and let BobCAM for SolidWorks do the rest!
A part with this many edges would normally be a nightmare to deburr, but by just selecting the entire model, BobCAM V9 gives you all the toolpath you need! The Deburr operation will even do undercuts automatically when a capable tool is selected for the operation!
4 Axis Pro
Turnmill
The new Turnmill operation combines turning with milling tools to power through materials in record time! In many cases turning operations are applied to the stock to remove material as quickly as possible. The only issue with turning material down quickly is when the chips don't break properly and form large piles against the part called bird nests. These can be dangerous to the part finish, tool, and the machinist. While the can be handled with chip break movements, that means there are slight pauses, or even slight retracts periodically in the toolpath. By combining the efficiency of turning with the chip slinging power of an endmill, you can have the best of both world and power through material quicker than ever without having to worry.
Deburring
The new Deburring operation allows you to automatically create toolpath to trim complex edges or apply chamfers/fillets to the edges of your parts. For all machined parts, sharp edges have to be dealt with. The burrs on sharp edges are a safety issue for the machinists working on them, and can even affect the functionality of the part. While taking care of these edges on basic 2-3 axis parts is simple, creating a trimming path on complex multiaxis geometries can often take just as long as programming the entire part! The new Deburring operation makes this vital step of the machining process a breeze with automatic feature detection, automatic linking, automatic lead in and even automatic collision detection! Simply select your tool, select your geometry, and let BobCAM for SolidWorks do the rest!
A part with this many edges would normally be a nightmare to deburr, but by just selecting the entire model, BobCAM V9 gives you all the toolpath you need! The Deburr operation will even do undercuts automatically when a capable tool is selected for the operation!
Intermediate Steps
The 4 Axis Advanced Rough now offers an Intermediate Steps option so you can bring the tool back through the remaining stock to help eliminate staircases. The Intermediate Steps option for 3 Axis Advanced Rough was a huge help when it came out. You could program your depth as deep as you dared and set a certain number of intermediate steps in the operation. Then, when your depth left large steps against the model, the intermediate steps would come back and focus only on those steps. It was a huge time saver. Now, for the first time, you can have that same power in a 4th Axis operation!
Num. of Intermediate Step
Num. of Intermediate Step
Detect Stock Thicker Than
The new Detect Stock Thicker Than option for the Number of Intermediate Steps option in the 4 Axis Advanced Rough is designed to eliminate unnecessary intermediate steps. The only issue with the Intermediate Steps, is that not all steps left against the model are created equal. Many of them weren't thick enough to cause a problem on the finish pass, but intermediate steps took those additional passes everywhere. Now, with the Detect Stock Thicker Than option, you finally have a way to specify steps that are not thick enough to worry about, and those will be ignored by the intermediate steps.
Num. of Intermediate Step
..Stock Thicker Than 0.000
Num. of Intermediate Step
...Stock Thicker Than 0.0626
5 Axis Standard
3 to 5 Axis Conversion
BobCAM for SolidWorks now allows you to convert your 3 axis toolpaths to 5 axis in order to use short, rigid tools in areas that could not be reached with a 3 axis move without gouging. In machining tool deflection can spell disaster for part precision. One sure fire way to avoid that is with tools that are as short as possible, but this can be impossible in some areas unless you can tilt into those hard to reach spots with multiaxis movements. With 3 to 5 Axis Conversion, you can quickly and easily turn your standard Mill 3 Axis Pro operations into robust 5 axis solutions to keep the precision you need while keeping programming at record low times!
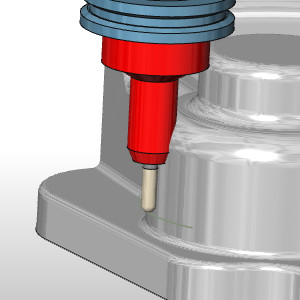
In the image to the left, you can see the arbor is colliding with the model and would not be able to cut that area if a 3 Axis gouge check was used.
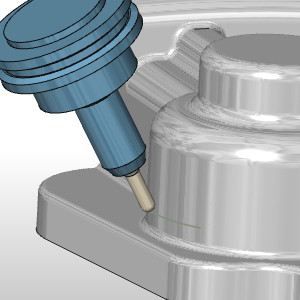
By switching to 5 Axis, we can use a gouge check and have it tilt the tool to avoid collisions!
Note: While the 3 to 5 Axis Conversion in Mill 5 Axis Premium allow you to utilize Barrel Tools, these are not available with Mill 5 Axis Standard.
5 Axis Pro
Multiaxis Finishing
The new multiaxis machining patterns bring the power and speed of the Multiaxis Roughing to finishing! The multiaxis roughing was a revolution in roughing multiaxis parts quickly and easily, but until now a similar solution for finishing did not exist. Generalized toolpath operations have all the settings you could possibly need so they can be utilized in a wide range of situations. These generalized toolpaths could be applied to the floors and walls of multiaxis parts, but with all those settings they were not designed for ease and simplicity. This meant it could take a bit of toying with all the various options to get the desired result. Now BobCAM for SolidWorks makes it quick and easy to get your floors and walls done with minimal input with these specialized toolpaths:
Multiaxis floor finishing
This path was designed to finish the floors of multiaxis parts. Pick your geometry and let us do the heavy lifting.
Multiaxis wall finishing
This path was designed to finish the walls of multiaxis parts. Pick your geometry and let us do the heavy lifting.
Note: While the Multiaxis finishing operations in Mill 5 Axis Premium allow you to utilize Barrel Tools, these are not available with Mill 5 Axis Pro.
Deburring
The new Deburring operation allows you to automatically create toolpath to trim complex edges or apply chamfers/fillets to the edges of your parts. For all machined parts, sharp edges have to be dealt with. The burrs on sharp edges are a safety issue for the machinists working on them, and can even affect the functionality of the part. While taking care of these edges on basic 2-3 axis parts is simple, creating a trimming path on complex multiaxis geometries can often take just as long as programming the entire part! The new Deburring operation makes this vital step of the machining process a breeze with automatic feature detection, automatic linking, automatic lead in and even automatic collision detection! Simply select your tool, select your geometry, and let BobCAM for SolidWorks do the rest!
Automatic arc - tool axis orientation
The Automatic arc feature has a new option in the Tool axis orientation drop down list when the lead type is set to Automatic Arc. The new option is called Automatic, and it performs automatic tilting to avoid collisions based on the tool components and geometry selected for gouge checking. When the lead that is created during a process is not collision free, and if the gouge check job is not already set to TILT AWAY, it is automatically set to TILT AWAY and the maximum tilt angle is set to 90 degrees. This can be extremely helpful since this new option modifies only the lead moves to provide a more complete toolpath.
Limits relative to surface normal
The new Limits relative to surface normal option gives you to flexibility to set tilting limits based on the normal of the surface instead of tying the tilting limits to the initial tool orientation. One area that can be a little tricky is setting up tilting strategies for your gouge checks. Figuring out how much tilting you may need along the way can seem a little daunting. With the new Limits relative to surface normal option, things get a lot easier! Since it’s easier to know a safe angle for the tool to use at any given position on a surface, just select the check box, and set the angle range and you will know exactly how the tool will be tilted relative to the surface normal.
Multiaxis Roughing
Undercuts Machining
Undercuts machining lets you machine areas that are hidden from the normal orientation of a predefined floor surface. While the Multiaxis Roughing allows you to conform to curved floor surfaces to help create ideal path, it still does not handle areas that are undercut from the surface normal. With the new Undercuts Machining option, you can finally handle these undercut areas. This option also allows you to specify one of three options:
- Do not Machine
- Machine
- Machine Only
Extend Undercuts
With the addition of the Undercuts Machining comes an option to give you the control you need when using undercuts: Extend Undercuts. Smoother is always better when creating good toolpath. With the Extend Undercuts option, you can define a distance beyond the necessary endpoint of the undercut portions of the part. This helps to ensure a smoother transition into the rest of the toolpath.
5 Axis Premium
Port Machining
The new Port Machining operation from BobCAM for SolidWorks allows you to machine complex interior geometries with ease and precision. This is definitely a must have for those in the industry! Applying toolpath to curved interior surfaces has always been possible, but it's also been a sure fire way to test your patience and lose a lose a lot of hair in the process. Spending hours jumping back and forth between tweaking parameters and double checking the simulation to find the necessary combination of settings and values is a thing of the past! This toolpath is specifically designed to handle these geometries with the bare minimum input from the user. Port machining allows you to select the tool, the machining surfaces, and a few check surfaces to get the results you had to struggle so hard for in the past.
Multiblade
The new Multiblade operation allows you to create toolpath on multibladed parts faster than ever before. There's a reason impellers and blisks are used to showcase the multiaxis ability of CAM systems: Multiblade parts can be found everywhere from vacuums to aircraft and have always been the most challenging 5 axis parts to cut. Having to control everything aspect of tool movement on such complex parts requires intimate knowledge of the possible settings and hours of programming. The Multiblade operation has four specific patterns that are specifically designed to handle a particular aspect of the part. Roughing, Blade finishing, Hub finishing, and fillet finishing are each designed to create optimum toolpath with very little input from the user. Use the Multiblade operation to flatten the learning curve and turn your hours of programming into minutes!
Auto 3+2 Roughing with Barrel Tools
BobCAM for SolidWorks now gives the Advanced Rough operation the power to automatically create index systems in order to tackle your roughing from multiple planes in the same operation in order to use short, rigid tools in areas that could not be reached with a 3 axis move without gouging. In machining tool deflection can spell disaster for part precision. One sure fire way to avoid that is with tools that are as short as possible, but this can be impossible in some areas unless you can tilt into those hard to reach spots with multiaxis movements. With Auto 3+2 Roughing, you can quickly and easily turn your standard Mill 3 Axis Advanced Rough operation into robust 5 axis solutions to keep the precision you need while keeping programming at record low times! Choose your level of control with:
- Automatic - allows you to do the same thing, but also allows you to specify a preferred direction of approach.
- Semi-automatic - allows you to set a search angle increment, a maximum amount of stock to leave, and a maximum tilt range, and let us do the rest.
- Manual - allows you to take complete control and specify each allowable direction of machining.
Multiaxis Finishing with Barrel Tools
The new multiaxis machining patterns bring the power and speed of the Multiaxis Roughing to finishing! The multiaxis roughing was a revolution in roughing multiaxis parts quickly and easily, but until now a similar solution for finishing did not exist. Generalized toolpath operations have all the settings you could possibly need so they can be utilized in a wide range of situations. These generalized toolpaths could be applied to the floors and walls of multiaxis parts, but with all those settings they were not designed for ease and simplicity. This meant it could take a bit of toying with all the various options to get the desired result. Now BobCAM for SolidWorks makes it quick and easy to get your floors and walls done with minimal input with these specialized toolpaths:
Multiaxis floor finishing
This path was designed to finish the floors of multiaxis parts. Pick your geometry and let us do the heavy lifting.
Multiaxis wall finishing
This path was designed to finish the walls of multiaxis parts. Pick your geometry and let us do the heavy lifting.