The CNC programming process is supposed to be simplified by CAD-CAM software, which is also supposed to streamline the workflow and open up the possibilities to keep CNC shops lean, competitive and profitable. For automating the CNC programming process, BobCAD-CAM delivers powerful Toolpaths and efficient G-Code programs in 10 simple steps. Here’s the process:
Step 1
Open up the Data-CAM Tree Manager.
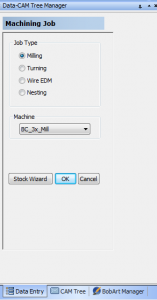
The CAM Tree manager allows the user to choose what type of Tree to open be it Mill, Lathe etc. The machine can be selected and the Stock Wizard can be launched to start off a job.
Step 2
Start a New CAM Job. Mill, Lathe, Wire EDM or Nesting.
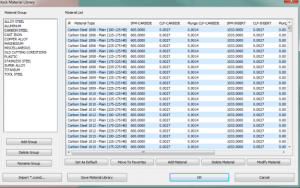
Step 3
Choose the part material.
BobCAD-CAM also provides a complete Material Library that can be customized by the user any time.
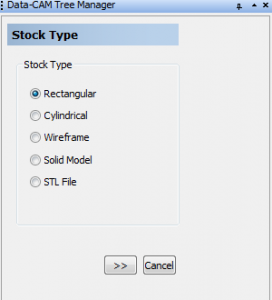
Step 4
Run the stock wizard and set the part zero.
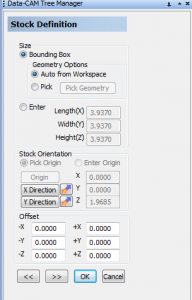
BobCAD-CAM software provides a Stock “Wizard” that will step the user through selecting stick and setting up any additional parameters for it including the orientation, any offsets and more.
Step 5
Apply the Toolpath.
BobCAD provides machining Wizards for all toolpath strategies to step the user through the process, streamlining everything and removing the guesswork from programming. Creating toolpath involves choosing the toolpath, editing the parameters and then computing everything to visually see the results. Dynamic Machining Strategies™ are added allowing the user to apply any number of applicable toolpath operations to a chosen CAD feature. This can save a tremendous amount of time as repetitive geometry selection is unnecessary. This also keeps the CAM Tree simple and clean.
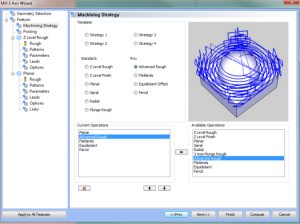
The machining wizards include tooling inputs and access to the customizable tool library, posting parameters, toolpath patterns, Leads, toolpath linking and more.
Step 6
Repeat steps 5 as needed.
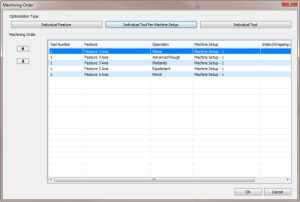
Step 7
Set the Machining Order.
BobCAD-CAM software allows the user to choose the machining order for the job. Thius can be by individual tool, individual tool by machine setup or by individual feature.
Step 8
Simulate the Job

Step 9
Post the G-Code.
BobCAD-CAM provides customizable post processors. Once the G-Code program is generated it can be sent to the built-in editor with the click of a button. Once opened in the editor the job can be saved.
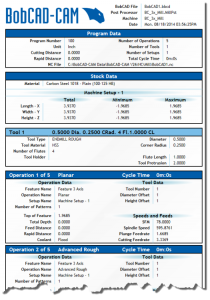
Step 10
Generate the Setup Sheets.
That is the simplicity of it. Powerful toolpaths and machining features, made easy to use. Contact BobCAD-CAM today for an easier methods of cnc programming at 877-262-2231 and information on how to add any of their CAD-CAM products to your CNC toolkit. You can also download a FREE demo HERE.