Questions? Call Us to speak with a CAD CAM Pro!
Introduction
We’re thrilled to introduce the remarkable enhancements in BobCAM for SOLIDWORKS V11. Our primary focus has been on making your experience smoother and more efficient, whether you’re handling simple tasks like version migration or trying to find the perfect options to tackle complex parts. Regardless of your expertise level – whether you’re a beginner, intermediate, or advanced user – there’s something truly valuable awaiting you in this latest version. Join us for our upcoming webinar on September 27th – we can’t wait to share these features with you!
The Experience
The new BobCAM for SOLIDWORKS V11 is designed to provide a smooth work flow, introduce shortcuts to get your work done quicker, and even provide an Advanced UI to give you the options you’ve always wanted to get your toolpath just the way you want it!
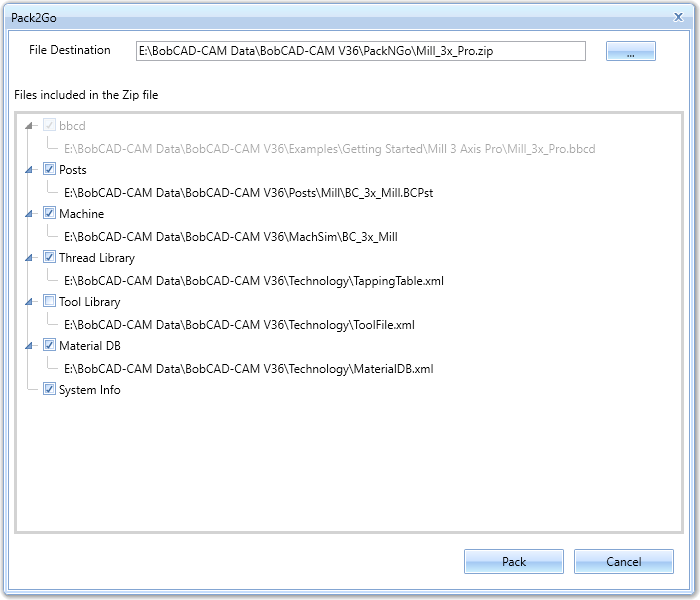
Our new migration utility makes moving to the latest versions, or a new workstation easier than ever. Keep all the settings you’re used to and all the data and libraries without having to manually copy over. And our support customers, and customers sharing files, will love the Pack2Go utility which automatically zips up your file with all associated machines, posts, and libraries, so the person receiving the file has everything they need to simulate and post without having to manually place the files in their appropriate place.
| Migration |
Pack2Go |
 |
 |
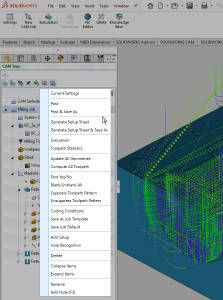
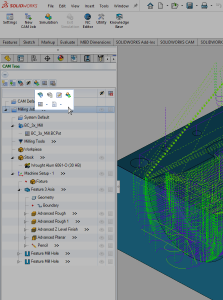
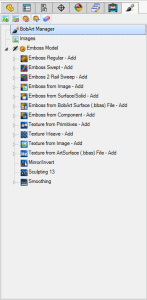
Once you start building your CAM Trees and BobART Trees start with a left-click and enjoy a little the brand new contextual toolbars! Contextual toolbars have always been a big part of the workflow in SOLIDWORKS, and now you’ll have those same handy contextual toolbars to put the most used items even closer!
| CAM Context Menu |
CAM Contextual Toolbar |
 |
 |
Test them out by adding a Note to the items in your job. If you haven’t used Notes before, it’s a great time to start! Not only are they great to add important information to your jobs, but now you can even output them in the code! The Advanced Rough and Advanced Z Level finish operations now allow you to calculate based on custom tool shape:
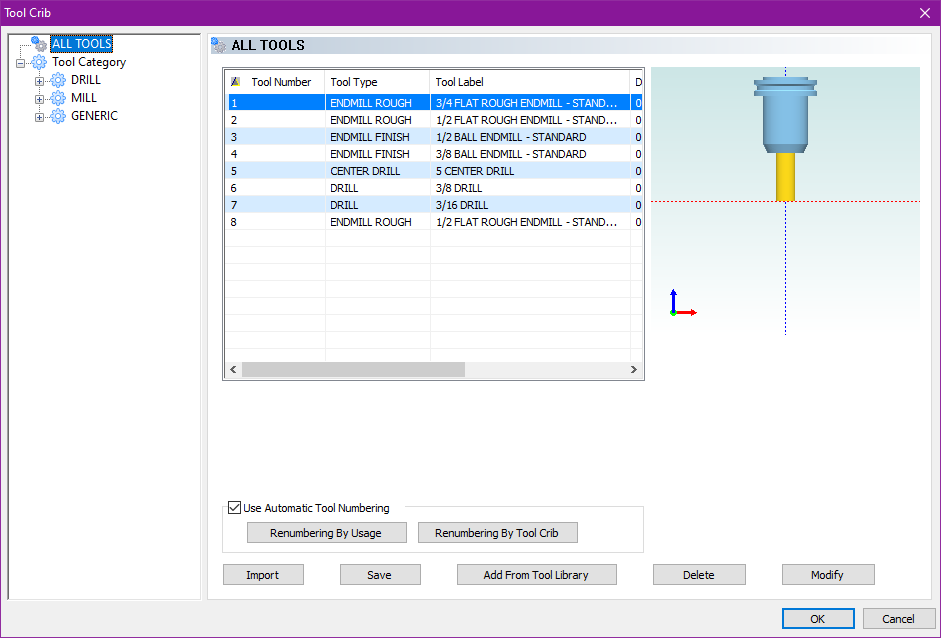
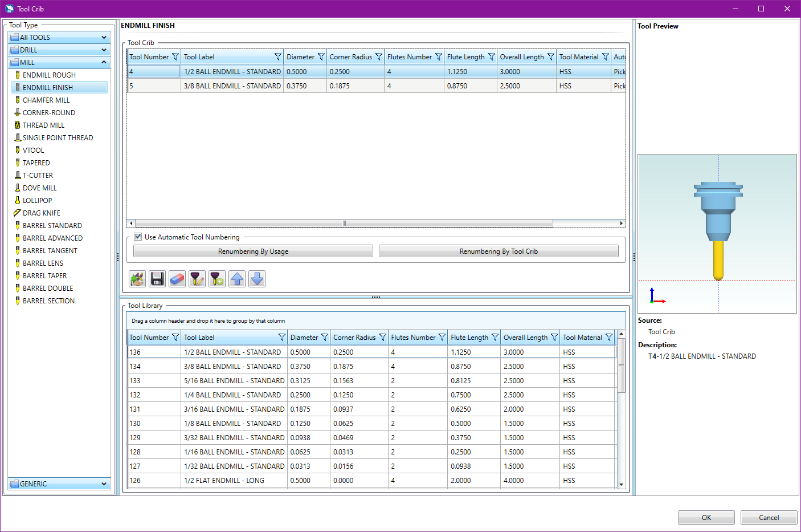
…and when you go to select that custom tool, you’ll get another big surprise from the new redesigned Tool Crib! Inside the Tool Crib you’ll notice the Tool Library is now seamlessly integrated within the same window, optimizing your workflow like never before. Select multiple tools and drag them effortlessly into the crib, and here’s the best part – you can now directly save tools from your Tool Crib straight into the Tool Library.
| Old Tool Crib |
New Tool Crib |
 |
 |
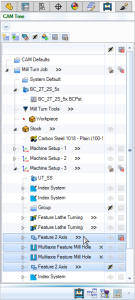
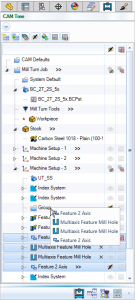
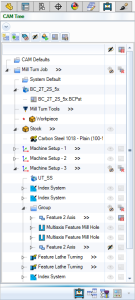
Multiple selection doesn’t stop at the Tool Crib. Select multiple items in your geometry picking lists, in your CAM Tree, Operation or Tool Tree, all those areas where multiple selection can save you ton of clicks!
| Select Multiple |
Move Multiple |
Done |
 |
 |
 |
Also, be sure to use the new Avoid contact point on tip option when you’re adding your deburring operations for peak efficiency and longer tool life.
| Off |
On |
 |
 |
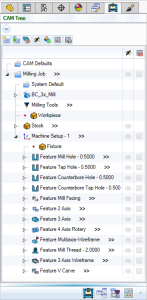
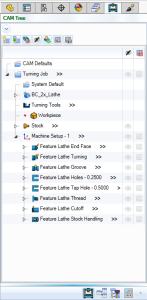
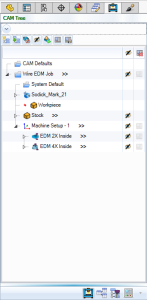
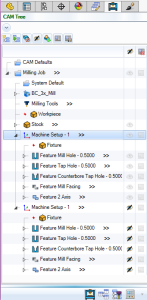
Once you get your first features you’ll notice each different feature type has a brand new icon!
| Milling Job |
Turning Job |
Wire EDM Job |
BobArt Job |
 |
 |
 |
 |
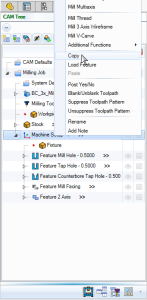
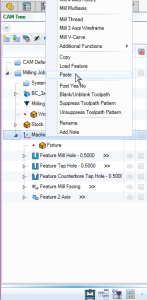
These will be a huge help with the visual organization of your trees. A quick glance and you’ll be able to differentiate your features with ease. Once you get your Machine Setup completed, you’ll be happy to know you can even copy the entire setup and paste it to recreate similar jobs in seconds, even between files!
| Copy Entire Machine Setups |
Paste Entire Machine Setups |
|
 |
 |
 |
Wrapping up the job, take a peak at your code and you’ll notice we now support helix output and 3D arcs to get you clean, accurate code in the fewest lines possible!
Along the way, our support customers know they can call anytime they hit a road block so we can get you back on your way! And when the issue goes beyond technical support and into a need for training, we have the best in the business! Train online one on one, get some hand delivered training in your own shop, or come down to Tampa Florida, get your training and enjoy the sights while your down! We’re here to help with what you need!
There’s plenty more in store for you in this release, but a few other biggies to mention:
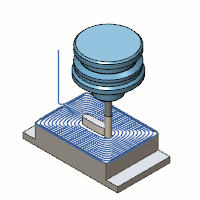
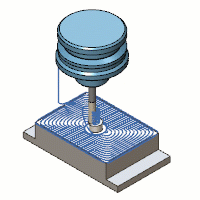
- Remove stock pillars :
The new Remove Stock Pillars option, for the Advanced Rough Adaptive pattern, allows you to finish the last of the stock on a given depth better than ever before. Here’s the magic: when you’re wrapping up stock removal at a specific depth, this ingenious feature leaves behind a precisely calculated cylinder of stock. This cylinder is then masterfully finished with a single spiral ramp motion. The result? A seamless elimination of adverse cutting conditions, including vibrations and heat generation. No more worries about whittling down stock to thin-walled islands – you’re in control of the process.
| Remove Stock Pillars Off |
Remove Stock Pillars On |
 |
 |
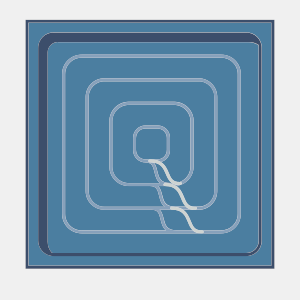
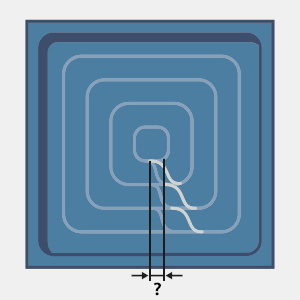
- Shift distance :
Say hello to the Shift Distance/Stepover % value – your key to achieving seamless pass transitions and impeccable results. This feature allows you to dictate that each pass begins a specific distance beyond the last. The result? An impeccably smooth finish appearance that eliminates any abruptness in link moves. But that’s not all – this innovation is a game-changer for your tools too. With gentler transitions, there’s less force on your tools, extending their lifespan and optimizing performance.
 |
 |
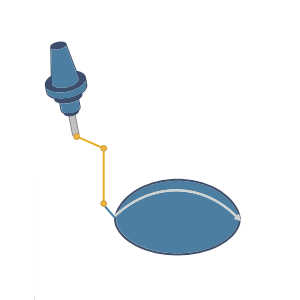
- Custom approach :
When entering a cut, you can now define the exact movements made to approach that cut. Rather than just selecting between approaching from clearance, rapid, feed, or other generic options, this gives you the ability to select a precise series of points that form the blueprint for your approach and retract motions. This isn’t just about options – it’s about crafting a bespoke path that aligns perfectly with your vision. No more compromises, no more limitations. With this simple feature, every cut becomes a masterpiece of precision and control.
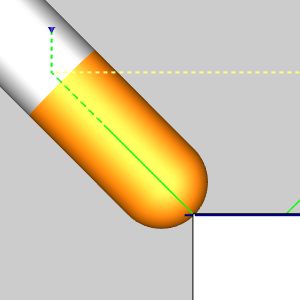
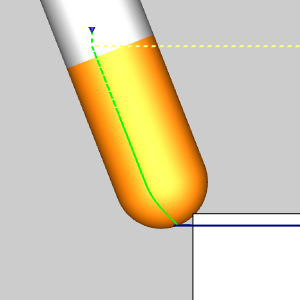
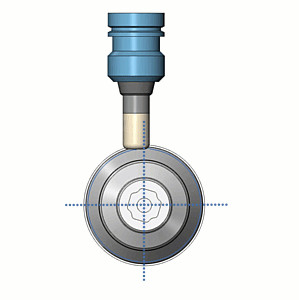
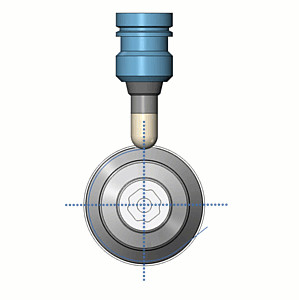
- Automatic tool contact point :
To get the most efficient cuts, it’s important to add an axial offset to create the proper tool engagement. In this version, this can be done automatically! No more guesswork or manual adjustments. With this innovation, you simply select the Cutting diameter, and the rest is taken care of. The correct axial offset is calculated based on your specific tool shape, ensuring your cuts are precisely aligned and as efficient as possible.
| Endmill |
Bullnose |
Ball endmill |
 |
 |
 |
- Support for unconnected surface finishing :
Say goodbye to unnecessary complexity and hello to unparalleled ease in programming. Now, you no longer need to create multiple operations for unconnected surfaces. Instead, you can effortlessly select multiple surfaces and utilize the same settings in the same operation, eliminating the need for excessive inter-operation linking. This is more than a feature – it’s a solution that simplifies your process and boosts your productivity.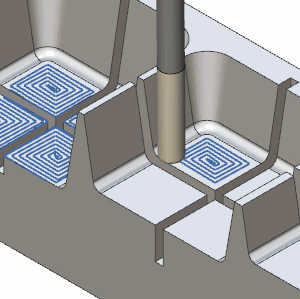
- Laser plasma waterjet – on/off :
Two new blocks have been added to intelligently call on/off codes for laser, plasma, and waterjet machines! Blocks 58 and 59 will output on/off codes respectively based on the next move in the code to ensure the on/off commands are timed properly, giving you the output you need.+
- Y-Axis facing :
A new pole handling option in the Multiaxis Post page helps better support Y-Axis facing for Mill Turn jobs and other multi-axis operations. The new Find head or table fixed position to stay in limits option can be found in the Pole Handling group to give you another solution in multi-axis situations.
Questions? Call Us to speak with a CAD CAM Pro!