Questions?
Call Us to speak with a CAD CAM Pro!
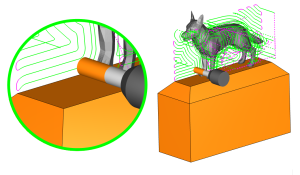
What is 5 Axis Roughing
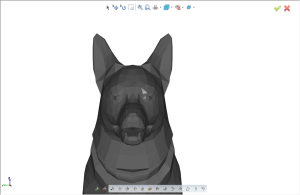
5 Axis Roughing is a machining strategy used on 5 Axis CNC machines to remove material around a workpiece efficiently. It involves using the two rotary axes to position so that the cutting tool has access to workpiece features being targeted with 3-axis cutting.
2D to 5 Axis, roughing is just part of the subtractive manufacturing process. Moving up to a 5 Axis process, gives you control to cut from any side of the part.
Why do they call 5 Axis Roughing 3 + 2 Roughing?
The term “3 + 2 roughing” is derived from the fact that the roughing operation is performed using 5-axis machining but with only 3-axis tool paths being used. The remaining two axes are used to orient the cutting tool to the correct angle, which is fixed for the entire roughing operation. This is known as 3+2 positioning, allowing for more efficient removal of material while maintaining accuracy and surface finish. The tool paths are programmed in a way that allows the cutting tool to access all necessary angles for roughing while still only using 3-axis movements.
5 Axis Roughing Old Way
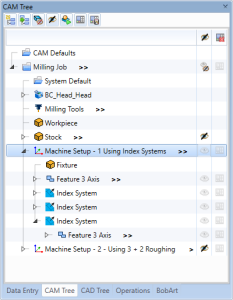
Creating multiple index systems and machining features, saving in-process stock used for the following index system as operation stock when roughing. Saving cycle time by reducing air cutting.
5 Axis Roughing New Way
Using the new tool axis control of Advanced Roughing, define index locations within the machine feature. This new toolpath track stock, limits cutting by flute length, auto repositions and will automate the way you approach roughing your 5-Axis parts.
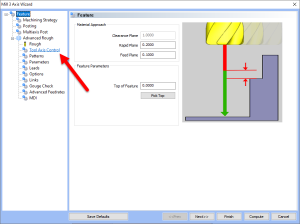
How to limit where you cuts in Z?
You can’t run all the way to the bottom in most cases, so what are the steps to limit where you cut in z? Using the depth options, you can pick a point to set the bottom of cutting. This is a Z limit and makes it easy to set the “bottom of cutting” for that operation.
Now that we know aren’t cutting deeper than we want, we can adjust our toolpath settings to better optimize the cut, setting like single-direction or bi-direction cutting, and other settings to adjust the way your tool comes into and step over in the work.
Why use intermediate steps when roughing in 5 Axis?
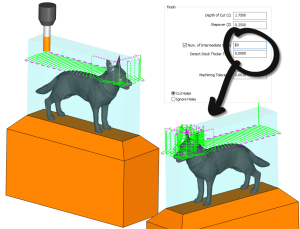
Depending on your depth of cut cutting ( DOC ) and your workpiece, there may be material left behind by larger more aggressive depths of cuts. Target this leftover material by using intermediate steps to target material left behind.
How to cut from a different side of the part?
Using index system(s), you can “clock ” your tool and workpiece aligning z to rough from different sides of the part. Establish an index system by selecting a surface or coordinate system.
5 Axis Roughing Fixture Avoidance
Using the New Advanced Allowance, users can easily ” avoid surfaces” through a check box, selection, and how much to avoid by value.
What resources are available for learning more about 5 Axis Roughing?

Many resources are available for learning more about programming and using a CNC router with a fourth axis. These include online tutorials, user forums, one-on-one, and professional training seminars. CAD CAM software providers often offer training and support to help users get up to speed quickly.
Free Weekly Training Click Here | 1 PM EDT
Over the last 3 years, over 200 new features were added to our CAD CAM software.
Join our weekly training to learn what’s New with BobCAD-CAM, BobCAM for SOLIDWORKS, and BobCAM for RHINO.
Are your machines and projects getting more complicated?
Call Us to speak with a CAD CAM Pro!