Questions? Call Us to speak with a CAD CAM Pro!
The elimination of lengthy rotary rewinds is possible with a couple simple tricks! While most machines don’t have any physical limitations on how many revolutions a rotary axis can make in a single direction, most controllers have a cap on the degrees of rotation that can be called in a program. This will usually necessitate a pause before or after an operation so the rotary axis can spin back, or ‘rewind’, enough full rotations to get to the correct rotary ‘location’. This document will explain how to update the code manually to eliminate unnecessary rotations, and how current technical support members can contact BobCAD-CAM to have the posts updated to do this automatically.
Rotary Positions and Controller Limits
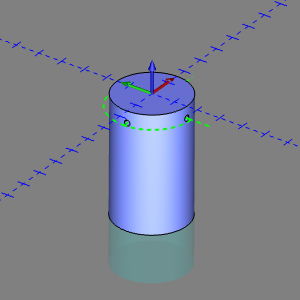
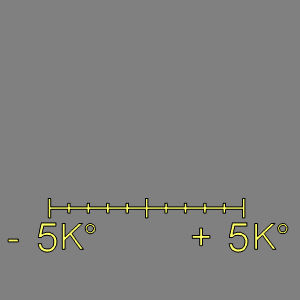
A position on a particular rotary axis will be the same regardless of how many rotations have been used to get there.
Position : 0°
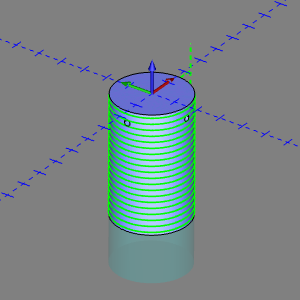
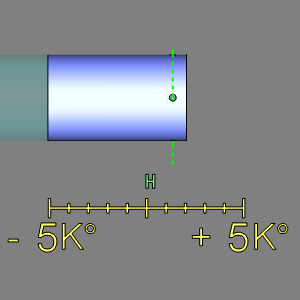
Position : 0°, 360°, 720°, 1080°, etc….
In the images above you can see a position on the rotary axis, marked in red in this case, will be the same no matter how many full 360° rotations you use to get there. However, since controllers can’t keep adding degrees of rotation to infinity, controllers have minimum and maximum rotation limits.
Case Example
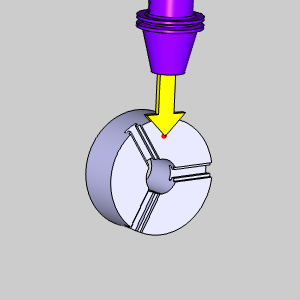
Feature A: Drill Positions
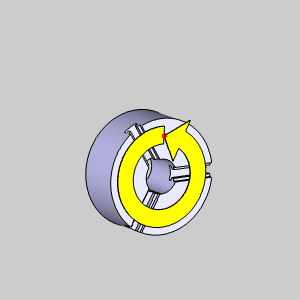
Feature B: Rotary Toolpath
For this example or drilling and rotary cuts will be done on the C Axis of a machine with a controller whose rotary limits are negative five thousand degrees to positive five thousand degrees, for a total of ten thousand degrees of rotation which we can visualize with the images below.
Total available rotations : 10,000°
Drilling : 360°
Rotary : 7,000°
Problem
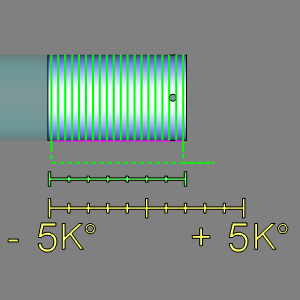
While all operations are possible on this controller, moving from the end of the drilling operations to the start of the rotary operations, and back to a starting position calls for large changes in the degrees in rotation. Notice in the images below how drastically the C Axis position has to change to begin the rotary toolpath.
What these images do not show, is the cuts stopping to allow the rotary axis to spin over thirteen full rotations to get into position. This is time that simply does not need to be spent. After all, the position is same regardless of how many complete rotations it takes to get there.
Solution A : Manual code update
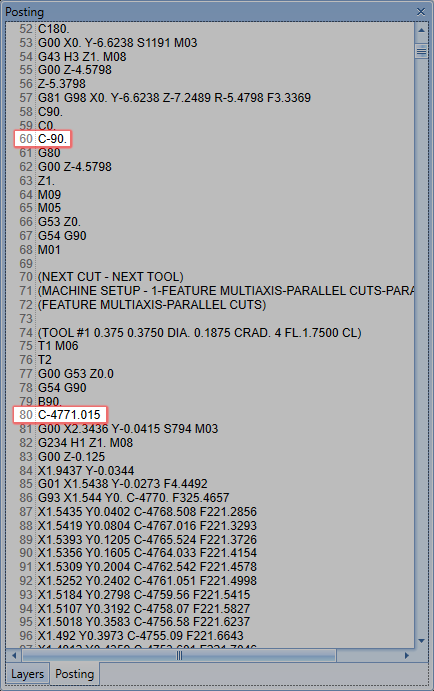
We can easily use G92 to shift the work coordinate systems so the commanded position becomes the current position in the active work system for a particular axis. In our case, the last C Axis called was C-90. The next position we want to get to is C-4771.015. Now, we could update the current position without moving the axis, but to make things easier, and to help eliminate the chances for mistakes on our end, we’ll first move to an increment of 0/360.
- Here’s how our code for our ended for our drilling operations:G81 G98 X0. Y-6.6238 Z-7.2489 R-5.4798 F3.3369
C90.
C0.
C-90.
G80
G00 Z-4.5798
Z1.To get to zero, add a line of code and enter G0 C0.G81 G98 X0. Y-6.6238 Z-7.2489 R-5.4798 F3.3369
C90.
C0.
C-90.
G80
G00 Z-4.5798
Z1.
G0 C0
- This moves our rotary into a position in a 0/360 increment.We now figure out how many full rotations to get close to our desired C -4771.015 position: -4,771.015 / 360 = -13.25281944
- We want full rotations, so the decimals will be dropped giving us -13 rotations to an increment of 0/360.To find the location to update, multiple -13 by 360 : -13 * 360 = -4,680.
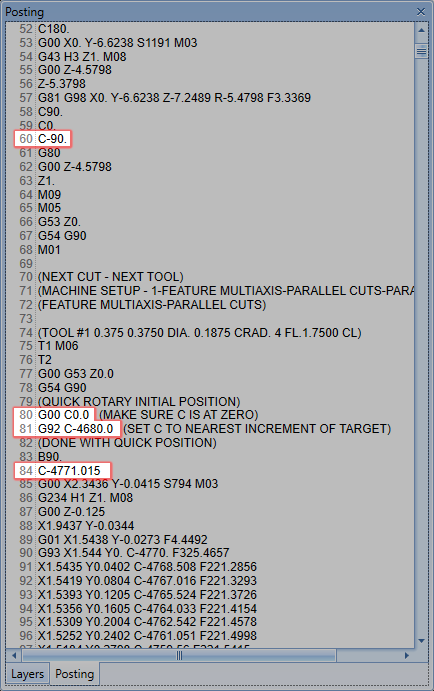
- Add a line of code and enter G92 C -4680.G81 G98 X0. Y-6.6238 Z-7.2489 R-5.4798 F3.3369
C90.
C0.
C-90.
G80
G00 Z-4.5798
Z1.
G0 C0
G92 C -4680
The position is updated. Our next moves now eliminate the need for those additional 13 rotations, and requires just over 90 degrees of rotation:T1 M06
T2
G00 G53 Z0.0
G54 G90
B90.
C-4771.015
G00 X2.3436 Y-0.0415 S794 M03
These same steps can be repeated at the end of the program to leave the rotary axis at zero. Each time the eliminations of additional rotations is necessary the steps are always the same:
- Move to the closest increment of 0/360.
- Update the location with G92 to the closest 0/360 increment of the desired position.
- Continue the program.
Solution B : Update your post processor
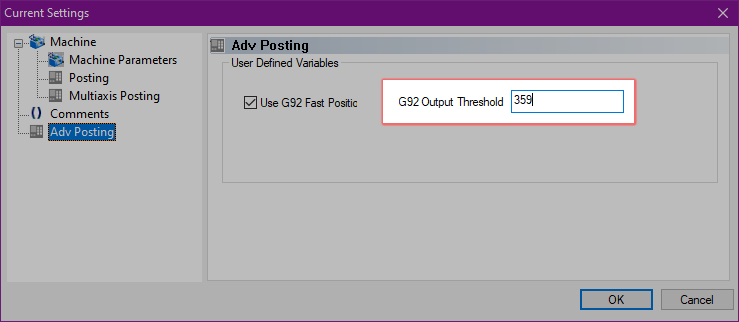
One of the many benefits for active technical support customers is the ability to have your posts tweaked by support. To handle this situation, a custom script can be added to your post processor to provide you with an advanced posting page in the Current Settings dialog of the current job:
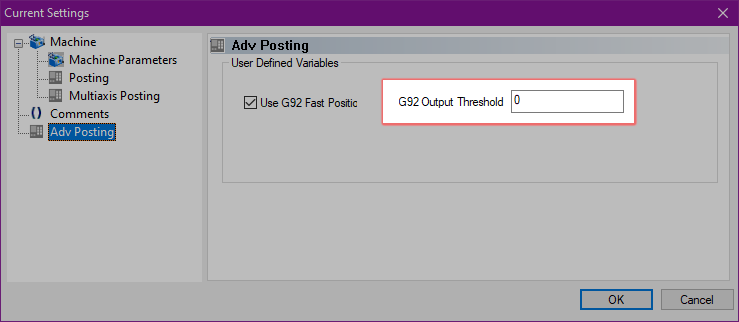
With this dialog you can enter how many degrees of rewind you are comfortable with before the scripting eliminates them for you automatically. By entering a value of less than 360, your post will employ this solution any time your rotary axis is required to rotate over a full revolution to continue or end the program.
For this same program, the work is done for us without the need to update our code manually.
Without scripting : 13+ full rotations of rewind
With scripting : 181° of rotation
This concludes the rotary rewind topic.
Questions? Call Us to speak with a CAD CAM Pro!